1. Setting up our workflow
Welcome in this tutorial to create your own online portfolio 🙂 ! The first step of our journey to set up our working environment. In order to do so, we are going to use several tools, like Git, GitHub and Visual Studio Code.
- Git and GitHub will allow us to manage the changes of our files, and store them online.
- Visual Studio Code will allow us to modify our files.
Git and GitHub
Git is a software that allows to manage all the changes done to the selected files. It is also called a version management software, or a version control system. Do we want to check all the versions and changes of our files from their creation until their current version ? If we use Git, it is possible.
Git does not only work with code files, but also with any type of file. If you have a text file (like a Master thesis for example) for which you want to control the different versions, you can use Git for it !
GitHub is a company (currently owned by Microsoft) whose servers can be used to store files. Their website integrates Git and uses it to track the changes of all the documents we choose to store on it.
GitHub has a lot of different uses, including collaborative coding, but this tutorial only focuses on how to use it to manage our project with Git and Quarto. It is widely used in the programming community and is sometimes referred to as the social network of developers.
This tutorial offers two methods to use Git and GitHub :
The first one is based on the Graphical User Interface (GUI) solution of GitHub Desktop. It is an application that offers a simple interface to interact with Git and GitHub at the same time. It is simple and quick to setup.
The second method is based on the Command Line Interface (CLI) approach. It uses the basic features of Git and GitHub, and relies on the Command Line to interact with Git and GitHub. It requires more steps, and is harder to setup, but allows to develop a deeper understanding of what is going on when we use Git and GitHub.
If we do not wish to dive deep into the mechanisms of the Git and its interactions with GitHub, we can proceed with the GUI approach.
If the GUI approach is easy and useful, it implies necessarily abstractions of how things are really working under the hood. Therefore, I highly encourage you to read the CLI section, even if you do not follow all of its instruction. You can always continue with the GUI approach, and later on come back to this chapter to read the CLI section once you are done with the tutorial.
Create your GitHub account
The first step is to create a GitHub account. We can go here and click on “Sign up”.
We have to be especially thoughtful of our username, because our website will inlcude it in its url. It will indeed have the format “https://username.github.io”.
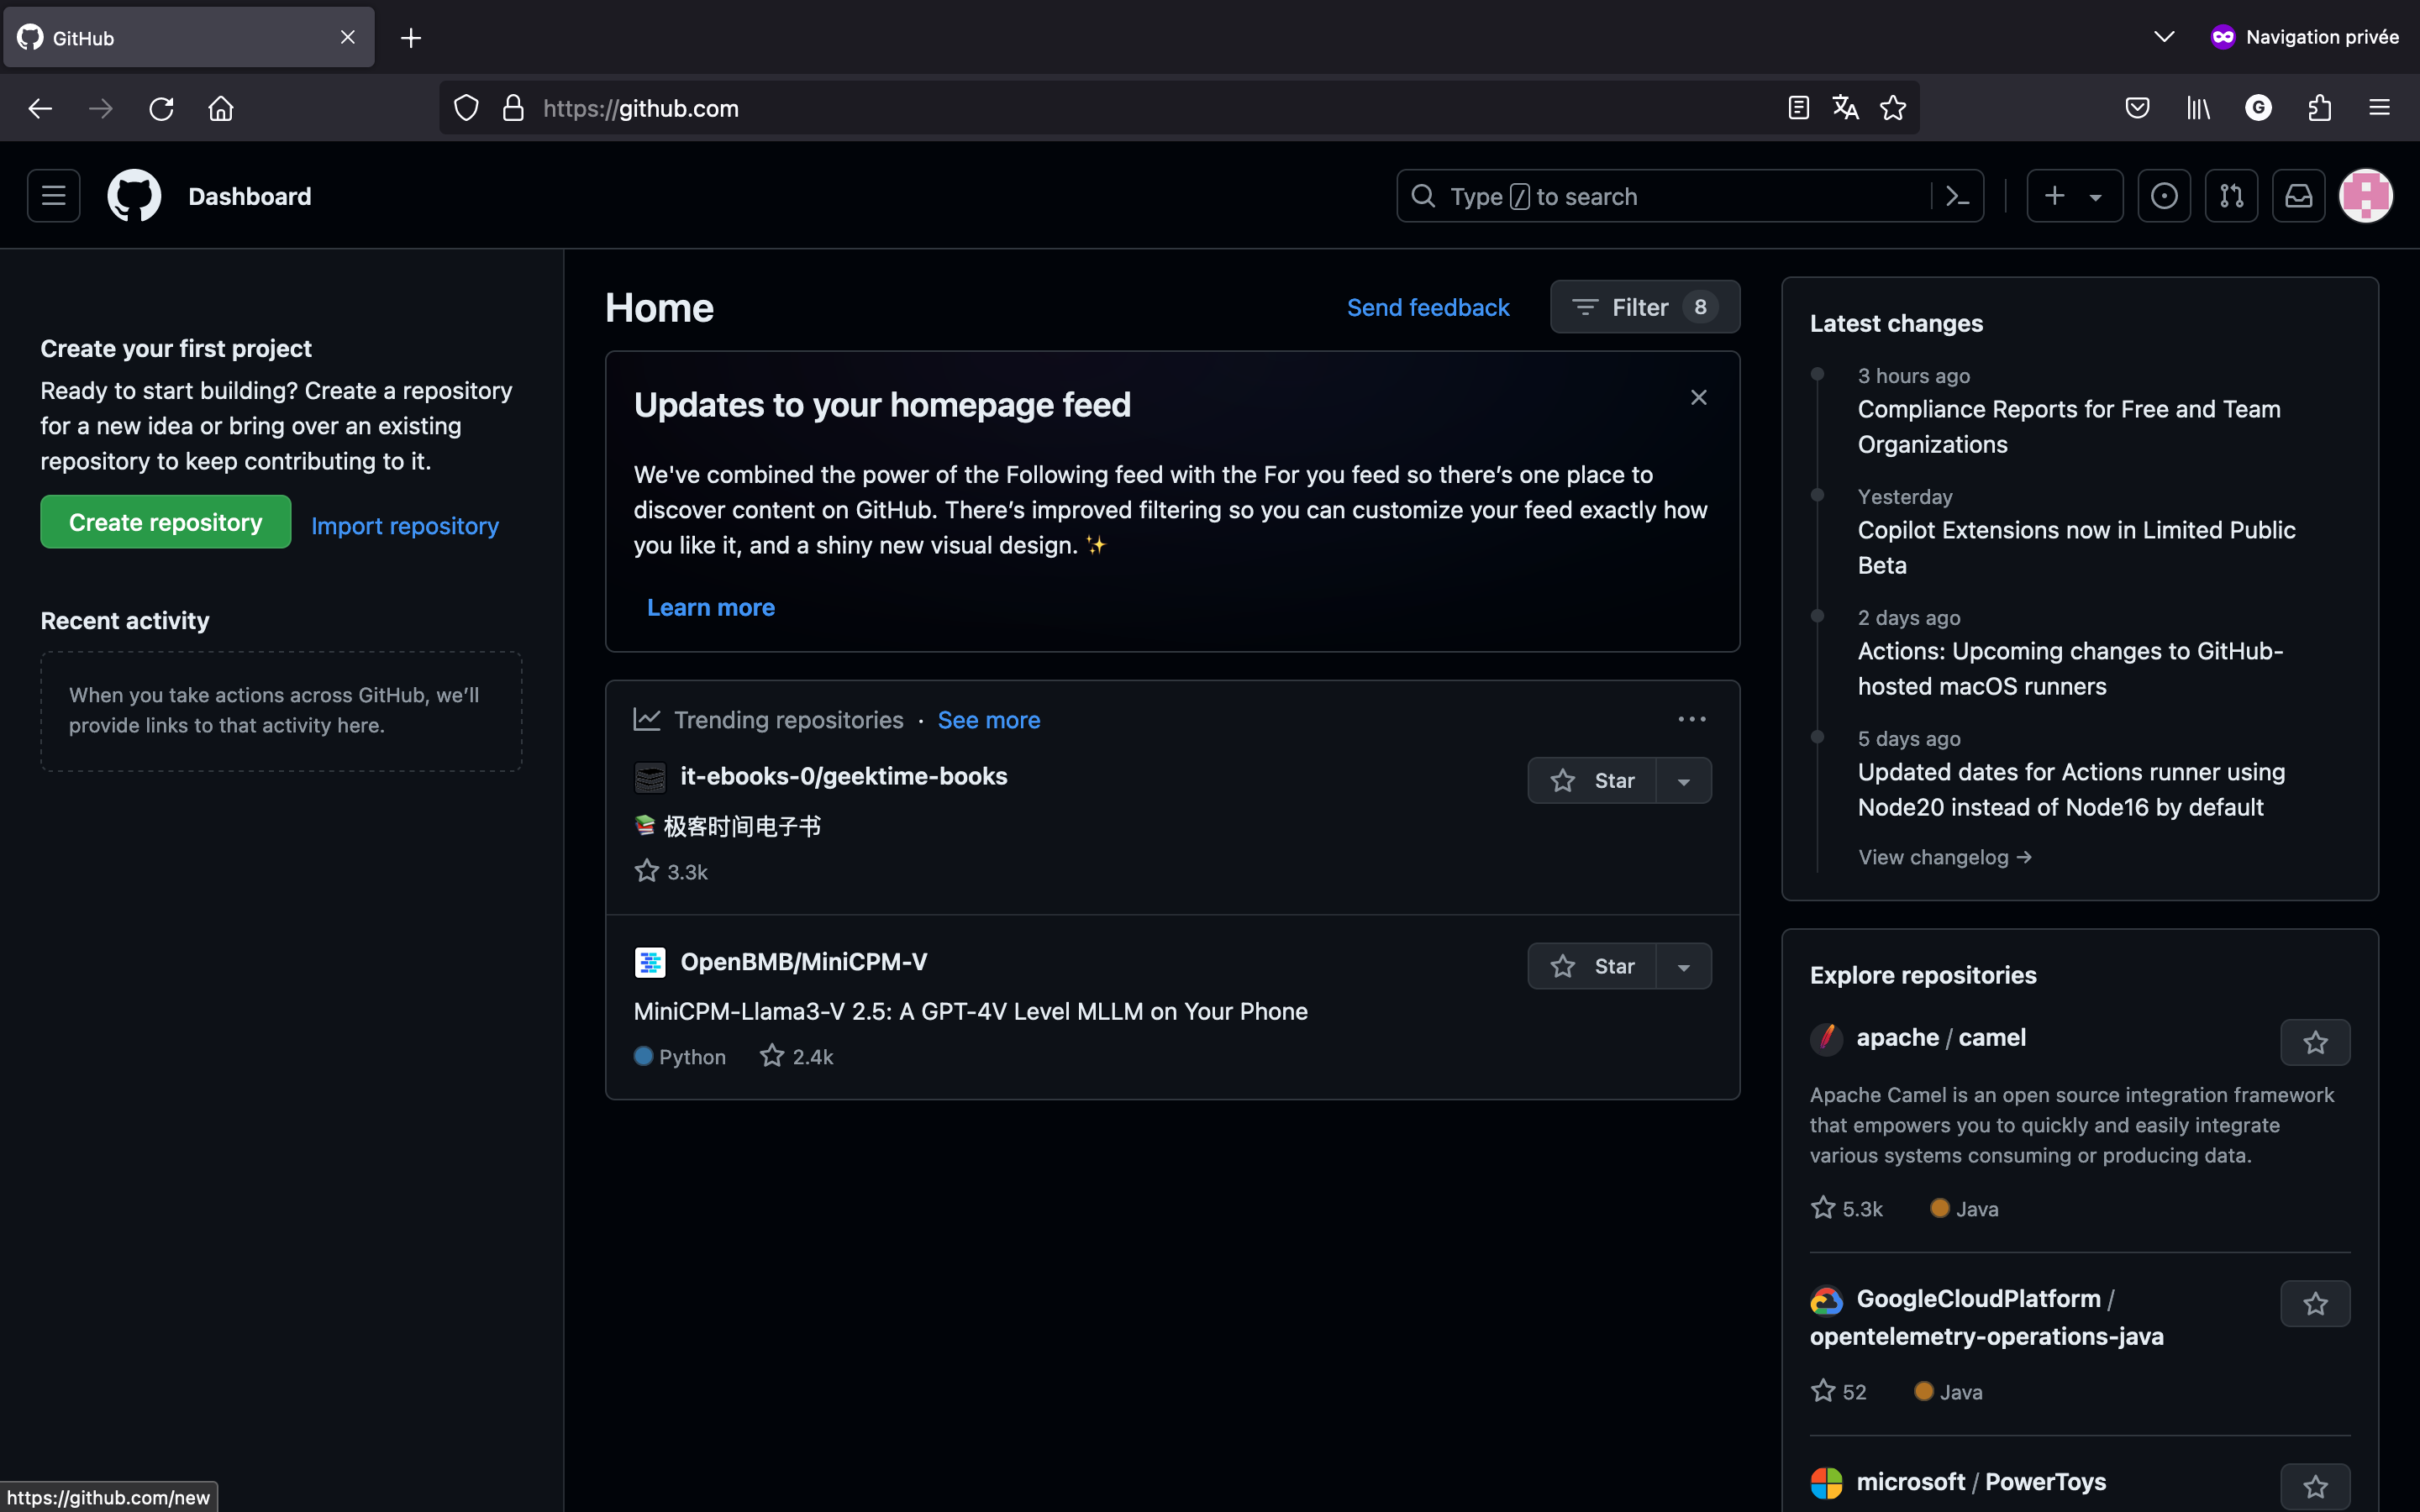
After having created our account, we should land on a page looking like this :
For this tutorial, I did create an account named “frpgcd”. It will be the example username you will see in all the screenshots.
Install and configure GitHub Desktop
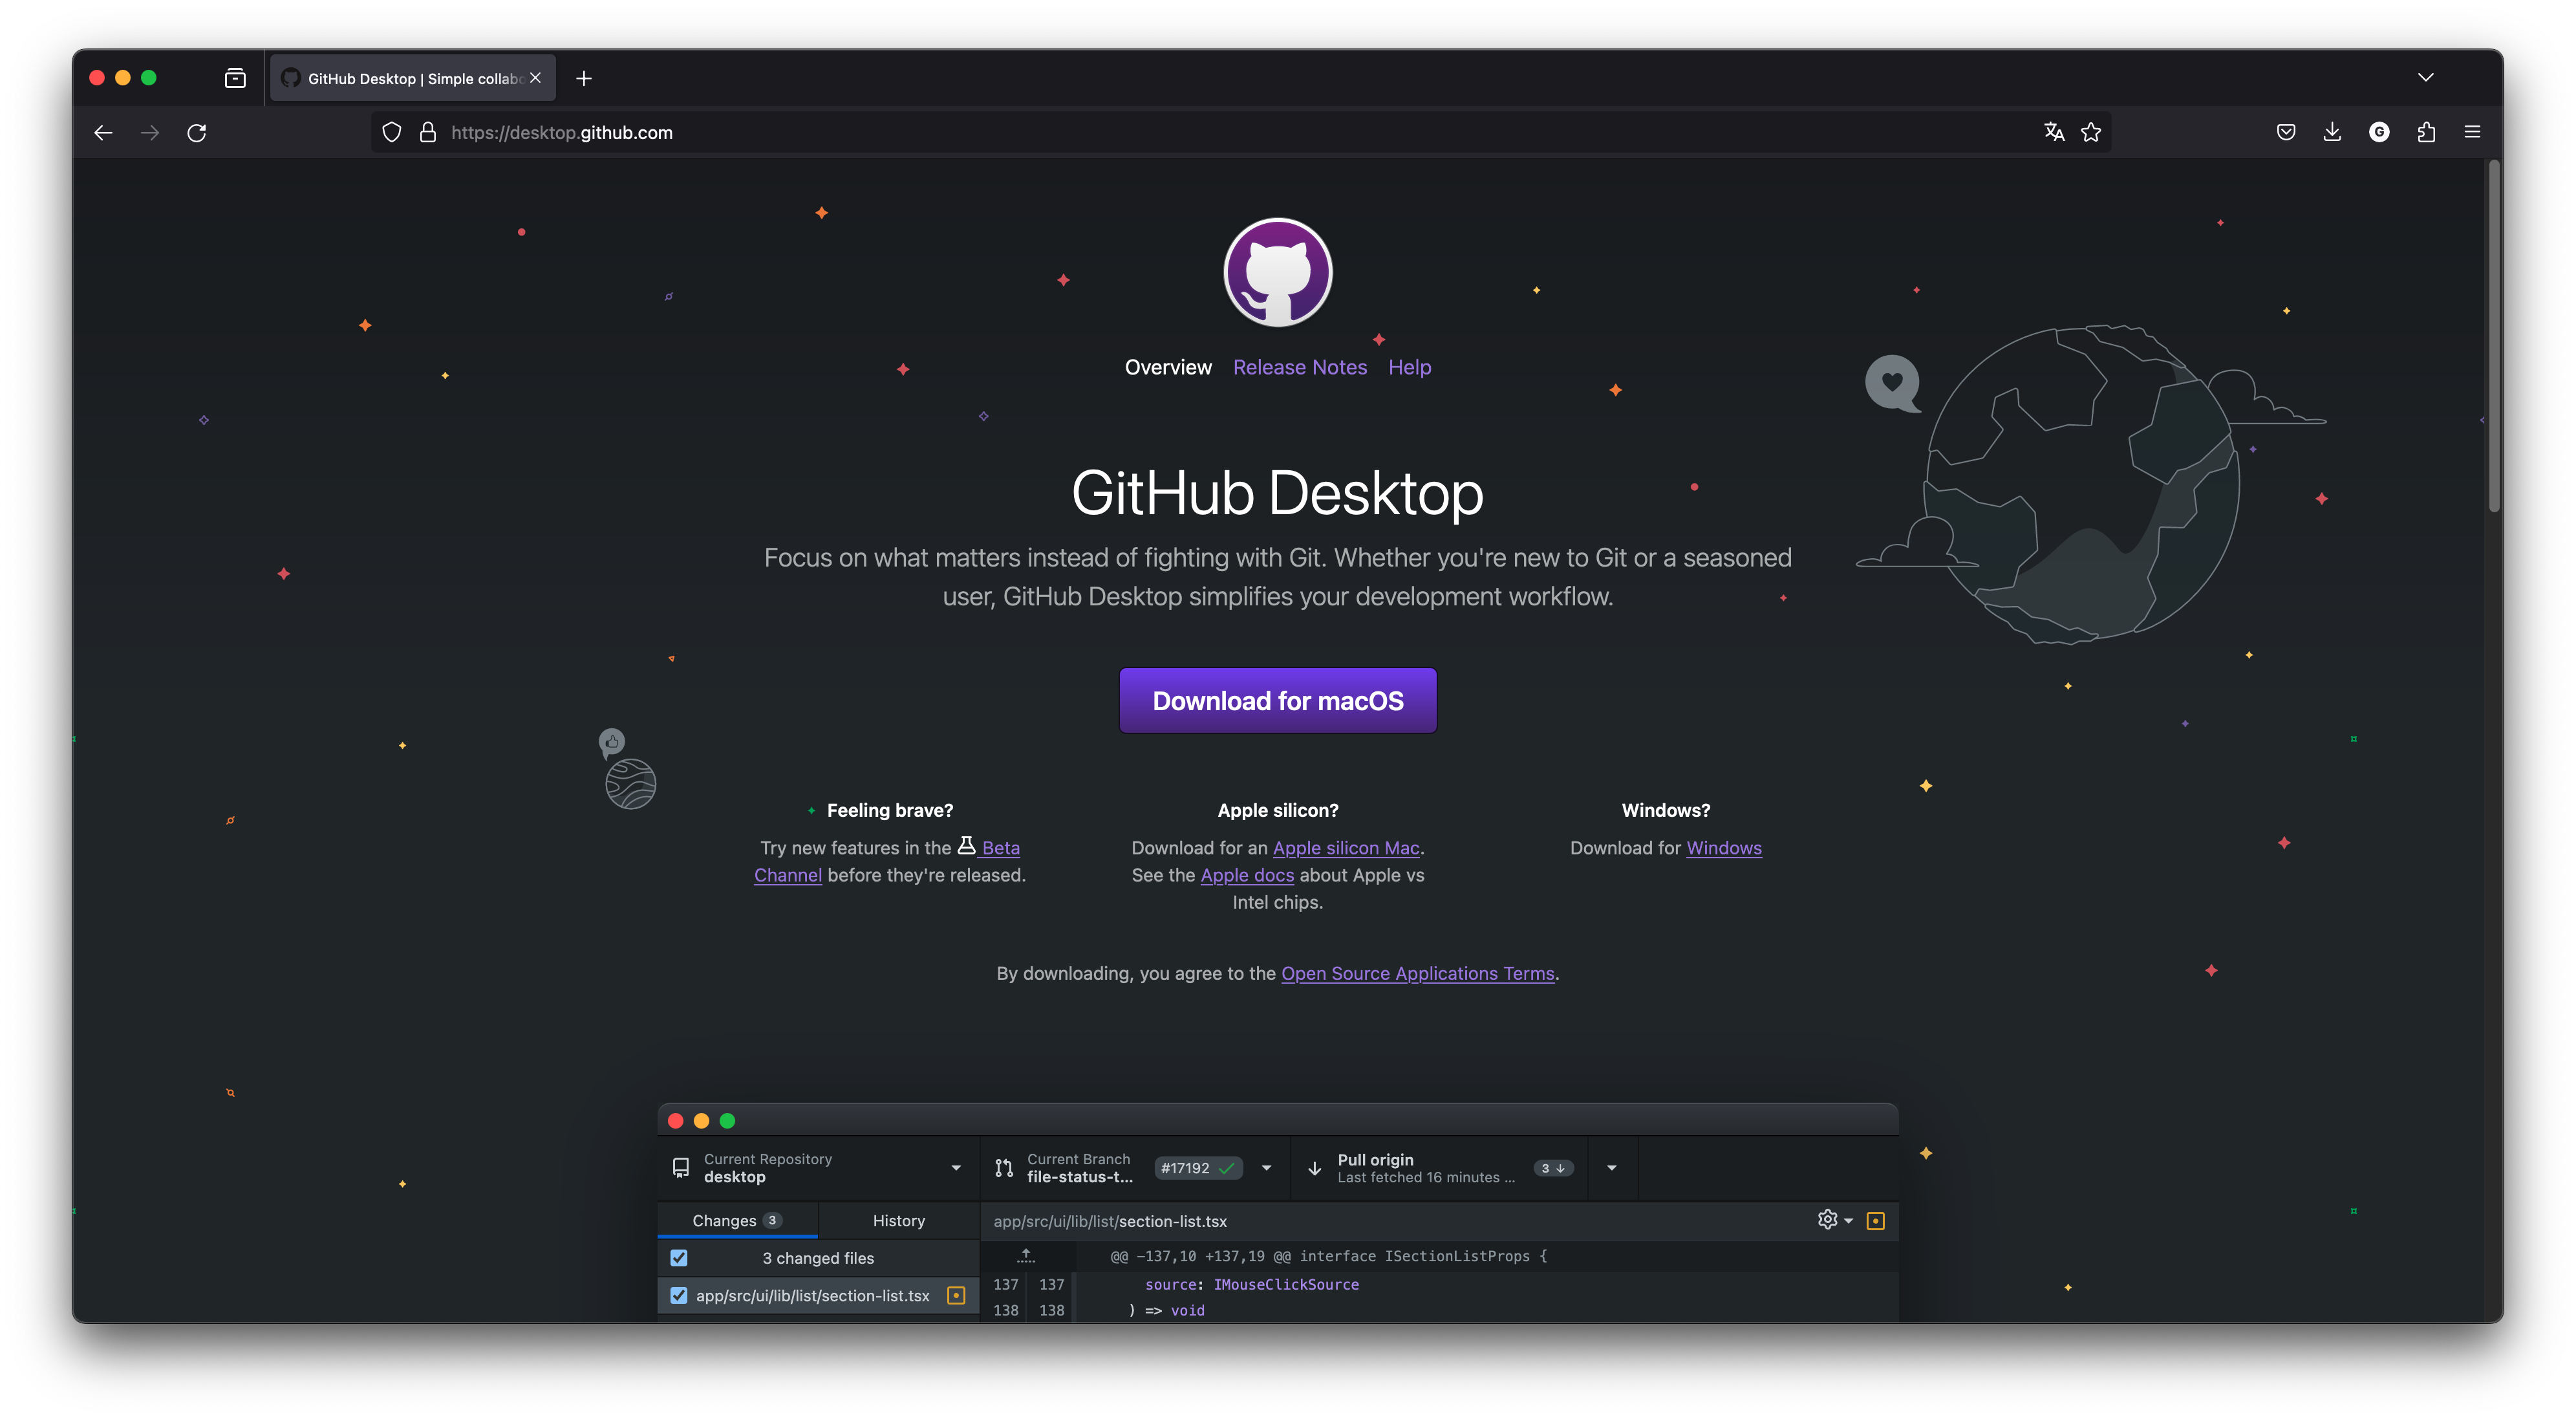
The next step is to install GitHub Desktop here.
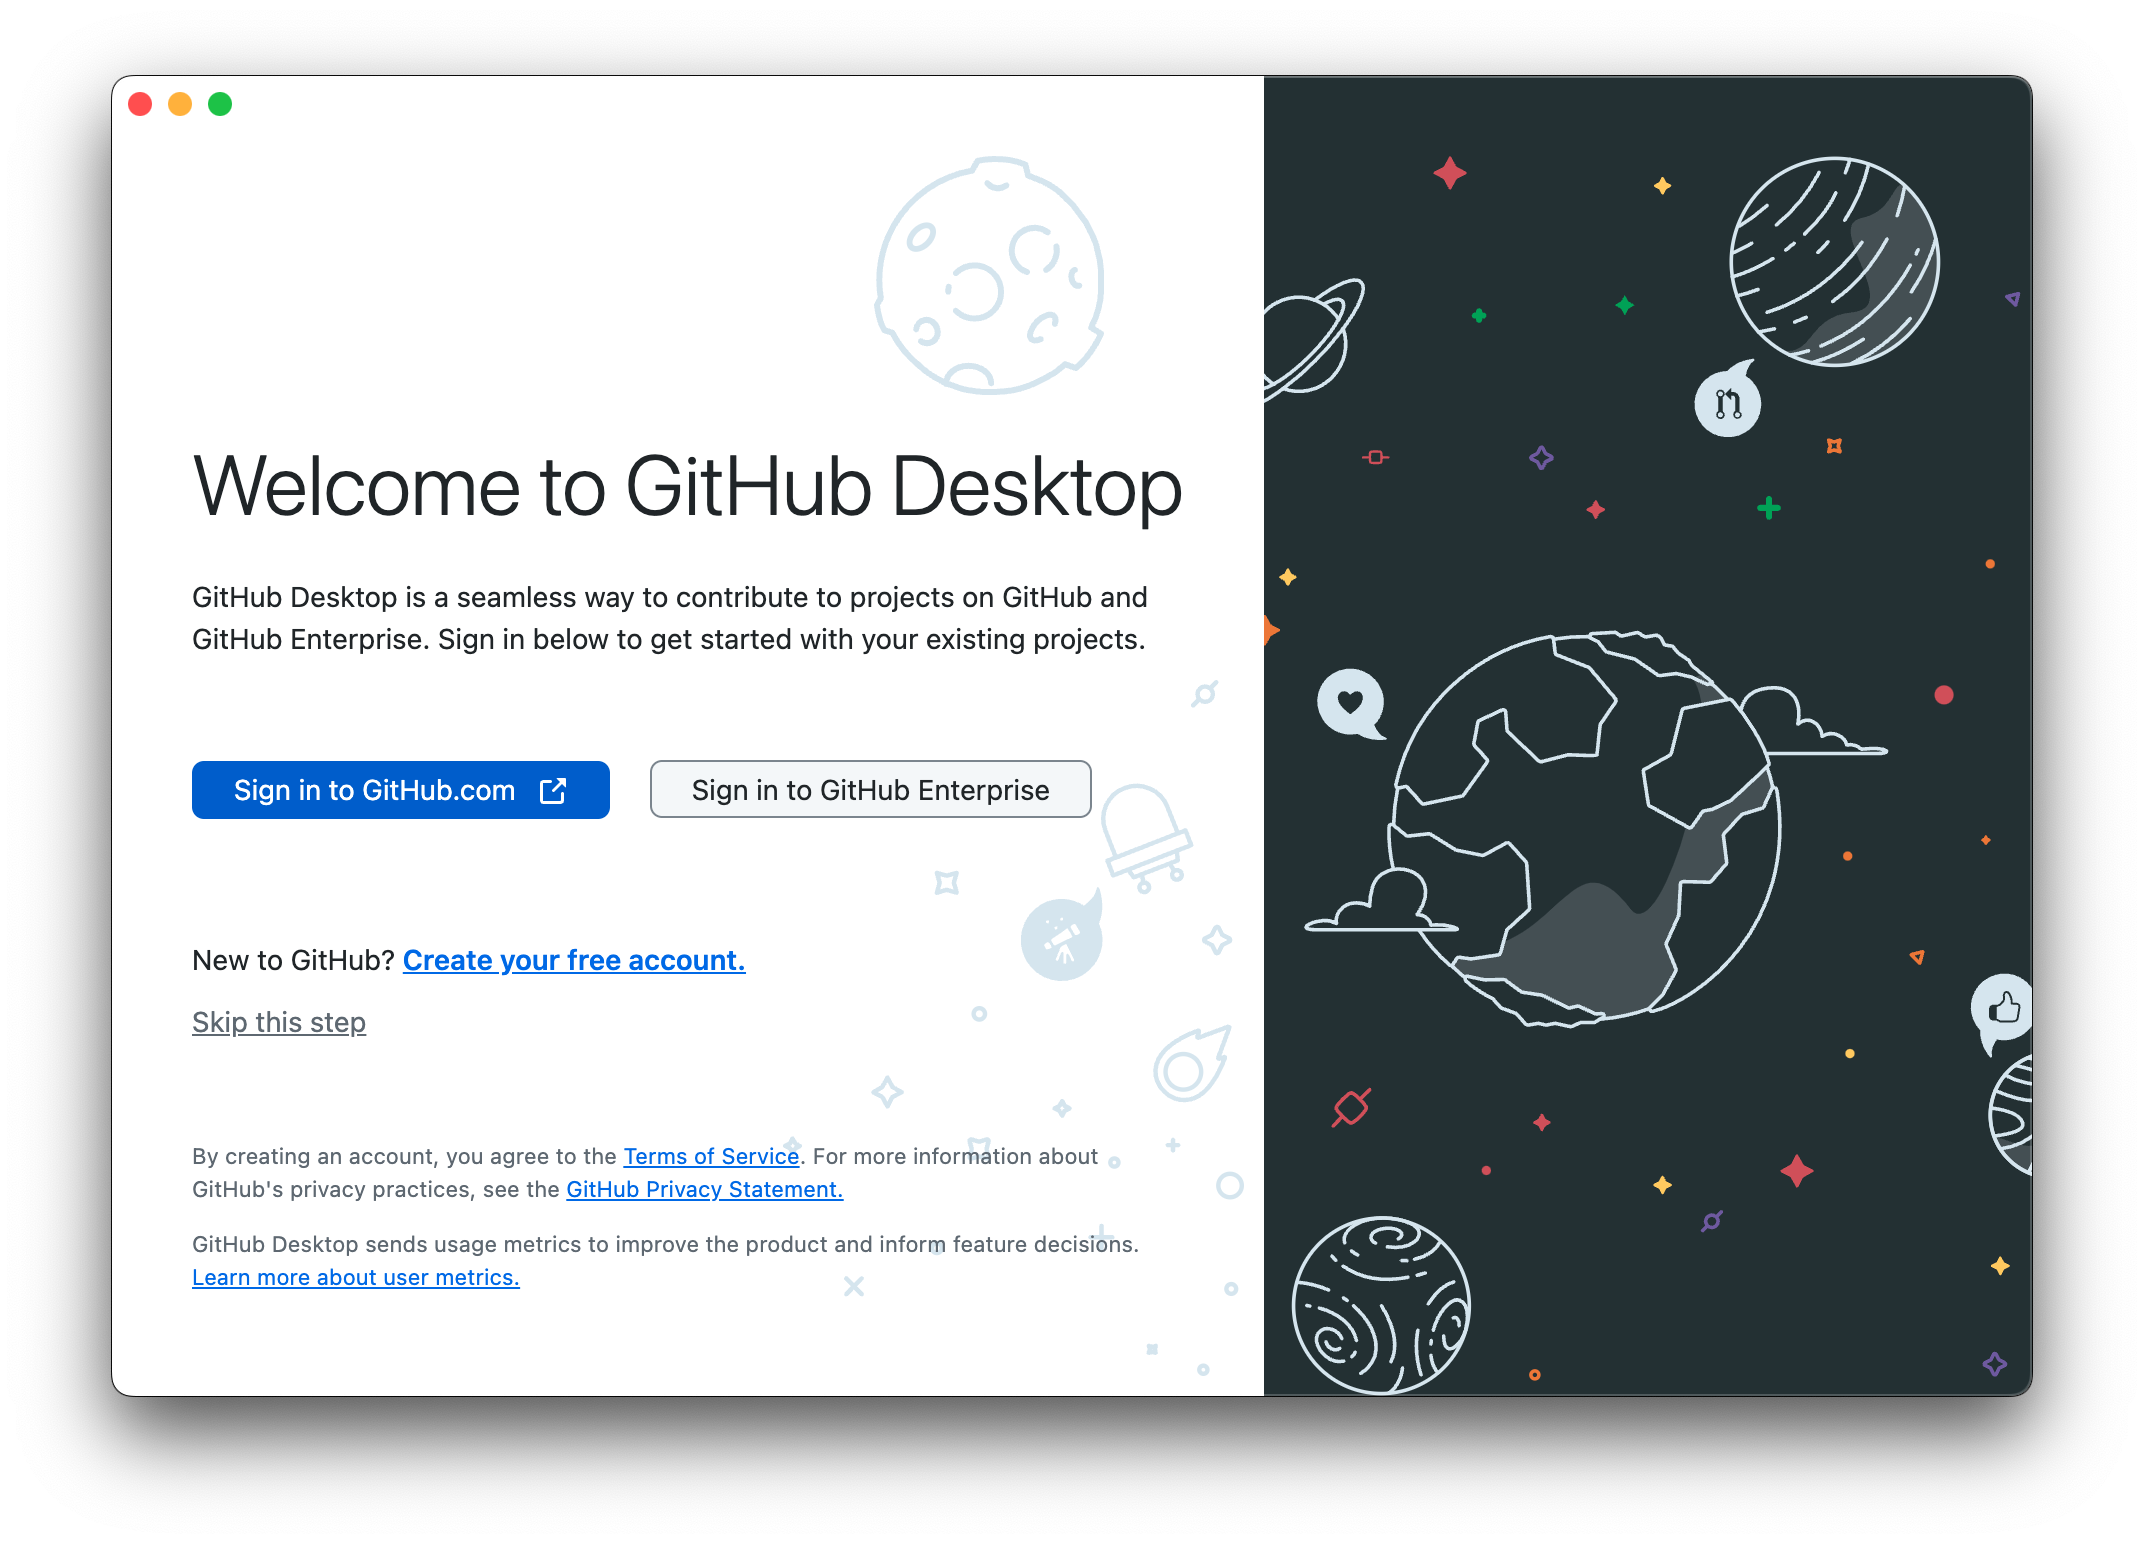
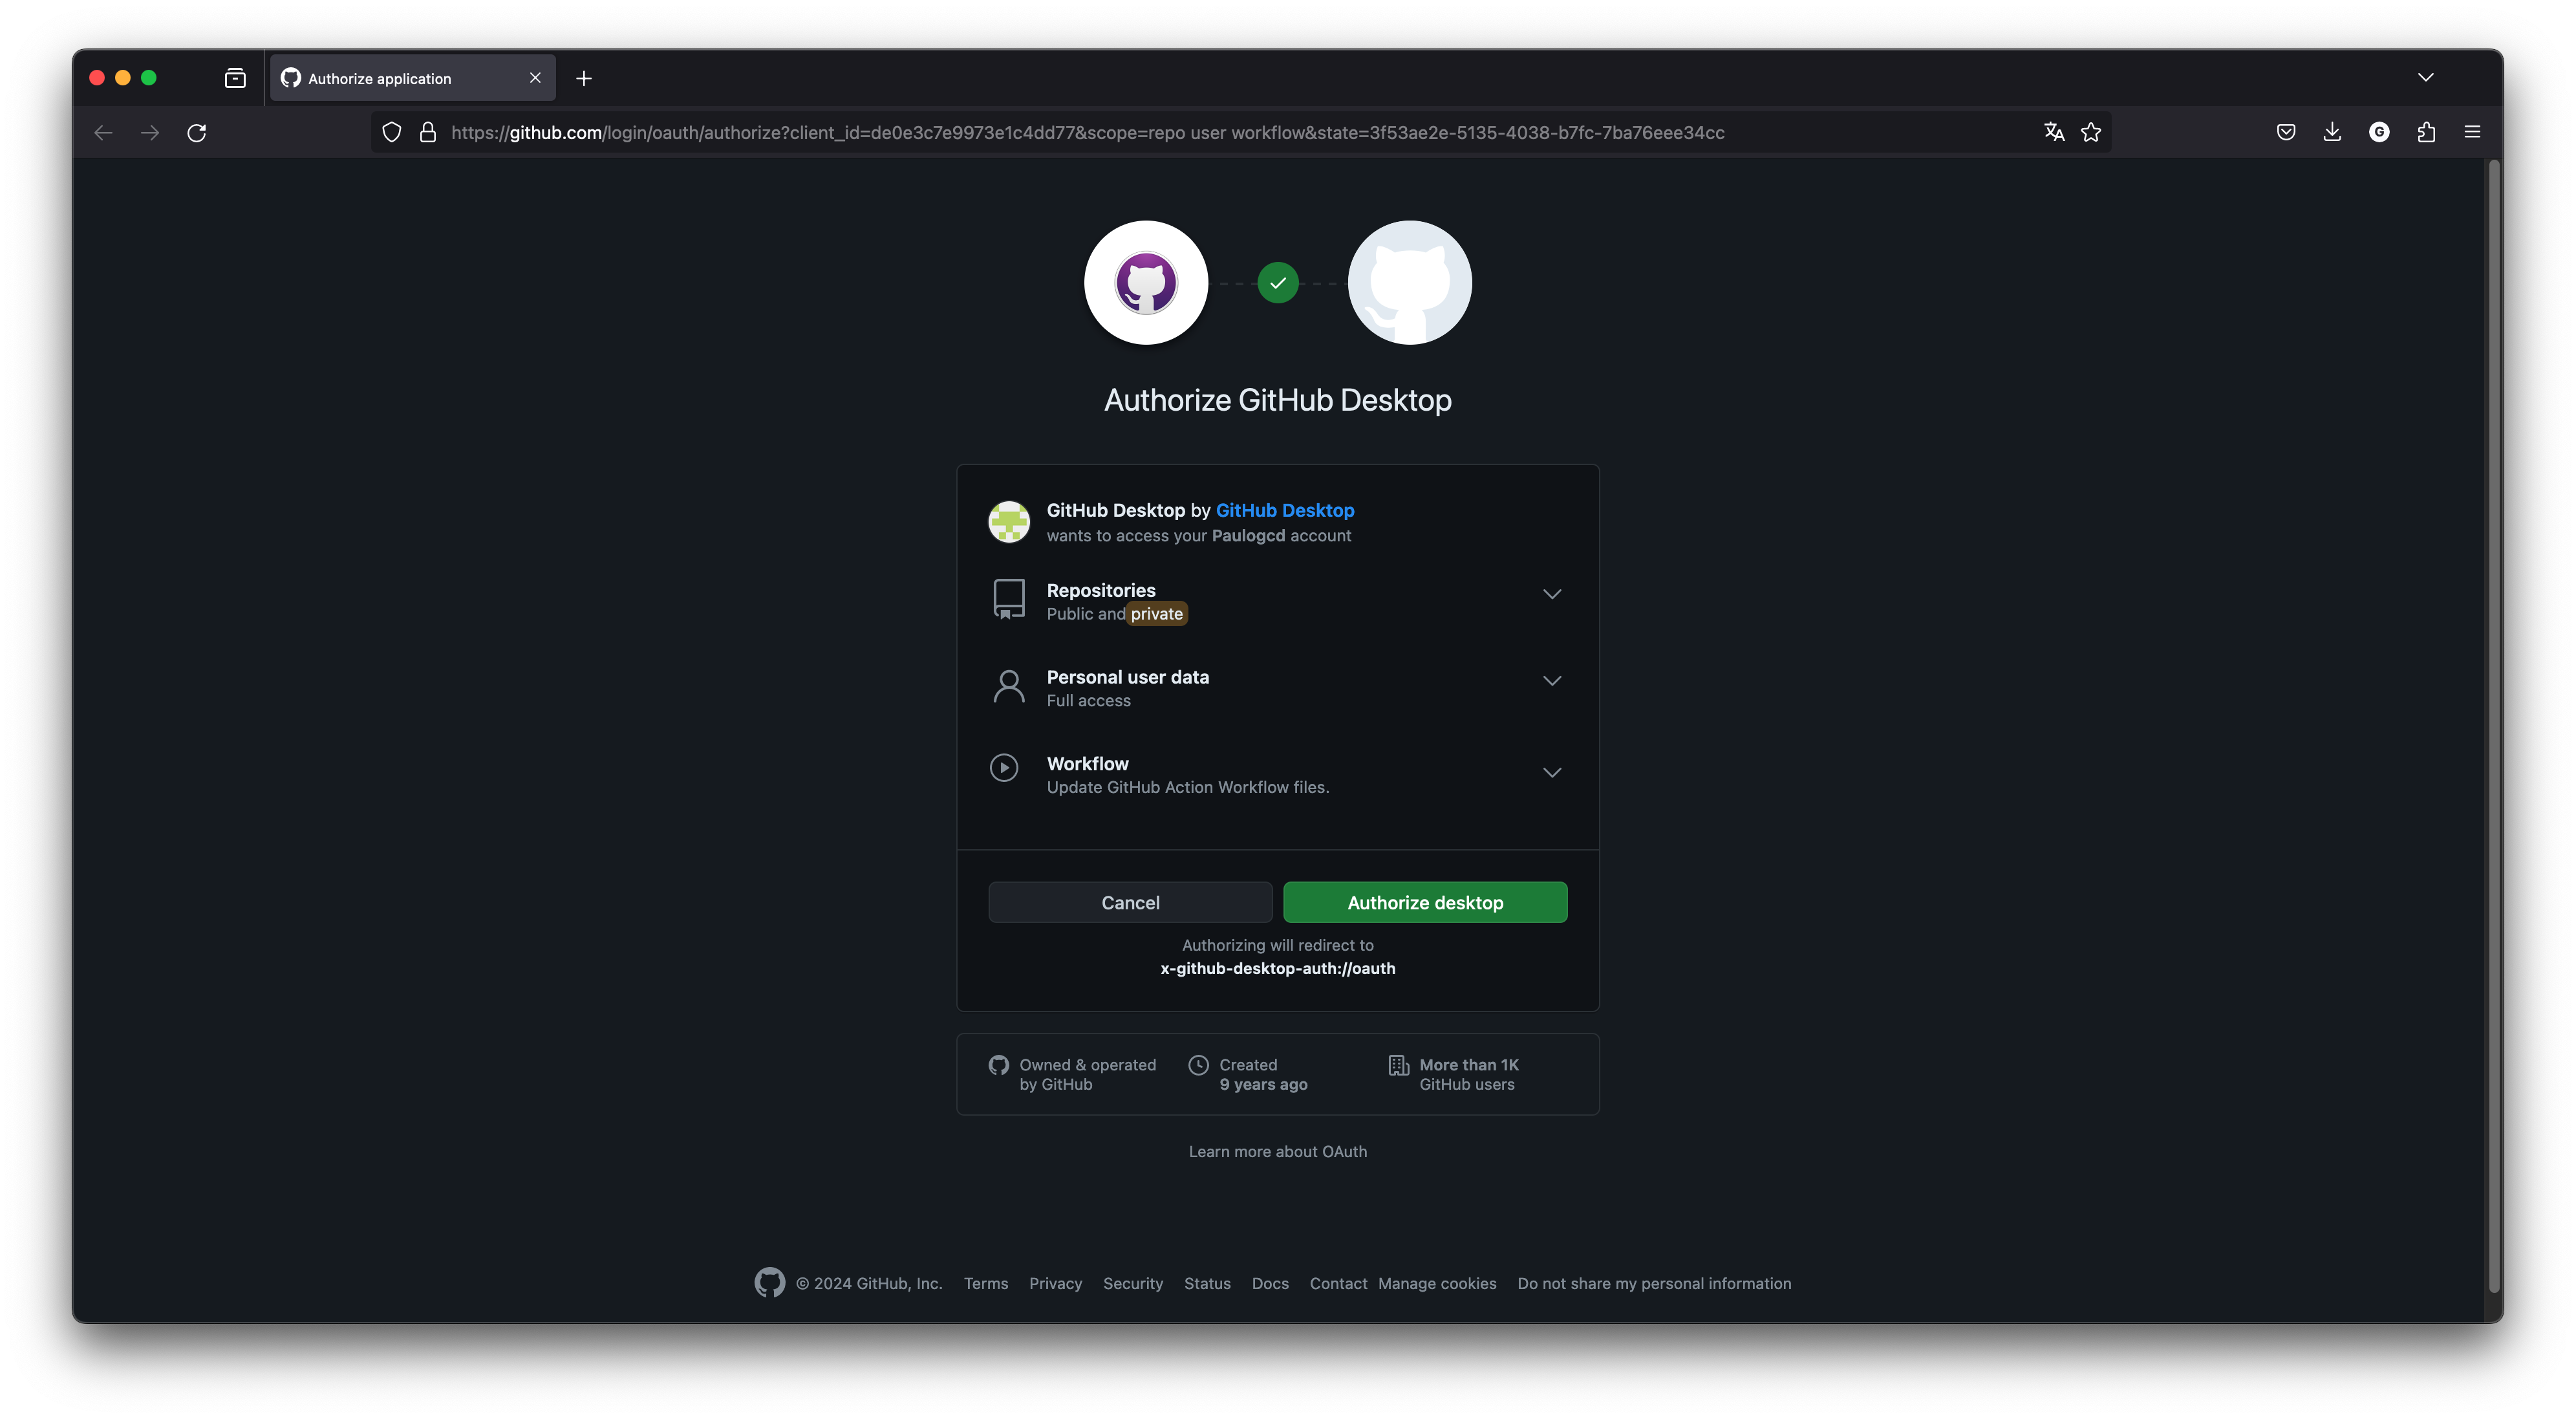
Once the installation is done, we can open GitHub Desktop and connect it to our recently created GitHub account. By clicking on “Sign in to GitHub.com”, we should be redirected to a connection page on our browser, and once we are connected on our browser, we are asked if we authorize GitHub Desktop to have access to our GitHub account.
GitHub Desktop initialization.
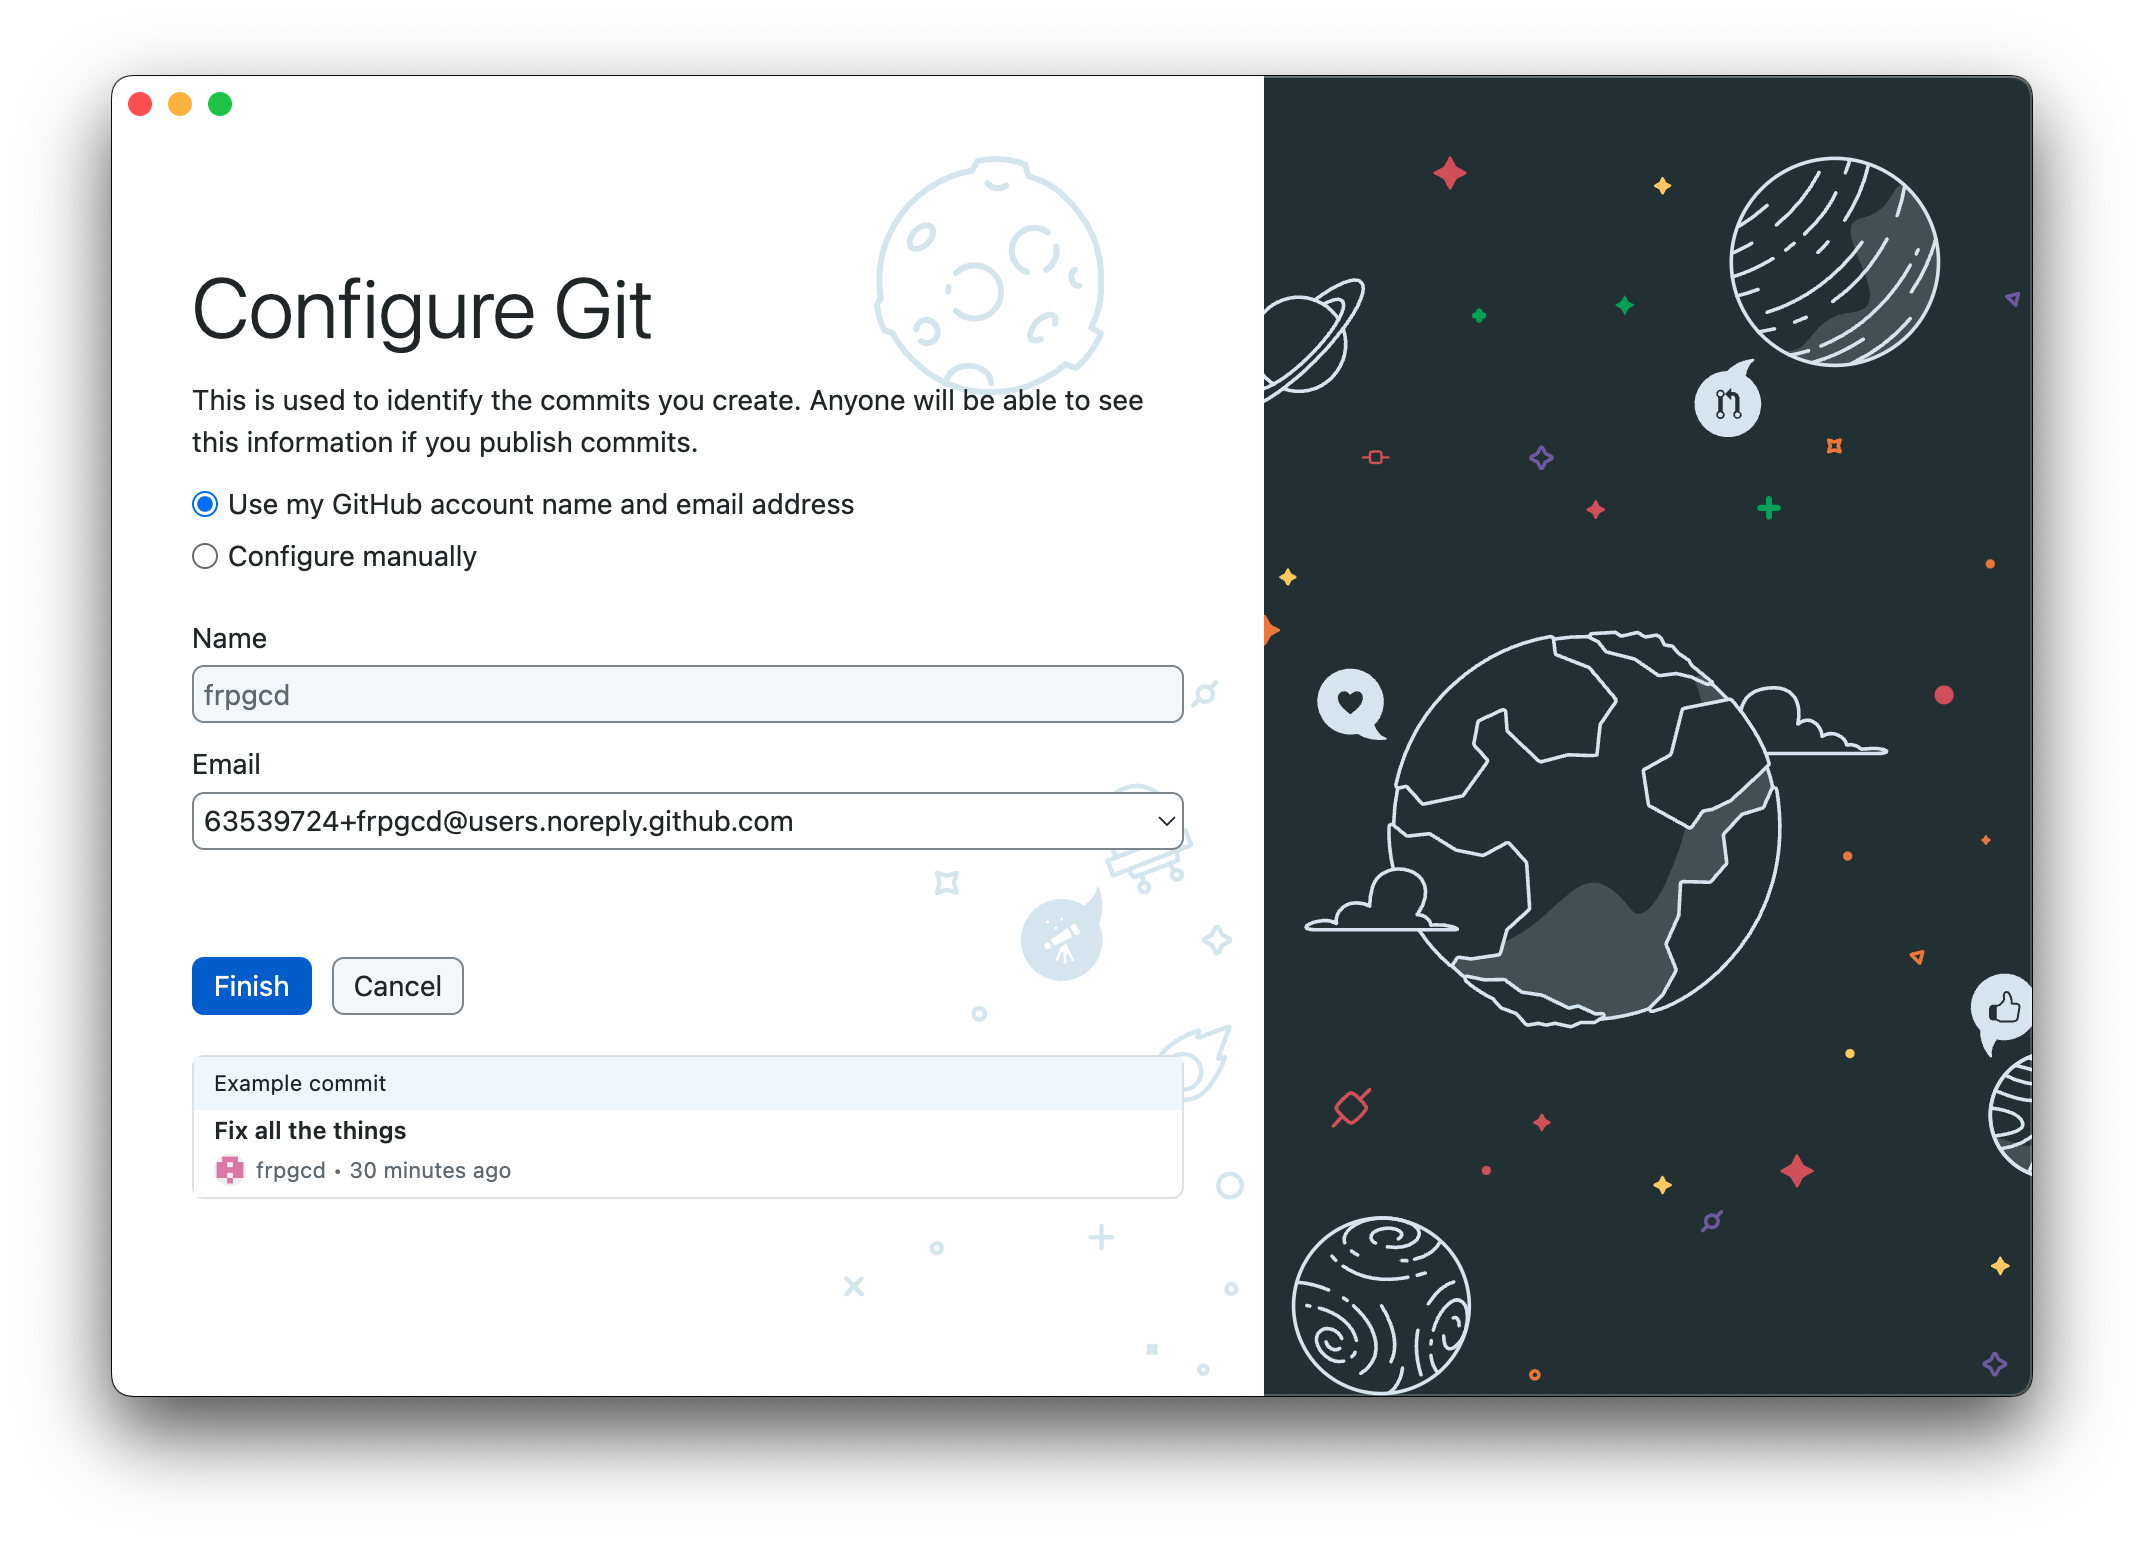
Then, we will be redirected to a configuration page on GitHub Desktop. We can here notice that a slightly different email address can be specified by default instead of the one we used in the creation process of our GitHub account. This is normal, it does not matter much for what we are trying to achieve here. We can also finish the configuration process with this default different email address.
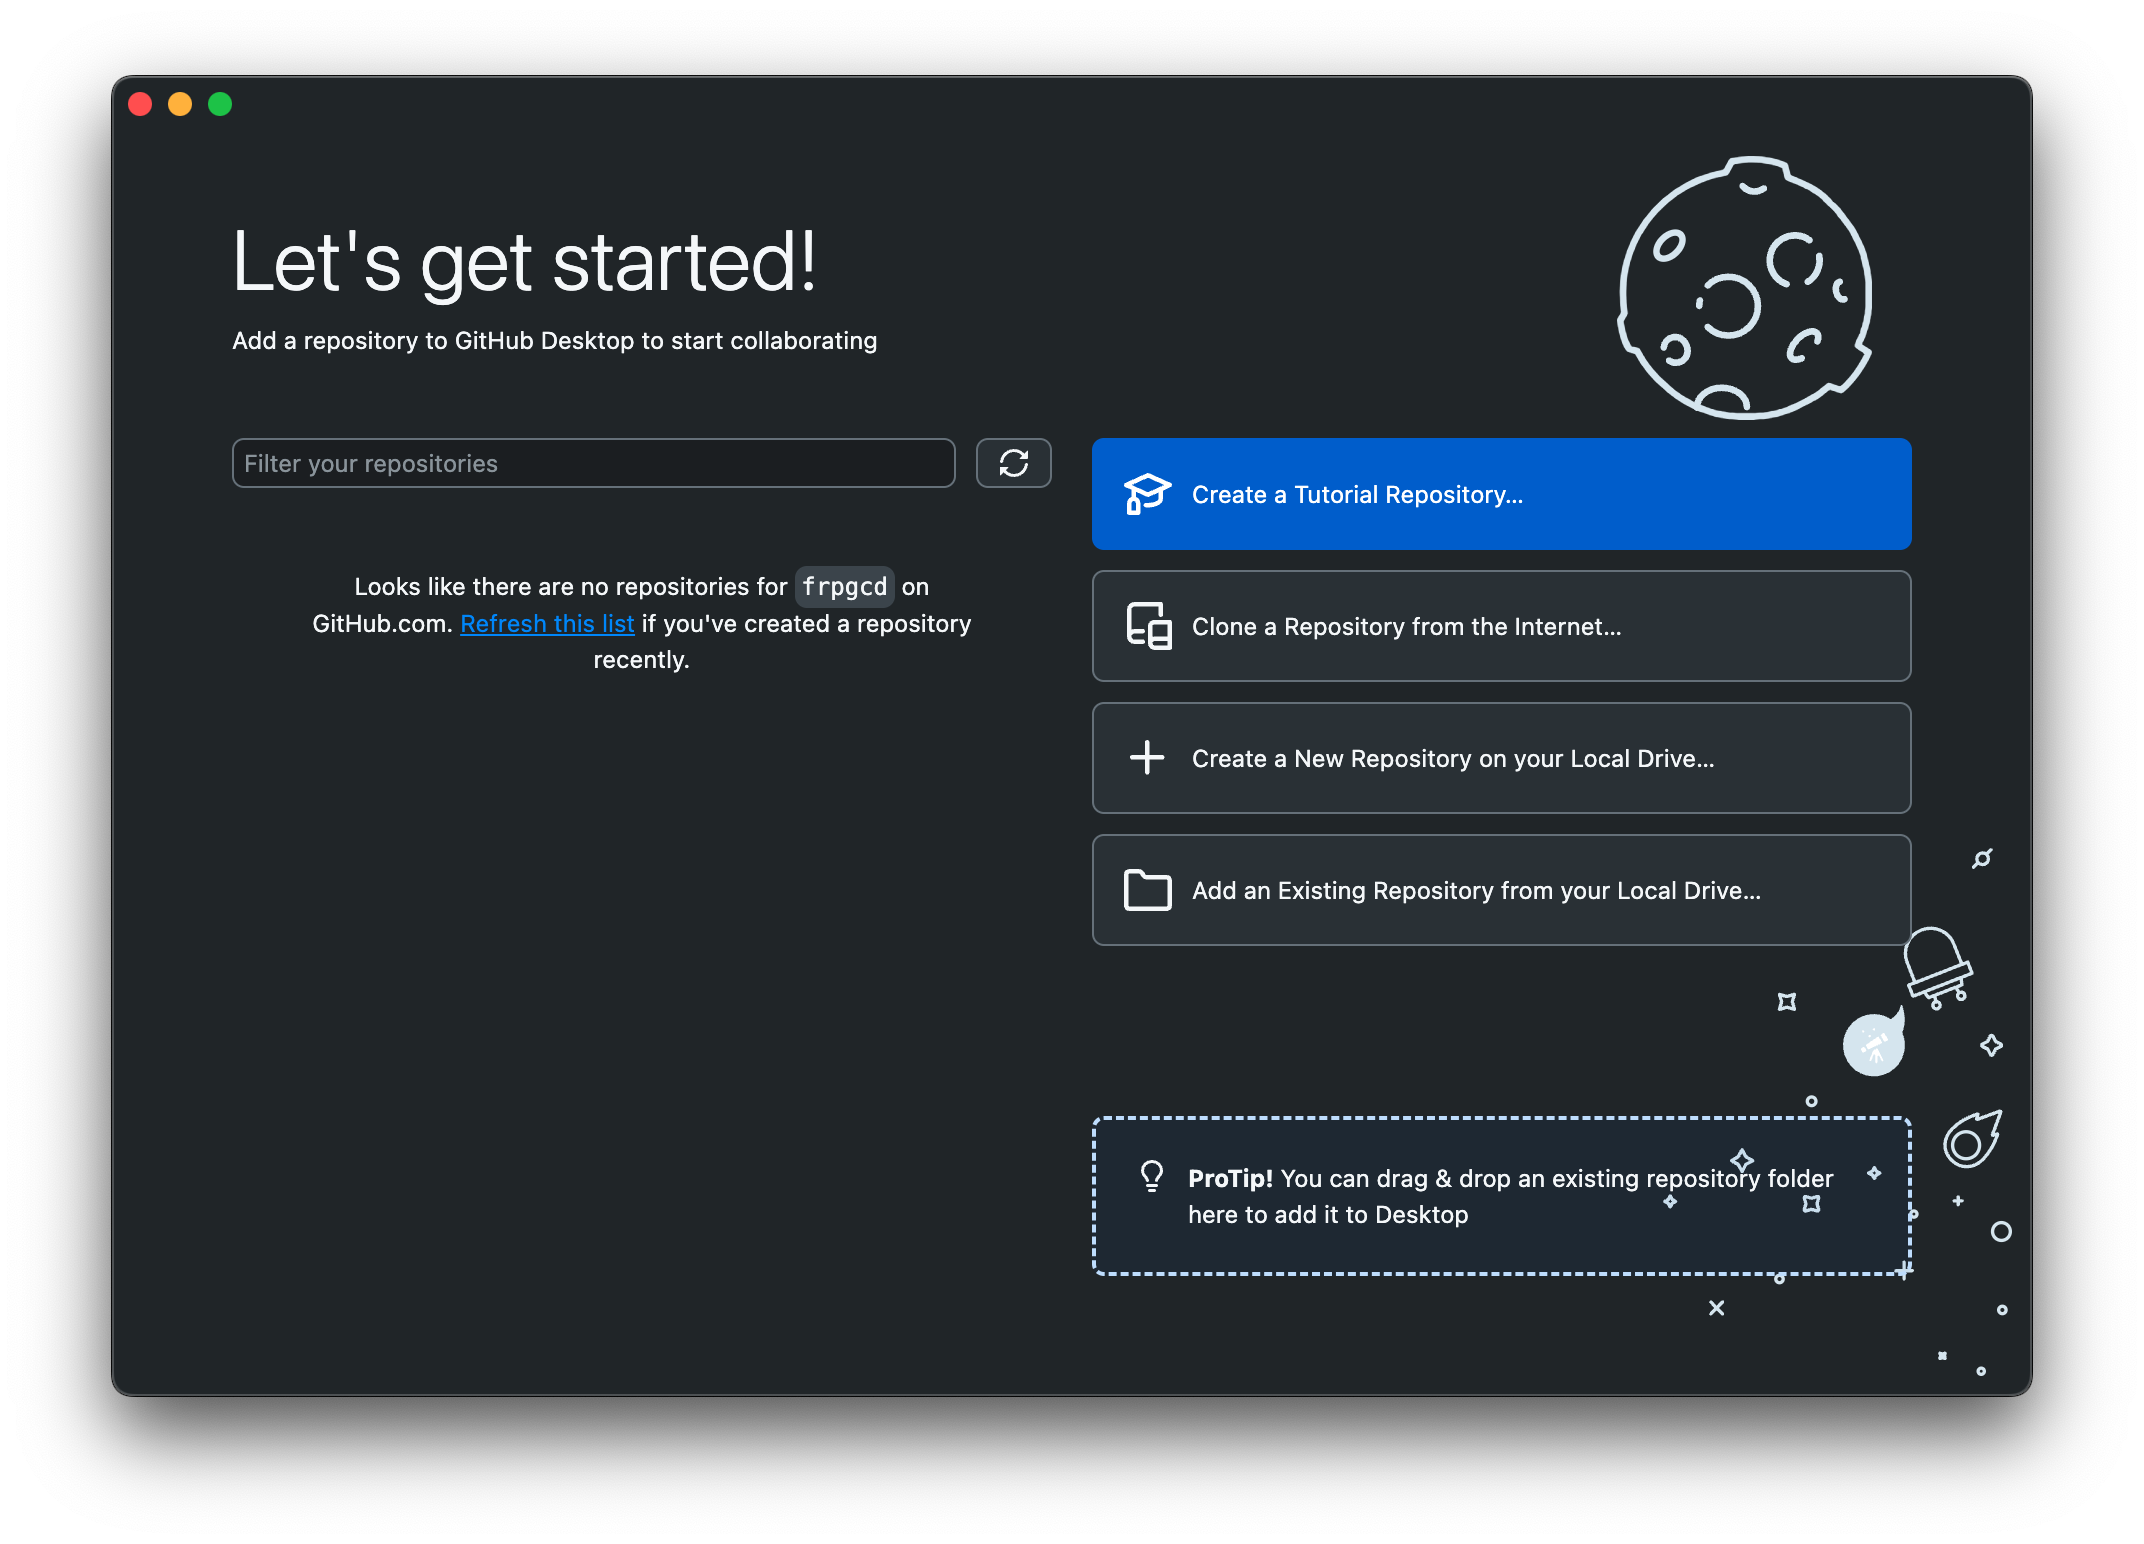
Once we are done with the configuration process, we should land on a page looking like that :
If we want to start our portfolio, we need a folder with all of our files. On our computer, we call it a directory, and on GitHub we call it a “repository”.
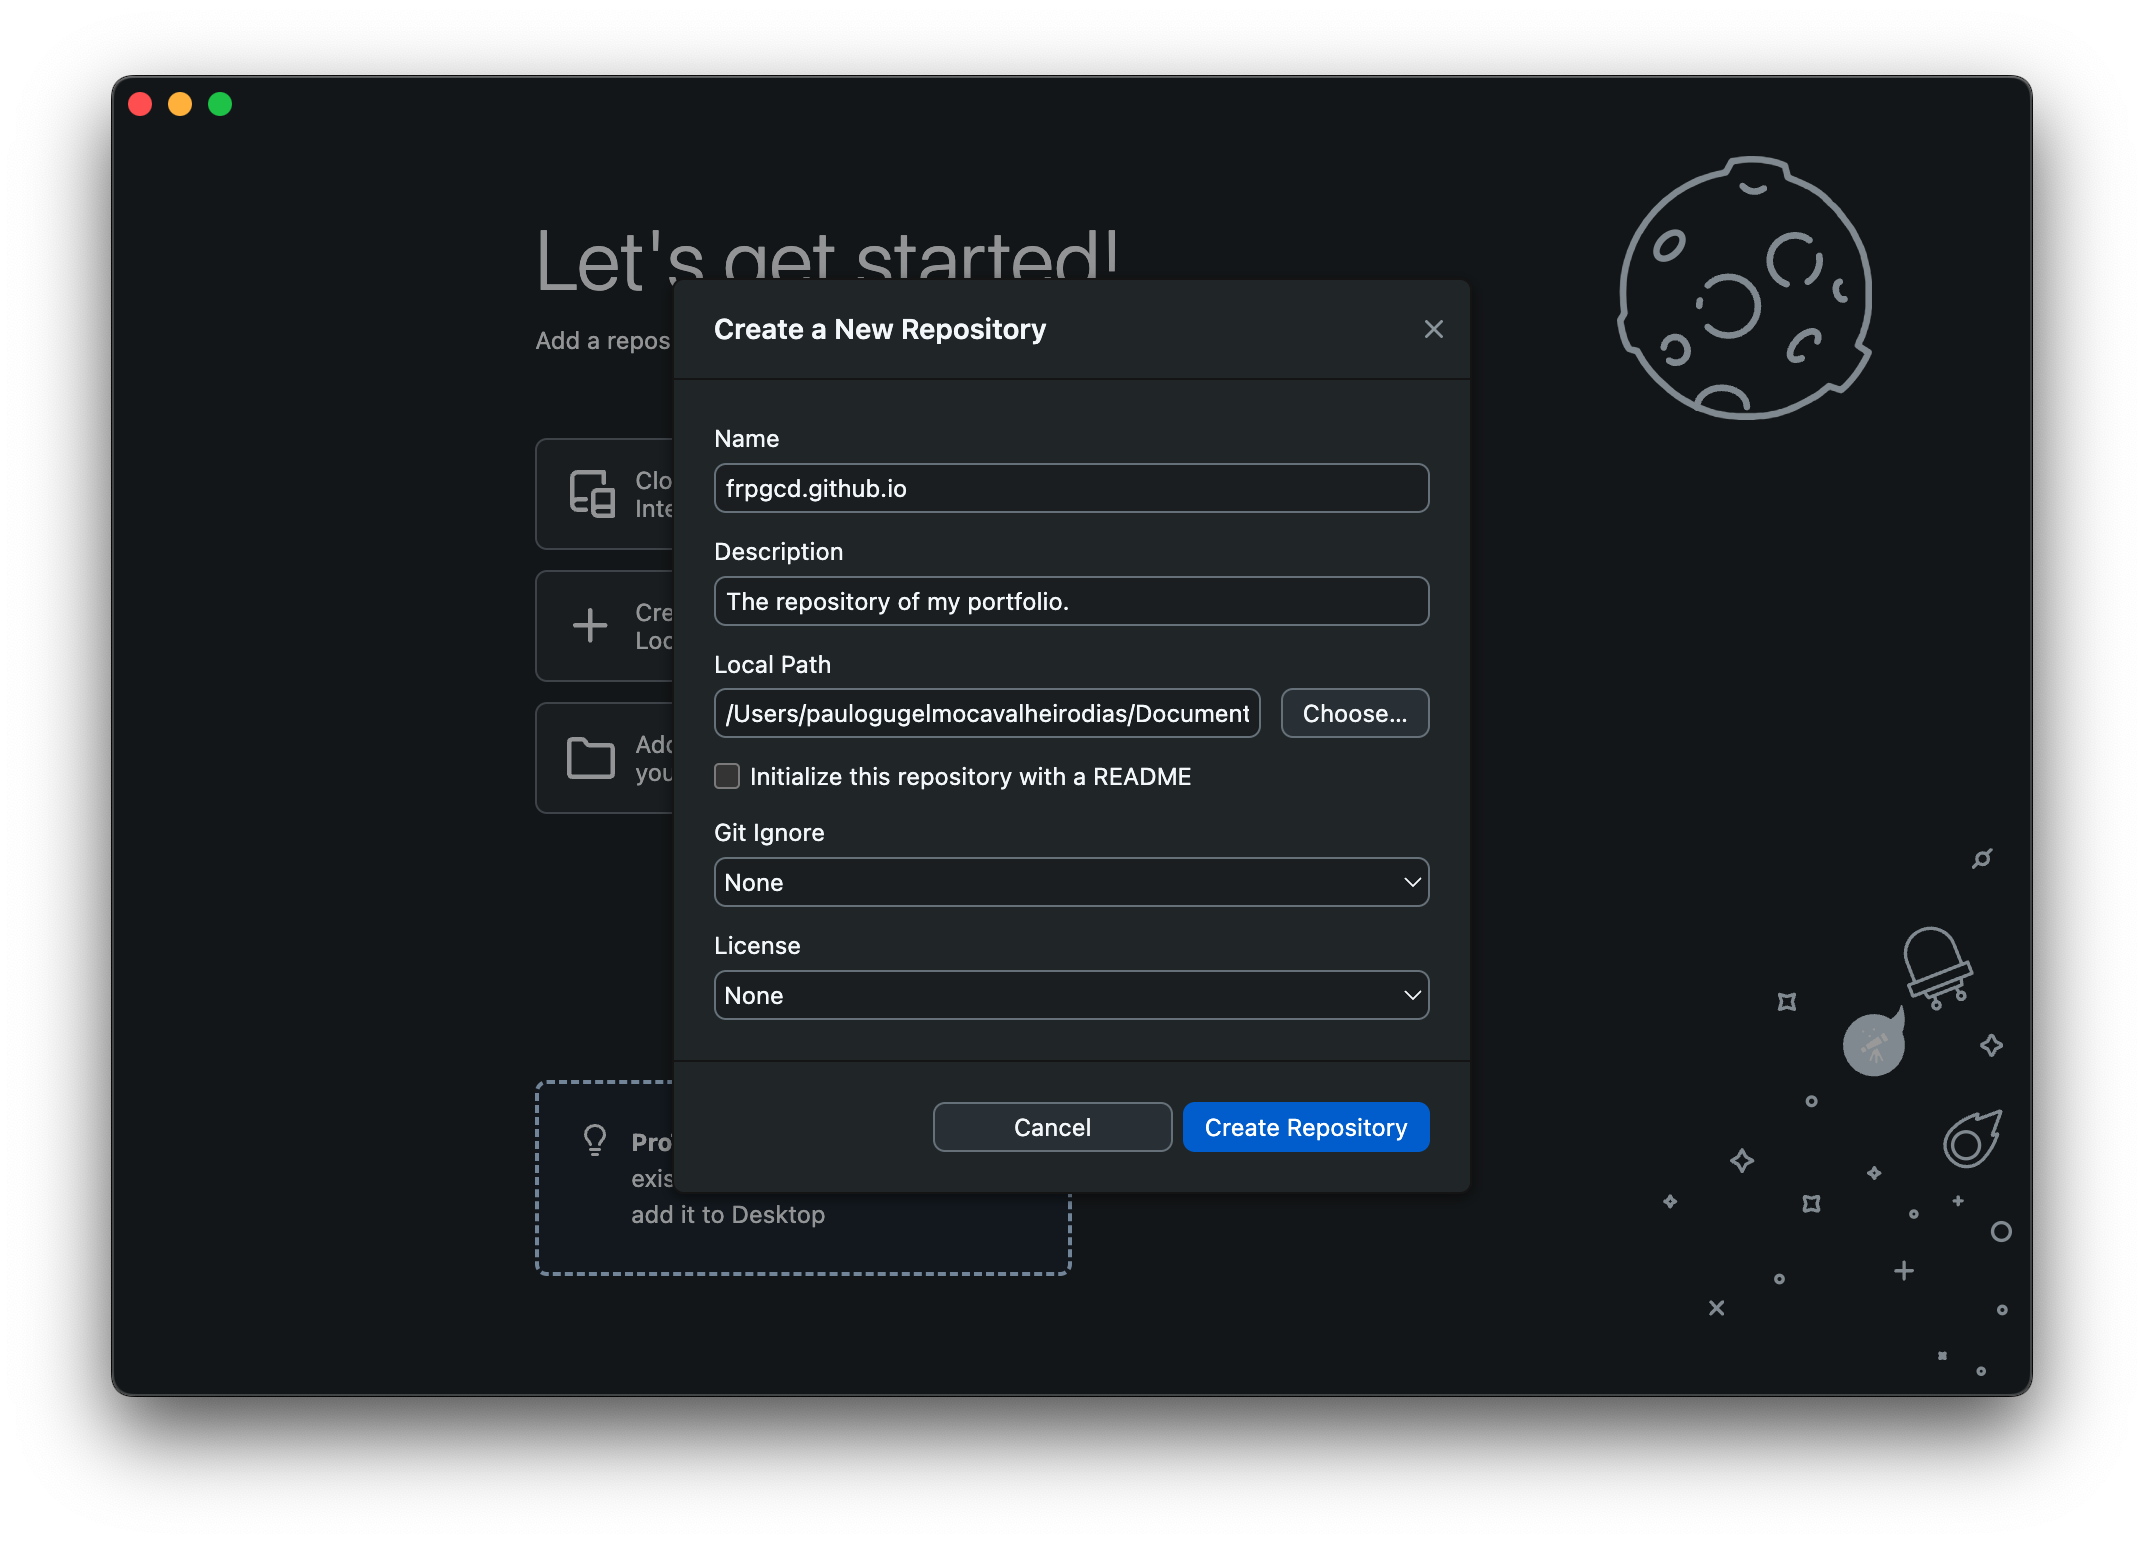
We click on “Create a New Repository on your Local Drive…”, and create a repository called “username.github.io”, with our actual username instead of “username”. I will create one, and since my GitHub username example is frpgcd, my repository will be called “frpgcd.github.io” :
Now, we should get something looking like that :
Let us take a moment to comment what we see. In the left side bar, we have all the modified files of our directory. Here, GitHub desktop automatically created a .gitattributes file. In the right side interface, we see the content of the selected files. Here, we see that two lines have been added, thanks to the green color and the addition sign “+”.
Now, if we make any change in our folder, we will be able to commit the changes. “Commit” means here that the changes will be recorded in the history of changes. Once our changes are commited, we can “push” them on our GitHub repository with the top-right button. If we want to “push” for the first time, we first have to publish the repository, i.e. create a distant repository on GitHub. We do it with the top-right button “Publish repository”.
In order for us to add files to our directory and modify them, we are now going to use another tool : Visual Studio Code.
This section presents the method to use Git and GitHub via the Command Line Interface (CLI).
Install vscode
It is much easier to use the CLI of Git with vscode. Therefore, we should first install vscode. I invite you to follow the instruction of the last section of this chapter and to come back here once you are finished with it.
Basics of Git
Once we installed vscode, we can install Git from here.
Once it is done, we can go back to vscode and open a new terminal console while having our folder “usernamen.github.io” open.
Now, to understand how to use Git, we need to stop for a moment, and have in mind the four main steps of our workflow :
- First, we have to initialise git in a folder. This will create a directory called
.gitin our current folder, that will be the logbook in which the history of all of our changes will be stored. - Second, we have to choose which files we track with Git. The changes of the tracked files will be registered in the
.gitfolder. - We can now work on our files. Once we want to save the changes of the files, we ‘add’ the modified files to the logbook.
- Finally, we have to describe the changes. Without descriptions, the changes won’t be saved in the logbook. To describe the changes, we write a ‘commit’ in the logbook.
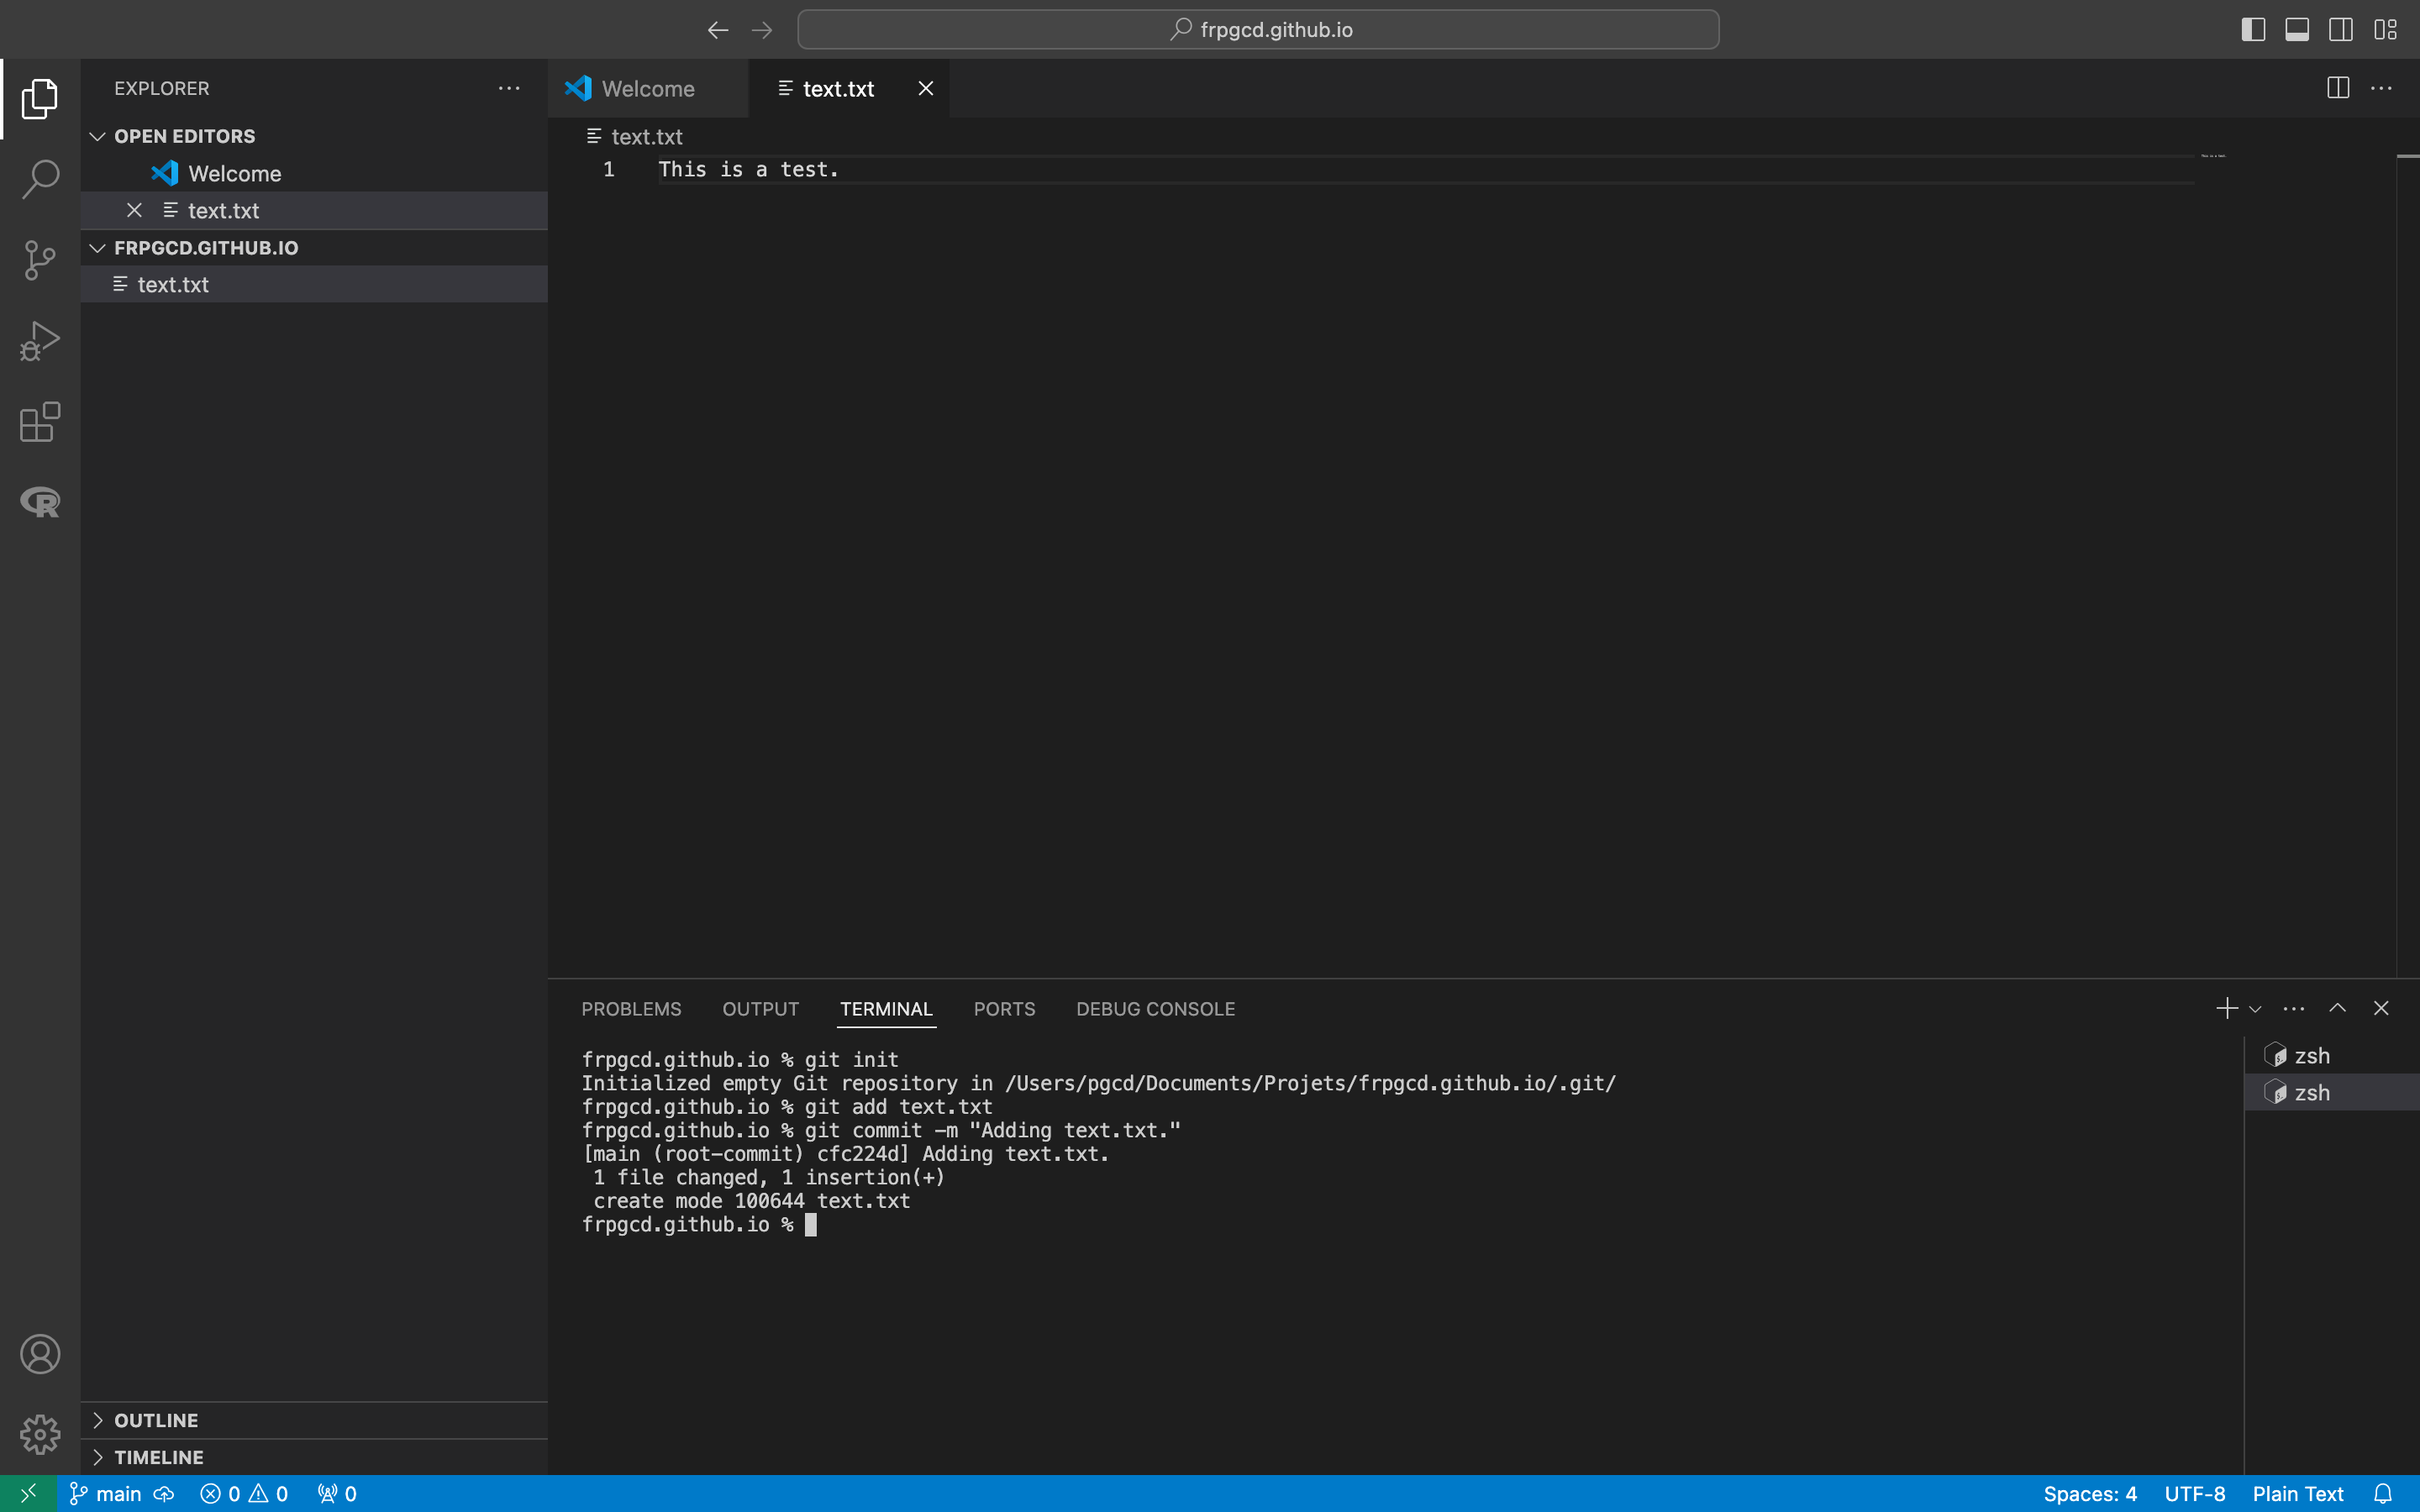
Concretely, using vscode :
- We write
git initin the terminal console to initialise a git folder. This create a hidden directory inside of our folder, named.git. You must not necessarily see it to use git. - We then click on “new file” on vscode, for example a text-file. We write something in it, and save it as
text.txt. - We begin tracking this file with git, using
git add text.txt. - We describe our action using
git commit -m "Adding a text file.".
At this point, we should have something like that :
At any moment, we can use some other git commands to have more information. For example :
git statusinforms us about which files in our folder are being tracked, and what modifications are not yet registered.git loggives back the logbook, i.e. the list of changes that were saved.git diffgives the differences between the current version of your files and the latest version saved in the logbook.
Finally, it is also useful to set up a branch. Simply put, a branch is the path in which we are registering all our commits and files. Creating and programming on another branch would be aking to continuing the development of our code on a parallel version of our project, without modifying the “main” version of it (often called the “main” branch). It is important to set up a main branch, in order for Git not to bug in future operations. In order to do so, we can enter : git branch -M main in the terminal.
Git is a very powerful tool that allows to do a lot of collaborative code managing, but we choose here to mainly exploit one of its features : remote synchronization. Ideed, in addition to having this local logbook on our computer, we can also send your files to a remote server, in a similar way than the cloud or a remote drive works. This is where GitHub enters into play.
Basics of GitHub
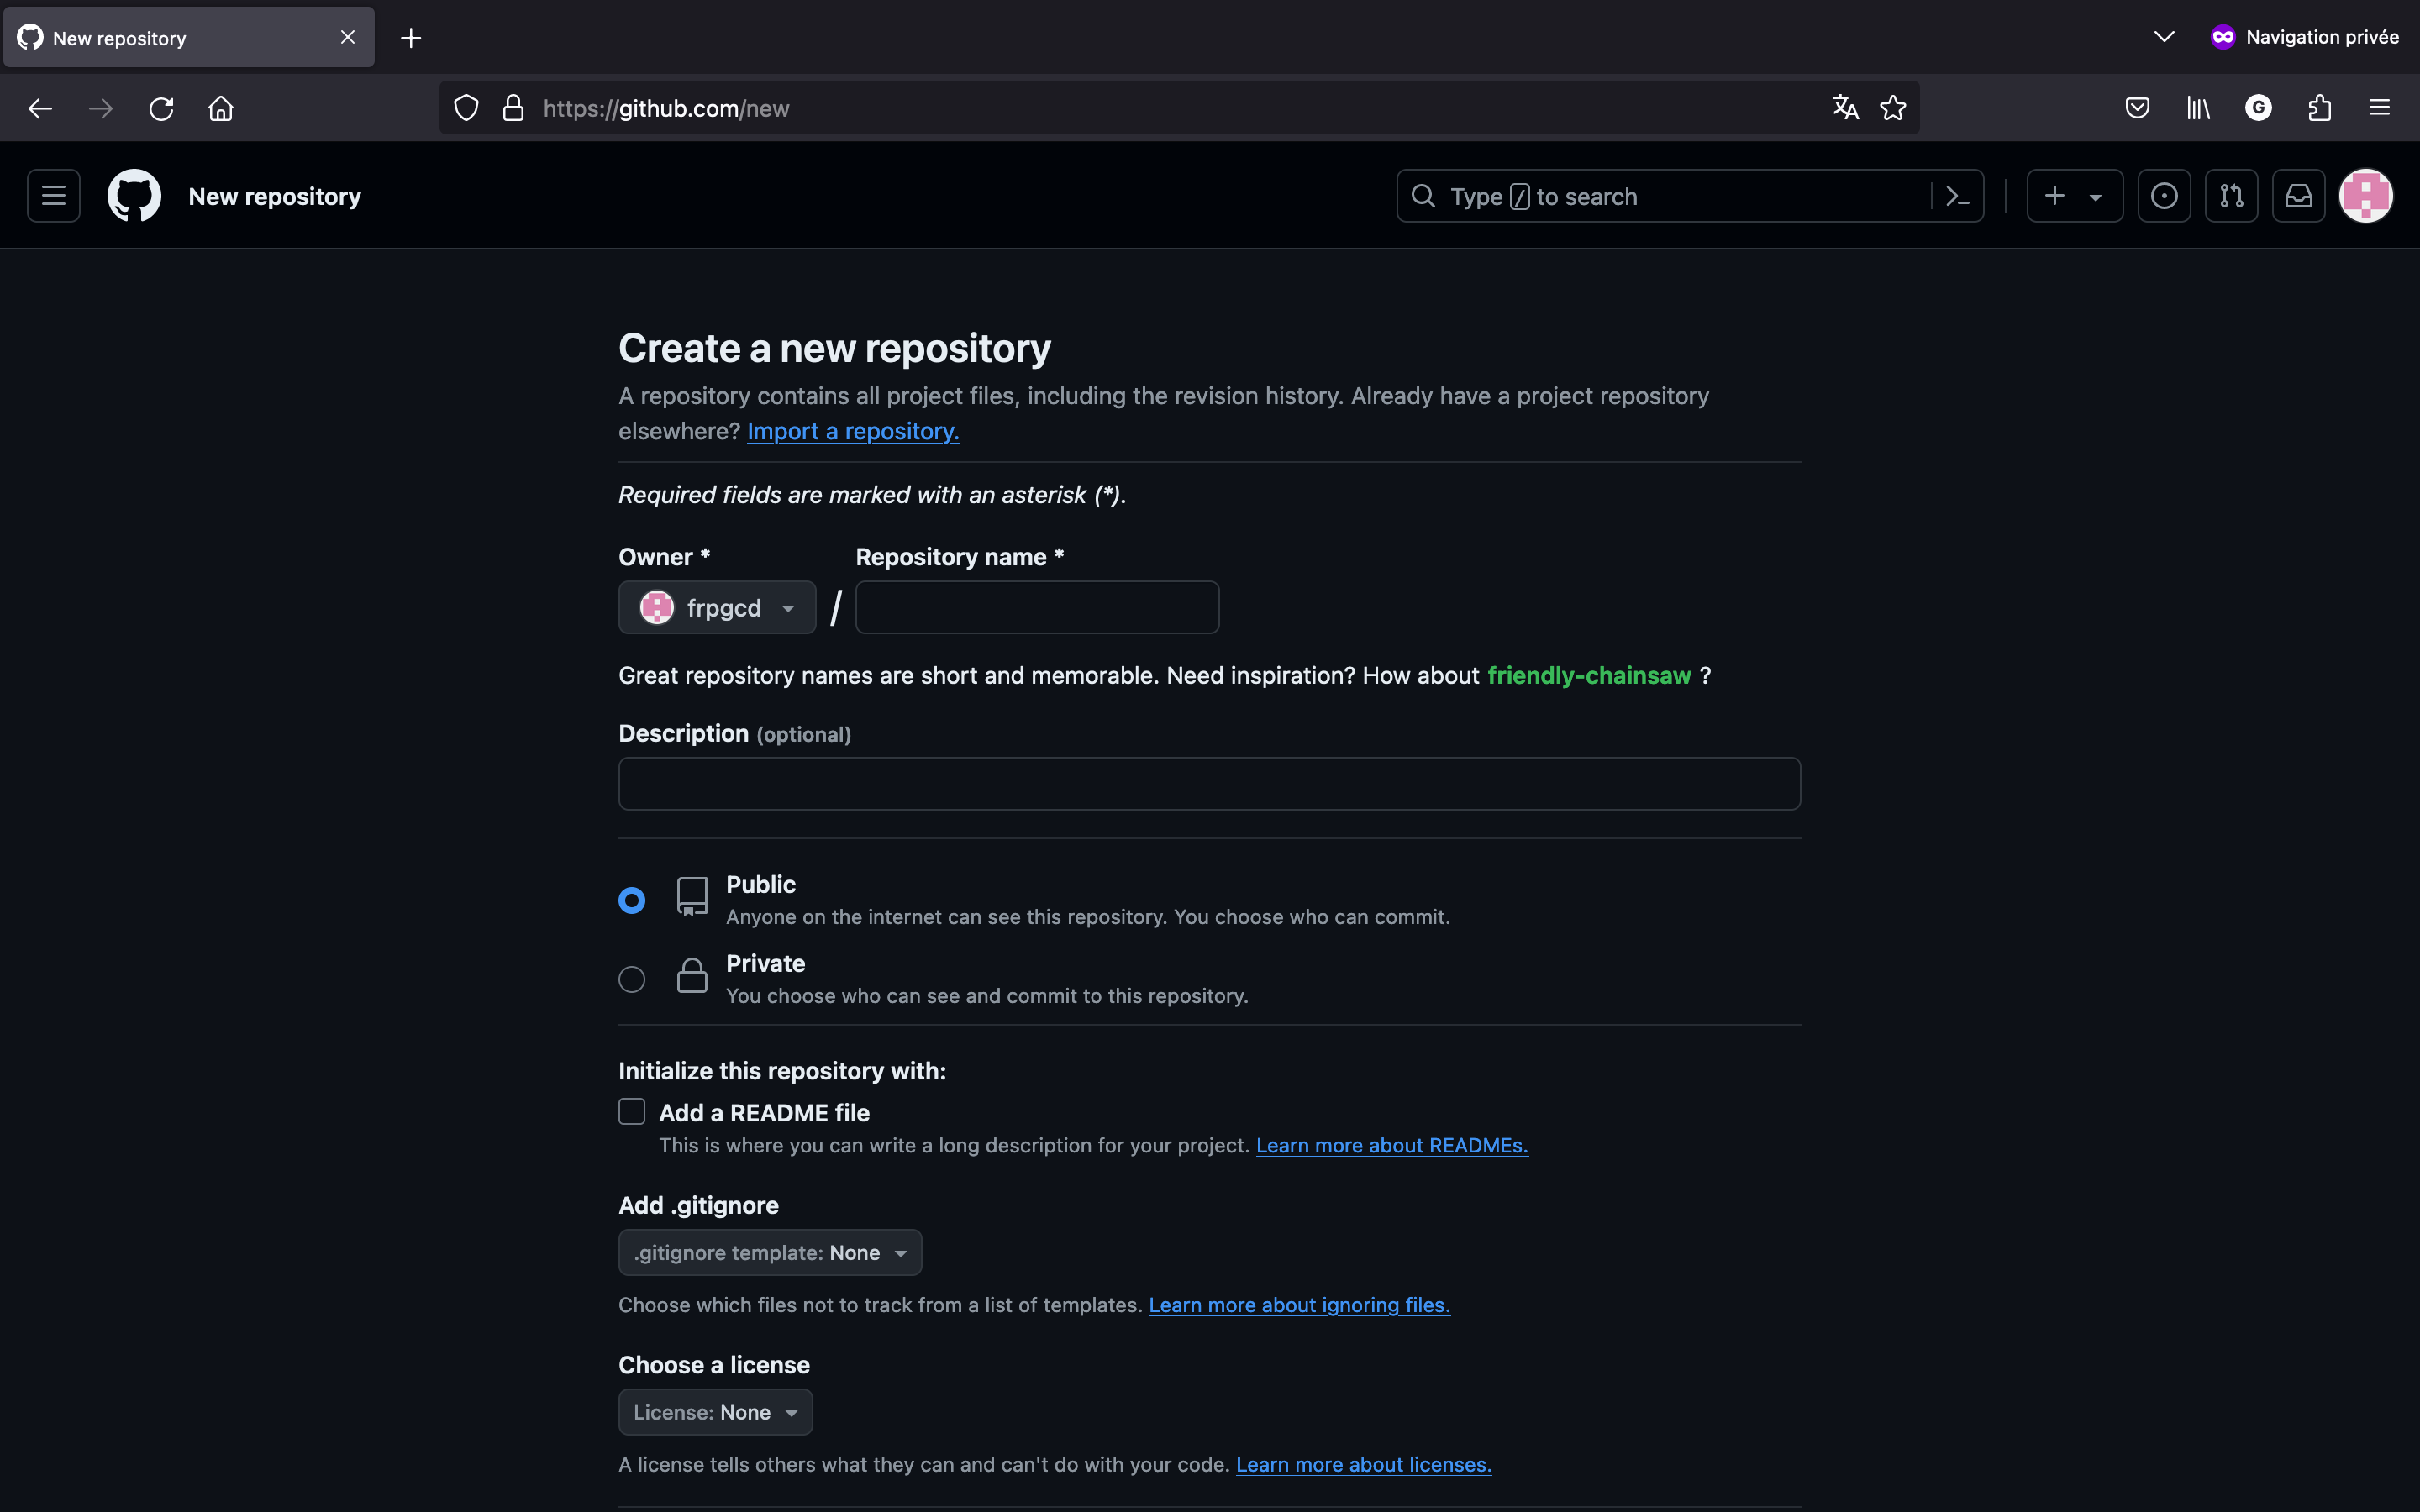
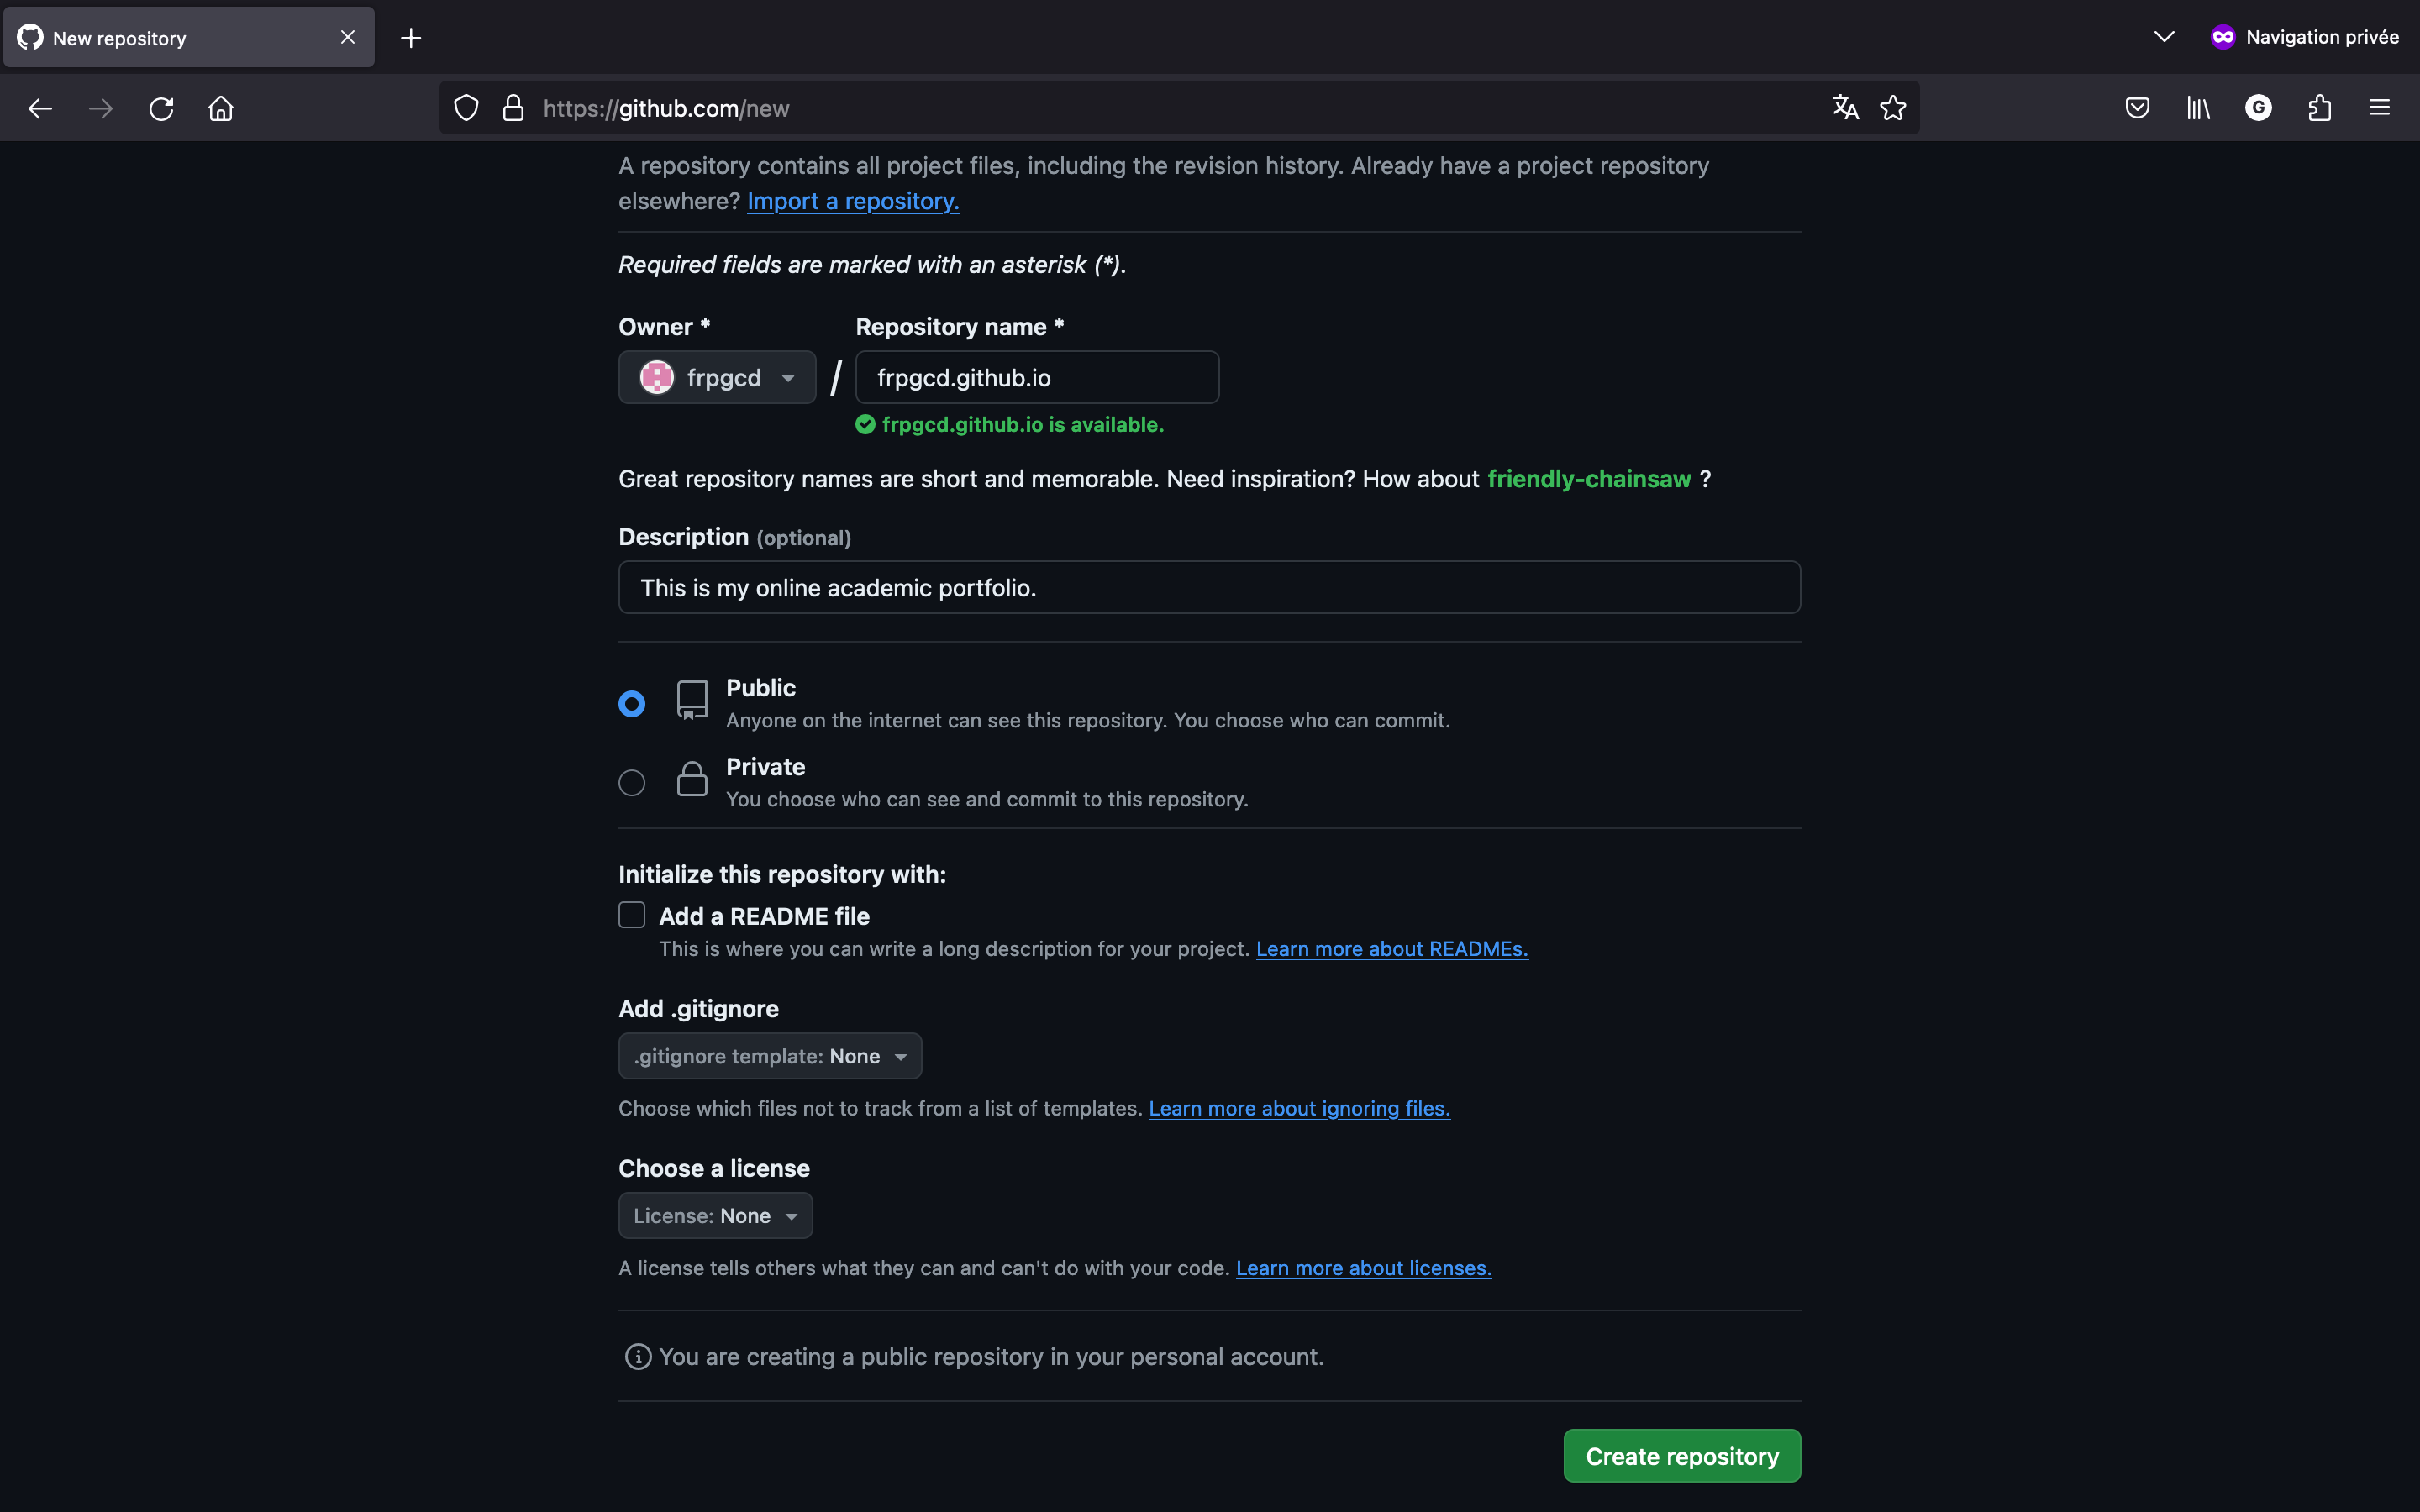
To use GitHub, the first step is to go to GitHub and create an account. Once our account is created, we can create a repository, named “username.github.io”, replacing “username” with our actual user name. Since I choose the username frpgcd, I will create in this example a repository name “frpgcd.github.io”.
Note : During the creation process of a repository, we are asked for a license. It is important to chose one, because without it, the most restrictive policy applies. After a quick research, it seems that the Creative Commons BY-NC-ND 4.0 Deed license should cover all the cases we need for an online academic portfolio. It is very permissive, but requires citation (“appropriate credit”), does not allows for commercial uses and derivatives. If your needs are different, it is worth looking into different kinds of license to see which one is better for your own usage.
Once it is done, we can go back to vscode, to add a connection between our local folder and the remote repository we just created. In order to do that, we first have to configurate git.
Enter
git config --global user.name "Your Name", replacing “Your Name” with the name of your choice. It doesn’t have to be the same as your GitHub user name.Enter
git config --global user.email "your@mail.com", replacing “your@mail.com” with the email of your choice. Note that it does not require you to actually have access to this email adress.Then, we have to add an ssh key to our GitHub account. An ssh key allows you to communicate to GitHub from your computer. Enter
ssh-keygen -t ed25519 -C "your@email.com", replacing “your@email” with your actual email. Your terminal will ask for a passphrase, but it’s better for simplicity purposes to not enter anything, and just press the enter key on your keyboard.
In my case, with the username “frpgcd”, I would enter in my Terminal console :
git config --global user.name "frpgcd"
git config --global user.email "frpgcd@mail.com"
ssh-keygen -t ed25519 -C "frpgcd@email.com"- Now, we are going to use this key to establish a connection between our computer and our GitHub account. On our terminal, we can enter
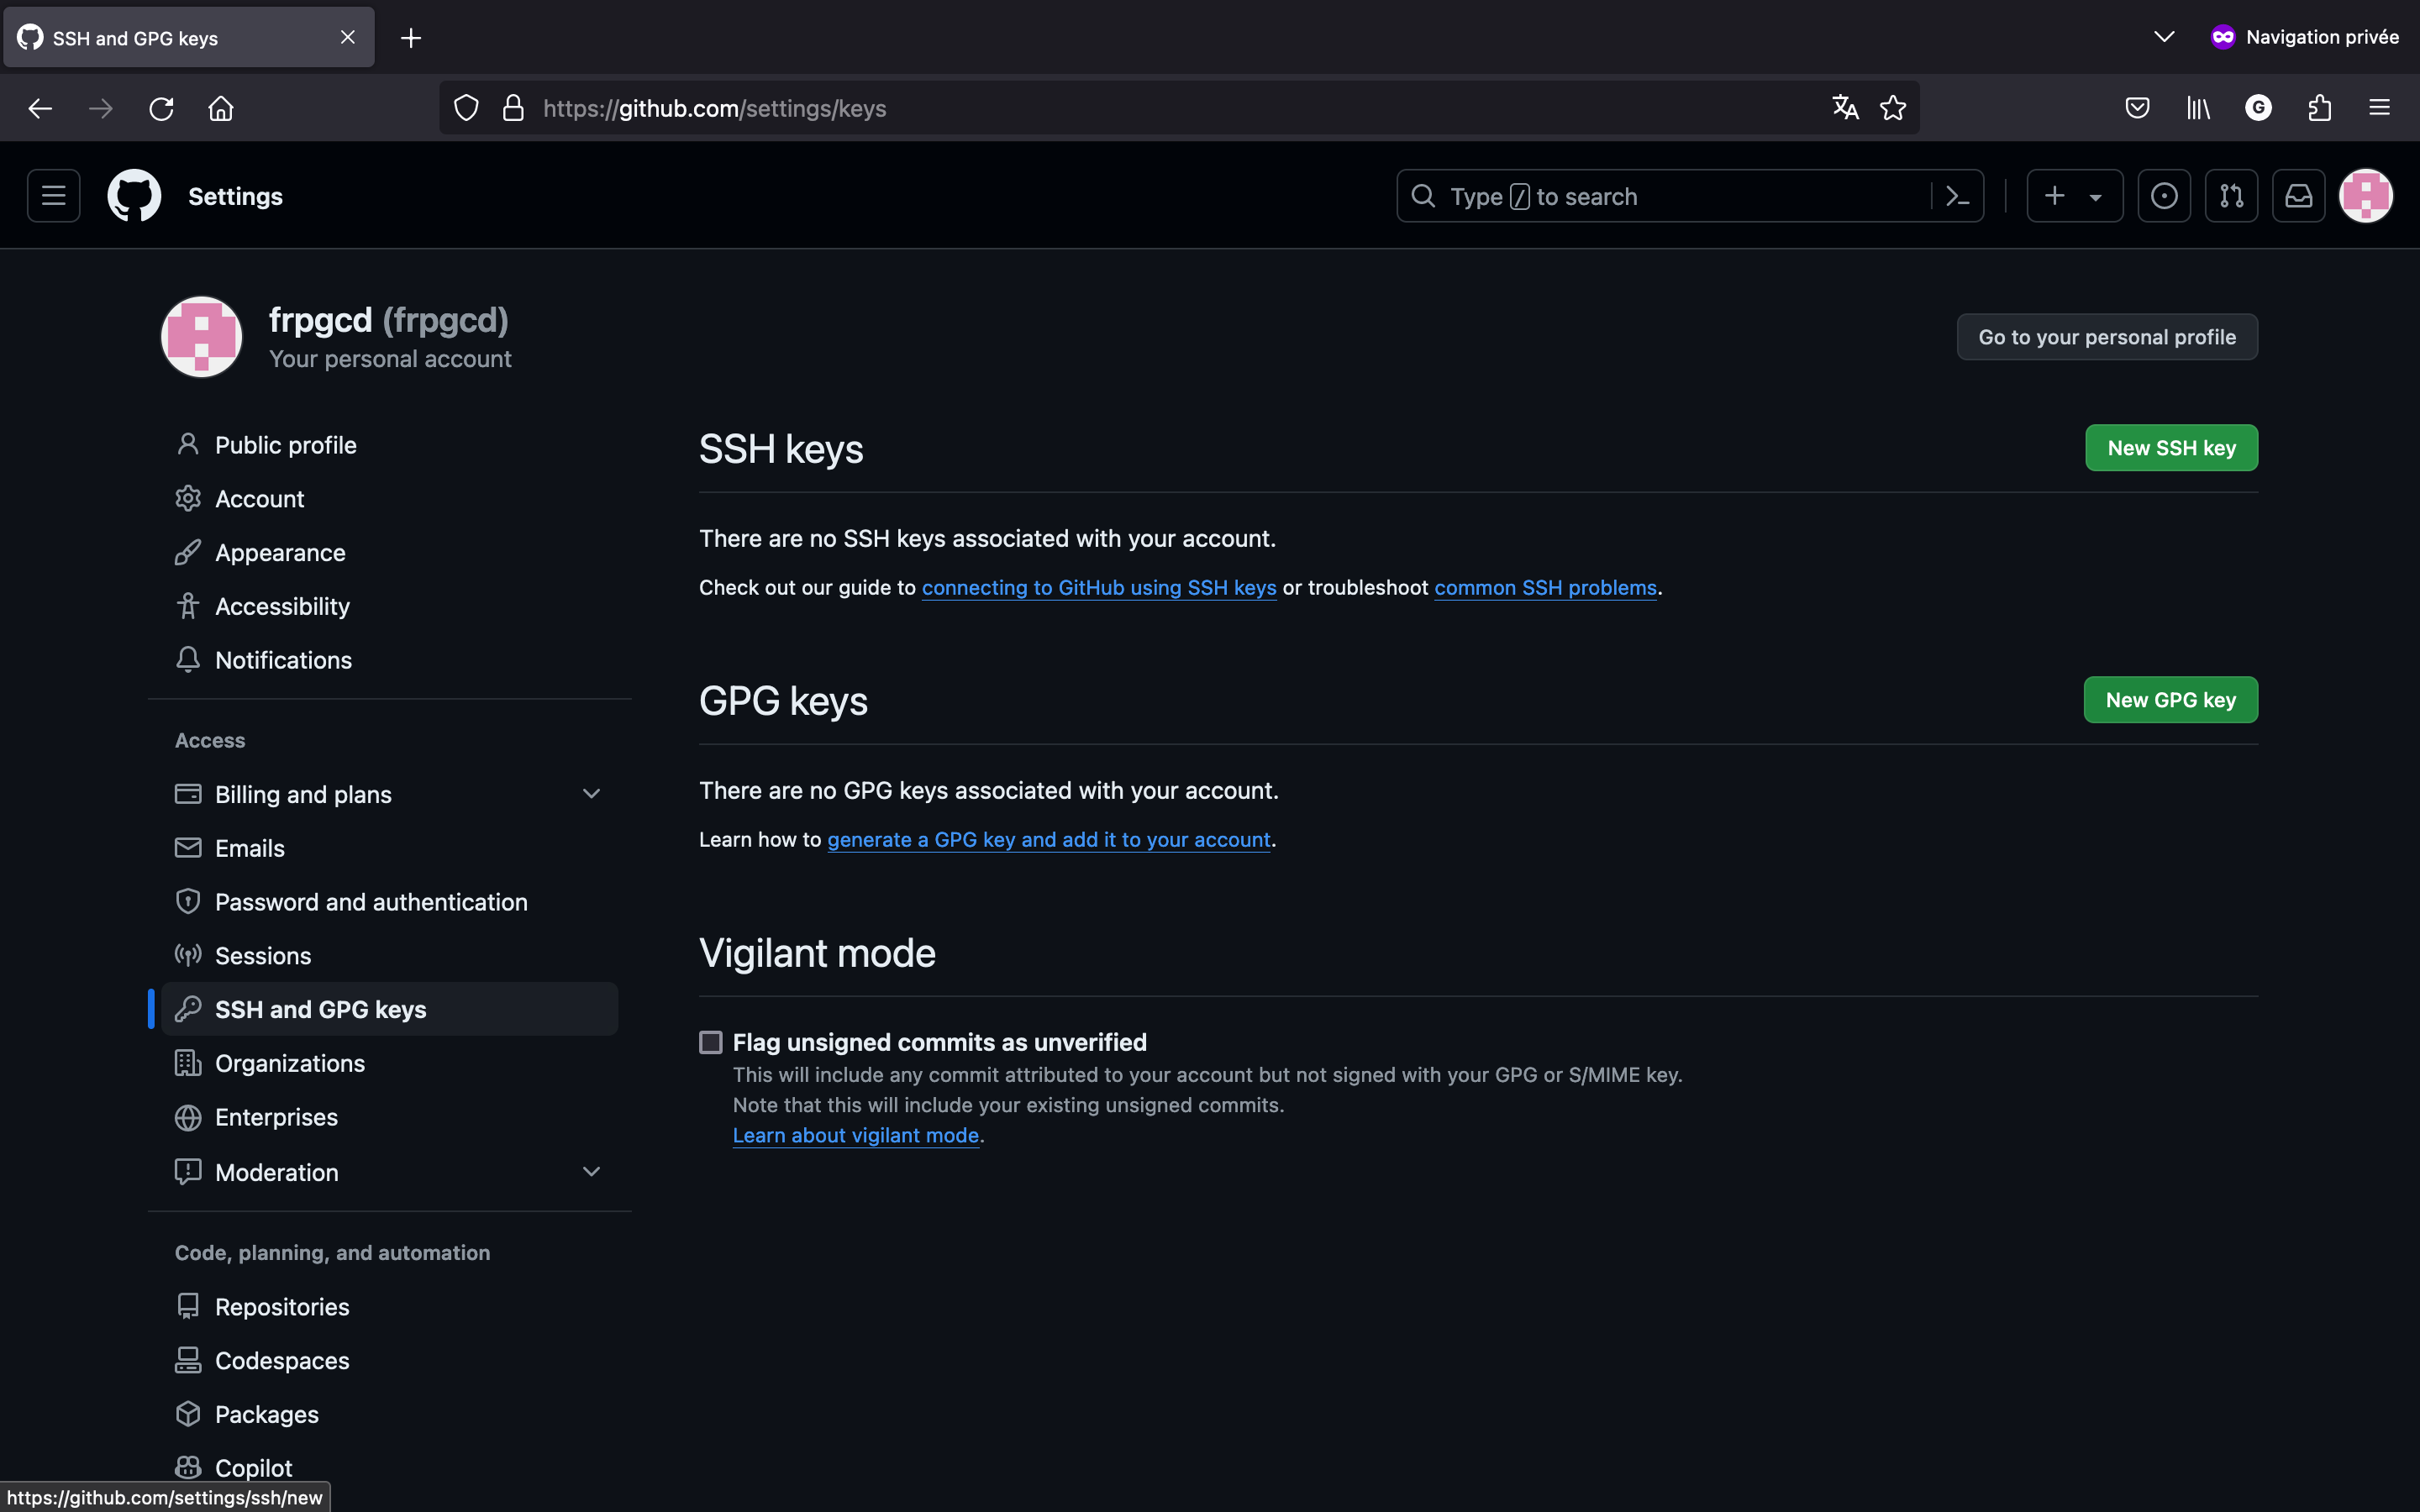
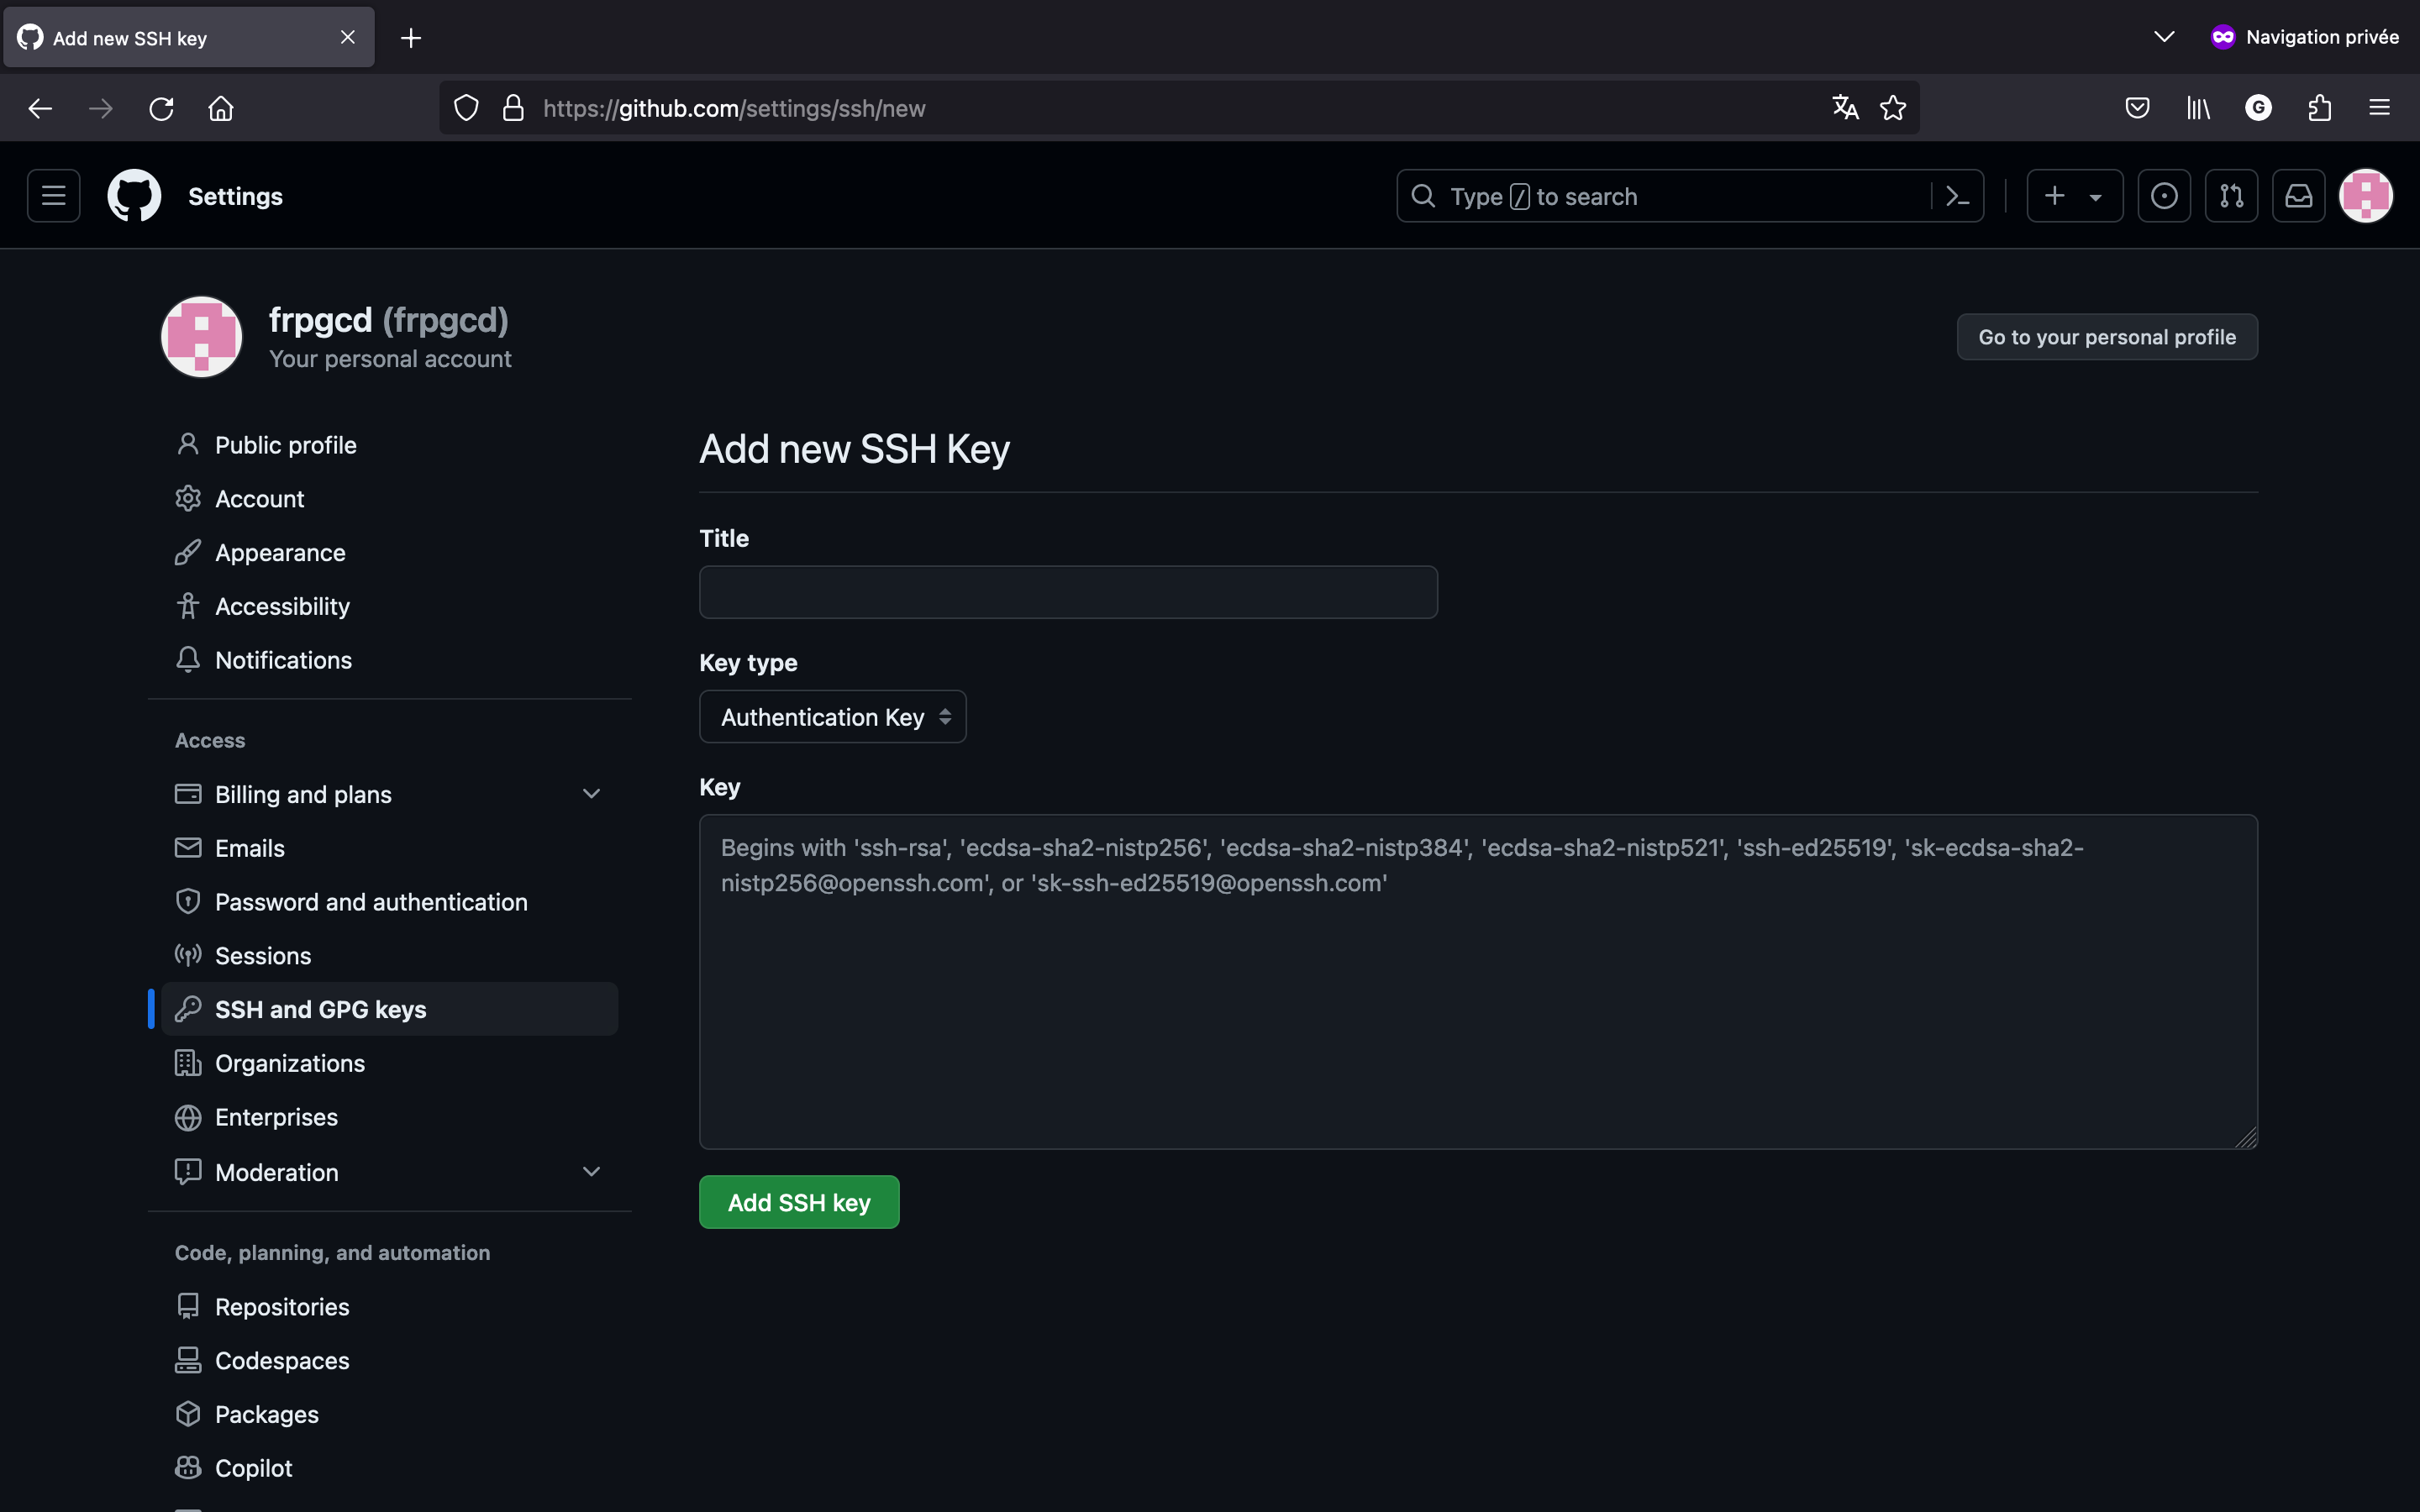
cat ~/.ssh/id_ed25519.puboropen ~/.ssh/id_ed25519.pub, and it will give us back a character string beginning with “ssh-ed22519”. We then go to our GitHub account, click on our profile picture at the top right of the website, choose “settings”, then click on “ssh and gpg keys”, then on “add new ssh key”, choose the title you want (for example the name of our current computer), and in “key”, add the value your terminal gave back to us. We should be connected !
You should not share your ssh keys to the public. It could jeopardize the safety of your connection and access to the distant repository.
Now that our GitHub account is connected to our computer, we have to connect our local folder to a repository. We must go on our repository, and copy the text it gives us in the SSH section (it should be something like “git@github.com:username/name_of_the_repository.git”). In our vscode terminal, with our folder open, we can then enter :
git remote add origin git@github.com:username/name_of_the_repository.git. The connection between our local folder and distant repository should be established.We can “push” the content of our local folder to our remote folder. This is a command that we use once all the changes are commited in our logbook to send all the information in the remote server. To be able to push correctly, you first enter
git push -u origin main, and then you can just entergit pushfor the next times, when your changes are added and commited.
In my case, I have, with the username “frpgcd” and the repository “frpgcd.github.io” :
git remote add origin git@github.com:frpgcd/frpgcd.github.io.git
git push -u origin main
You can also initialise a git folder in another directory, and “clone” an existing GitHub repository. This will create a duplicate of this repository in your folder and on your GitHub account, or just load the data locally if it is one of your repositories. Although this is not covered in the current tutorial, you can check the GitHub and Git documentations to get more information on those operations.
Use Git and GitHub together
Now that the connection between your local folder and your distant repository has been created, you can add modifications to your folder (like creating a new file), add those changes via git add followed by the name of your new document (you can also use * to select everything in your folder), commit those changes via git commit -m "the description of your changes", and then push those changes via git push. This add-commit-push process is one of the basics to synchronize your local folder with the files of your GitHub account.
For example, if we want to create a new file, named “new_file.txt”, to enter some text in it, to save it and to track it with git, and then to send it to our distant GitHub repository, we would do, after saving the file :
git add new_file.txt
git commit -m "Adding a new file."
git push
You can then verify that your changes have been taken into account by going on the website of GitHub, on your repository. Your tracked files should appear there.
Visual Studio Code
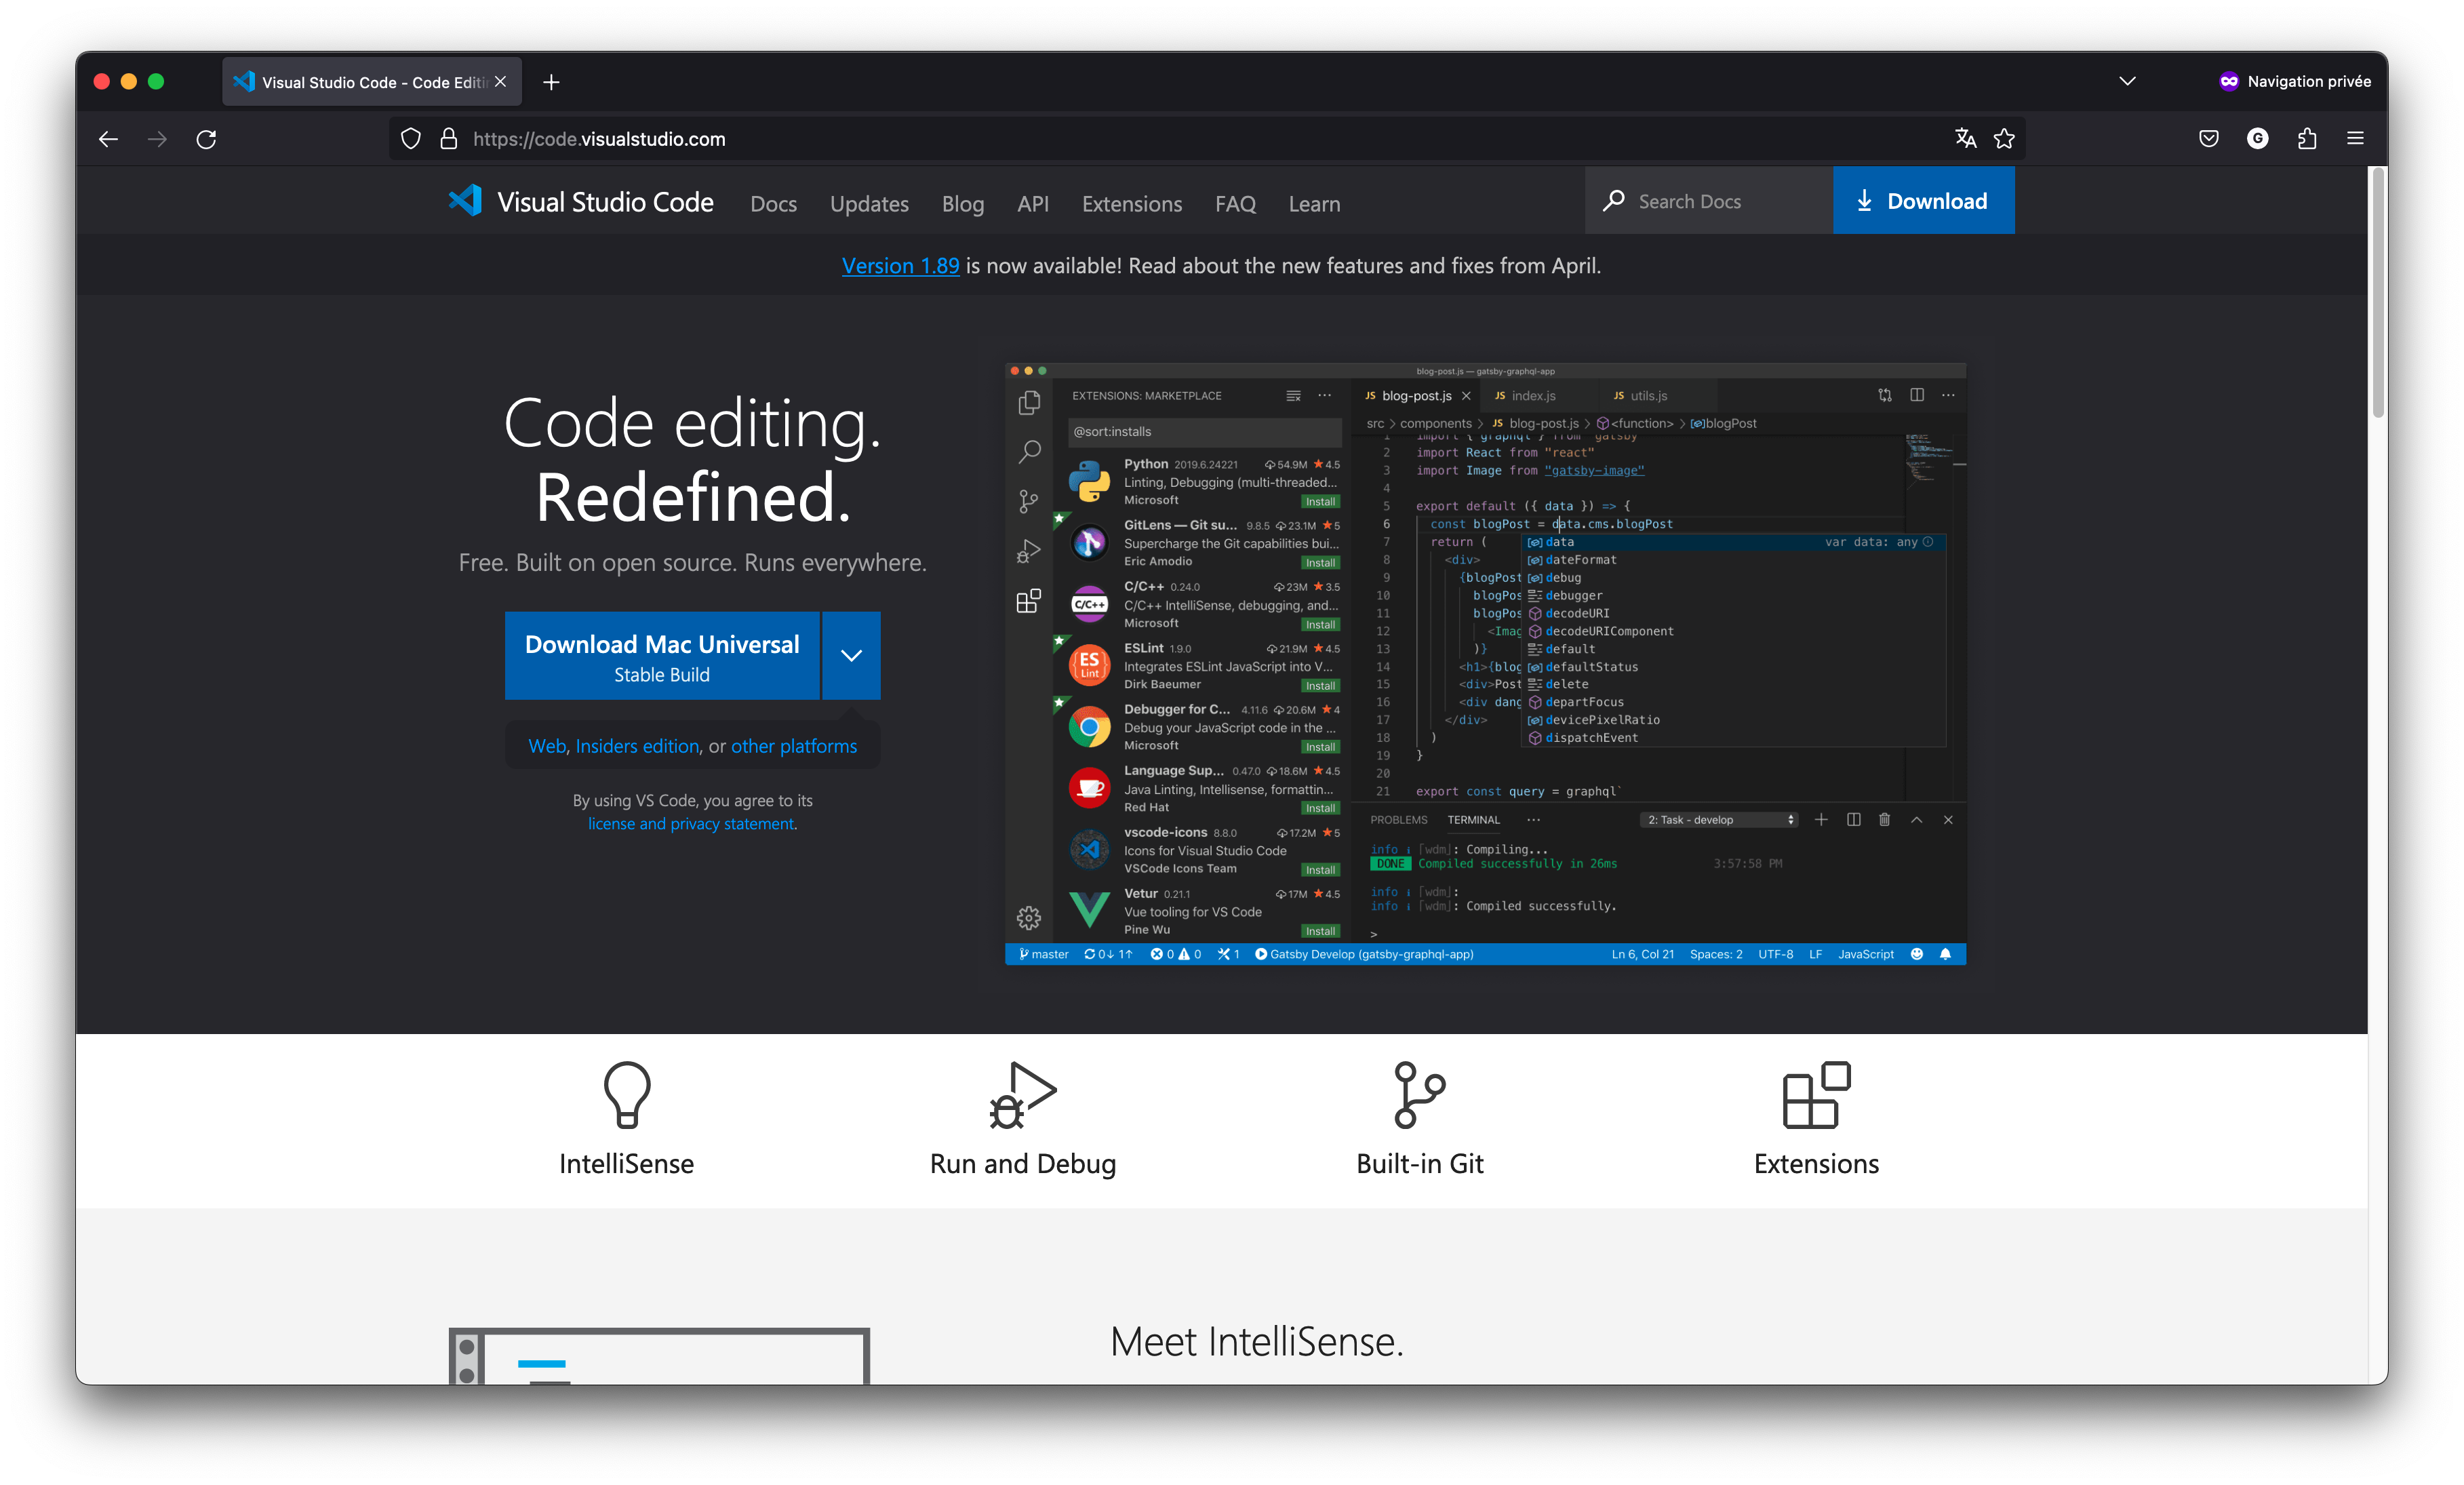
Visual Studio Code (VSC or vscode) is a software to write and execute code, also called Integrated Development Environment (IDE). It is largely used, and many extensions exist to customize one’s experience with it. We are going to install vscode here.
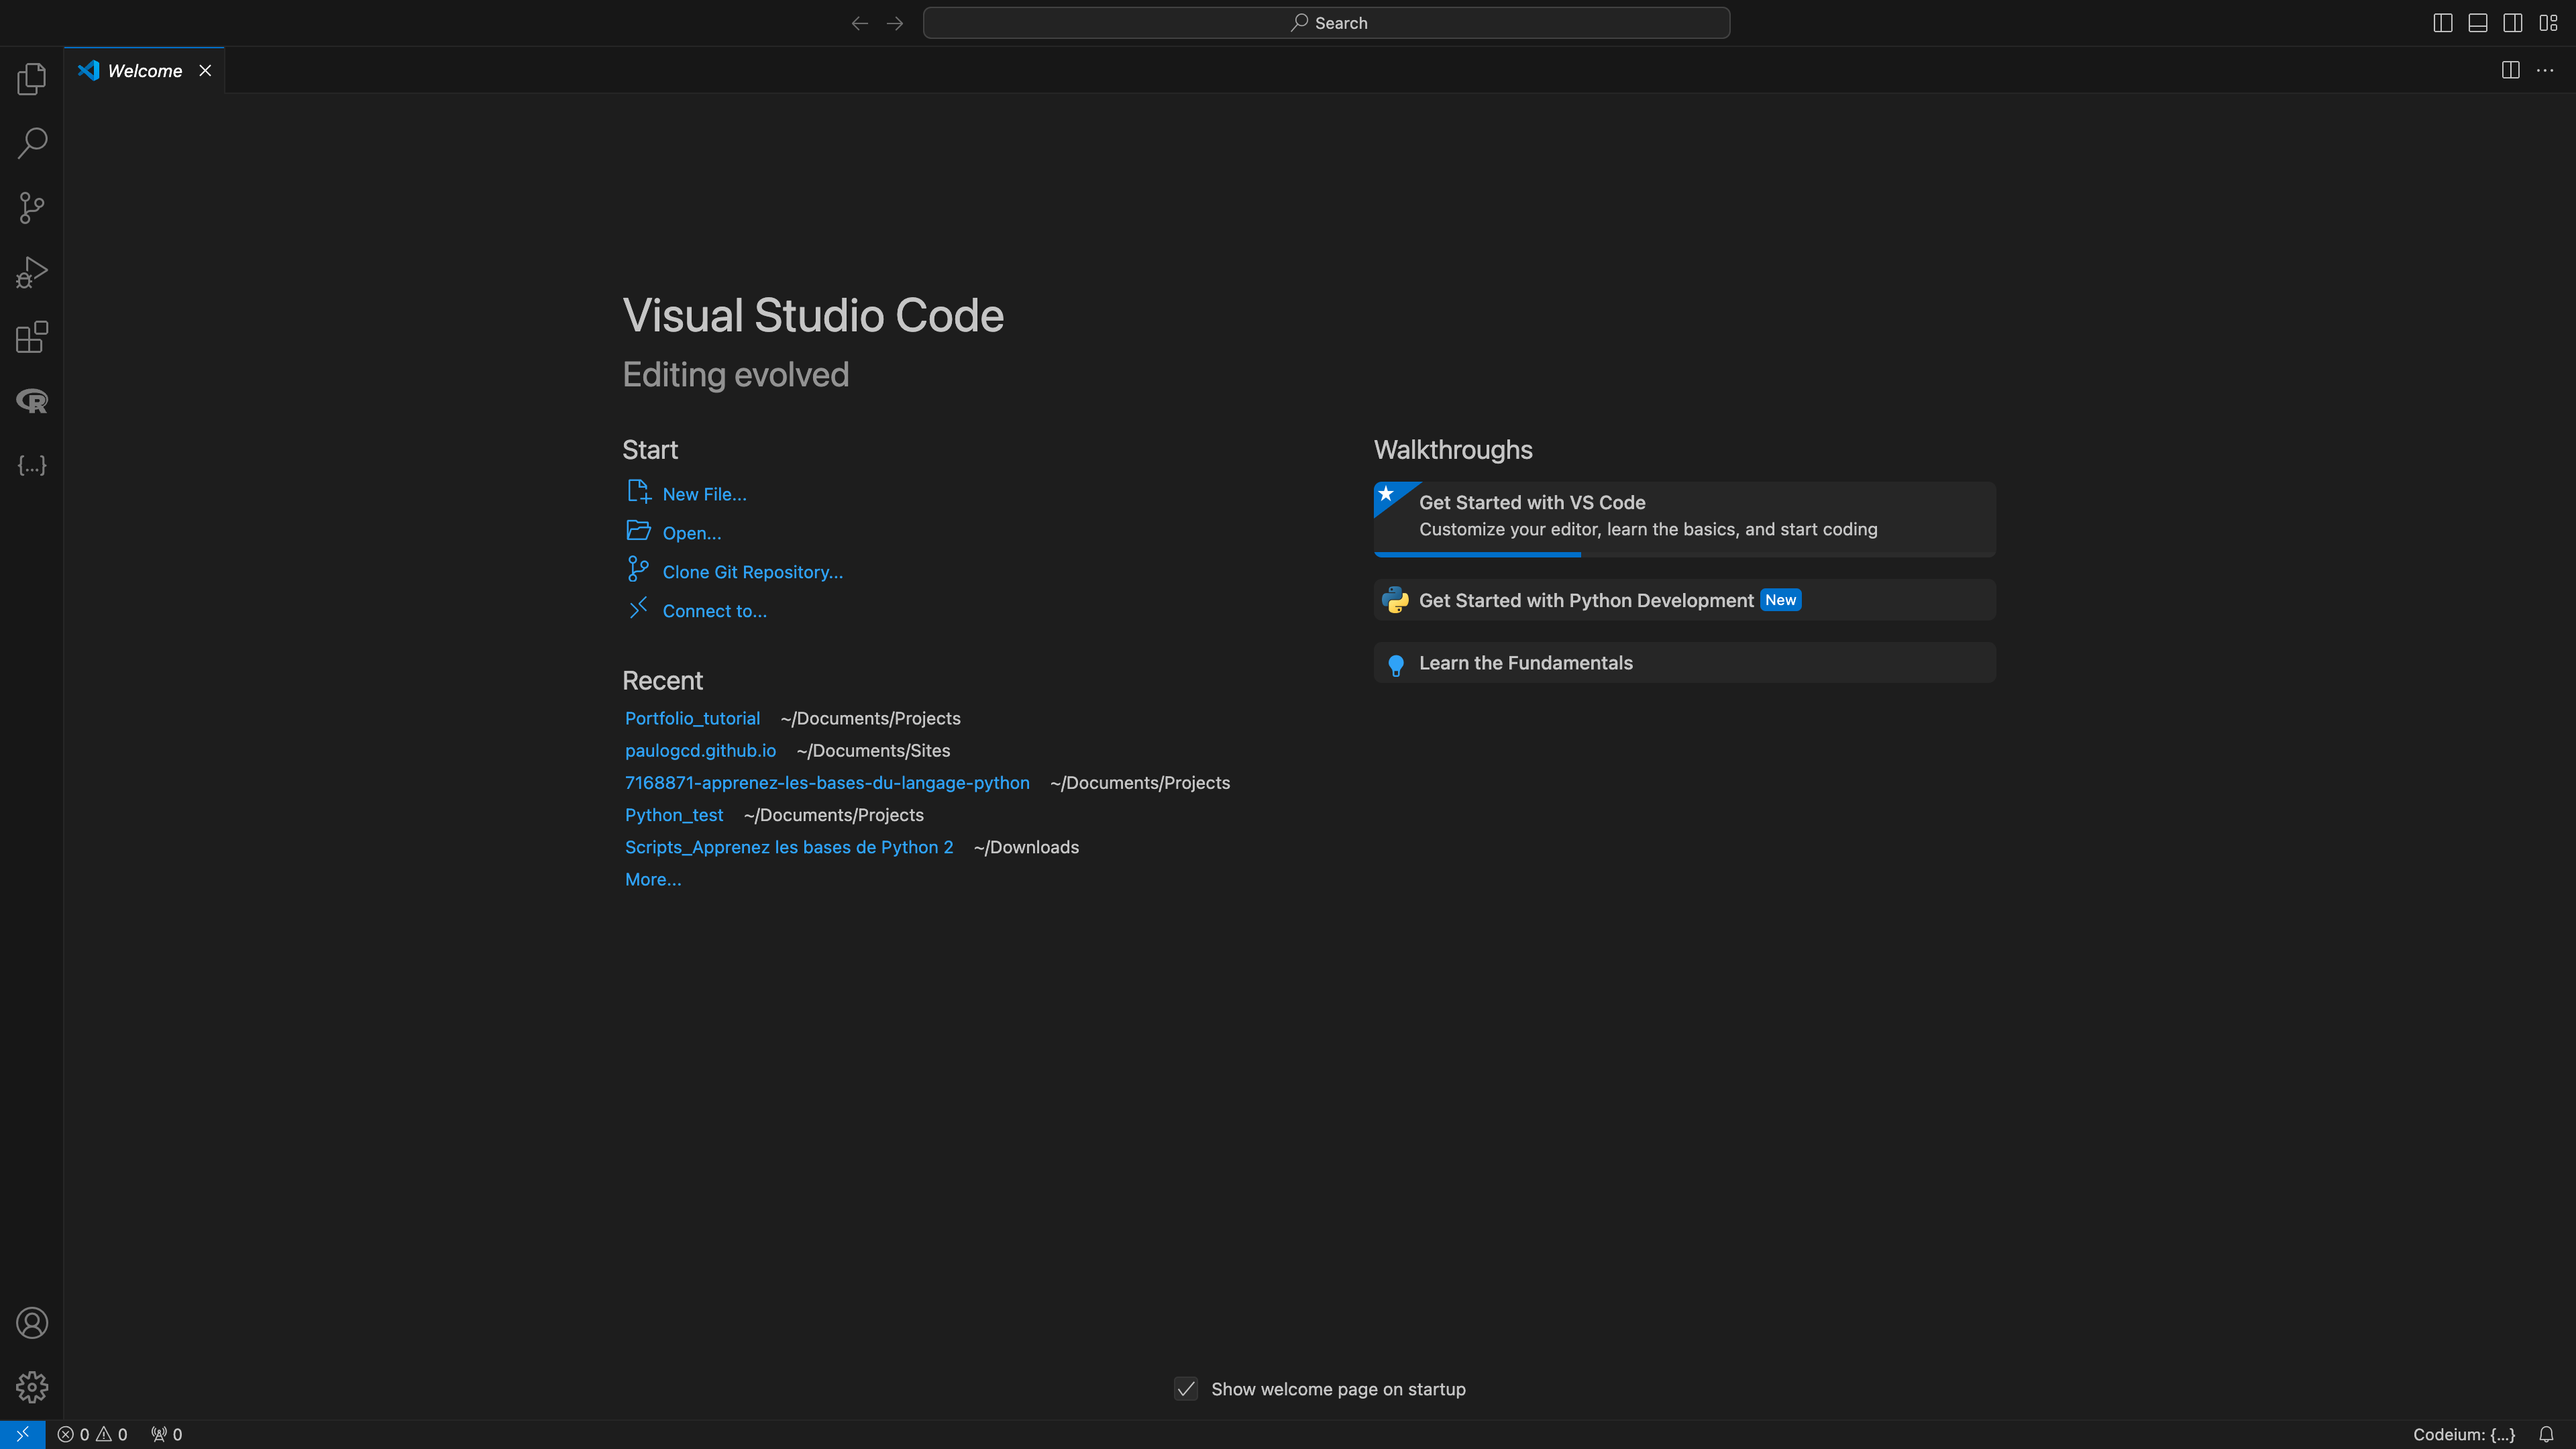
One of the strenghts of vscode is the fact that it can open and manage a whole folder. We are now going to use vscode to open the folder “username.github.io” that we created earlier. To do so, we open vscode, click on “open” in the starting page, and select our folder.
In some versions of vscode, two options exist for opening a file or a folder. Be sure to select the option to open a folder and not a file.
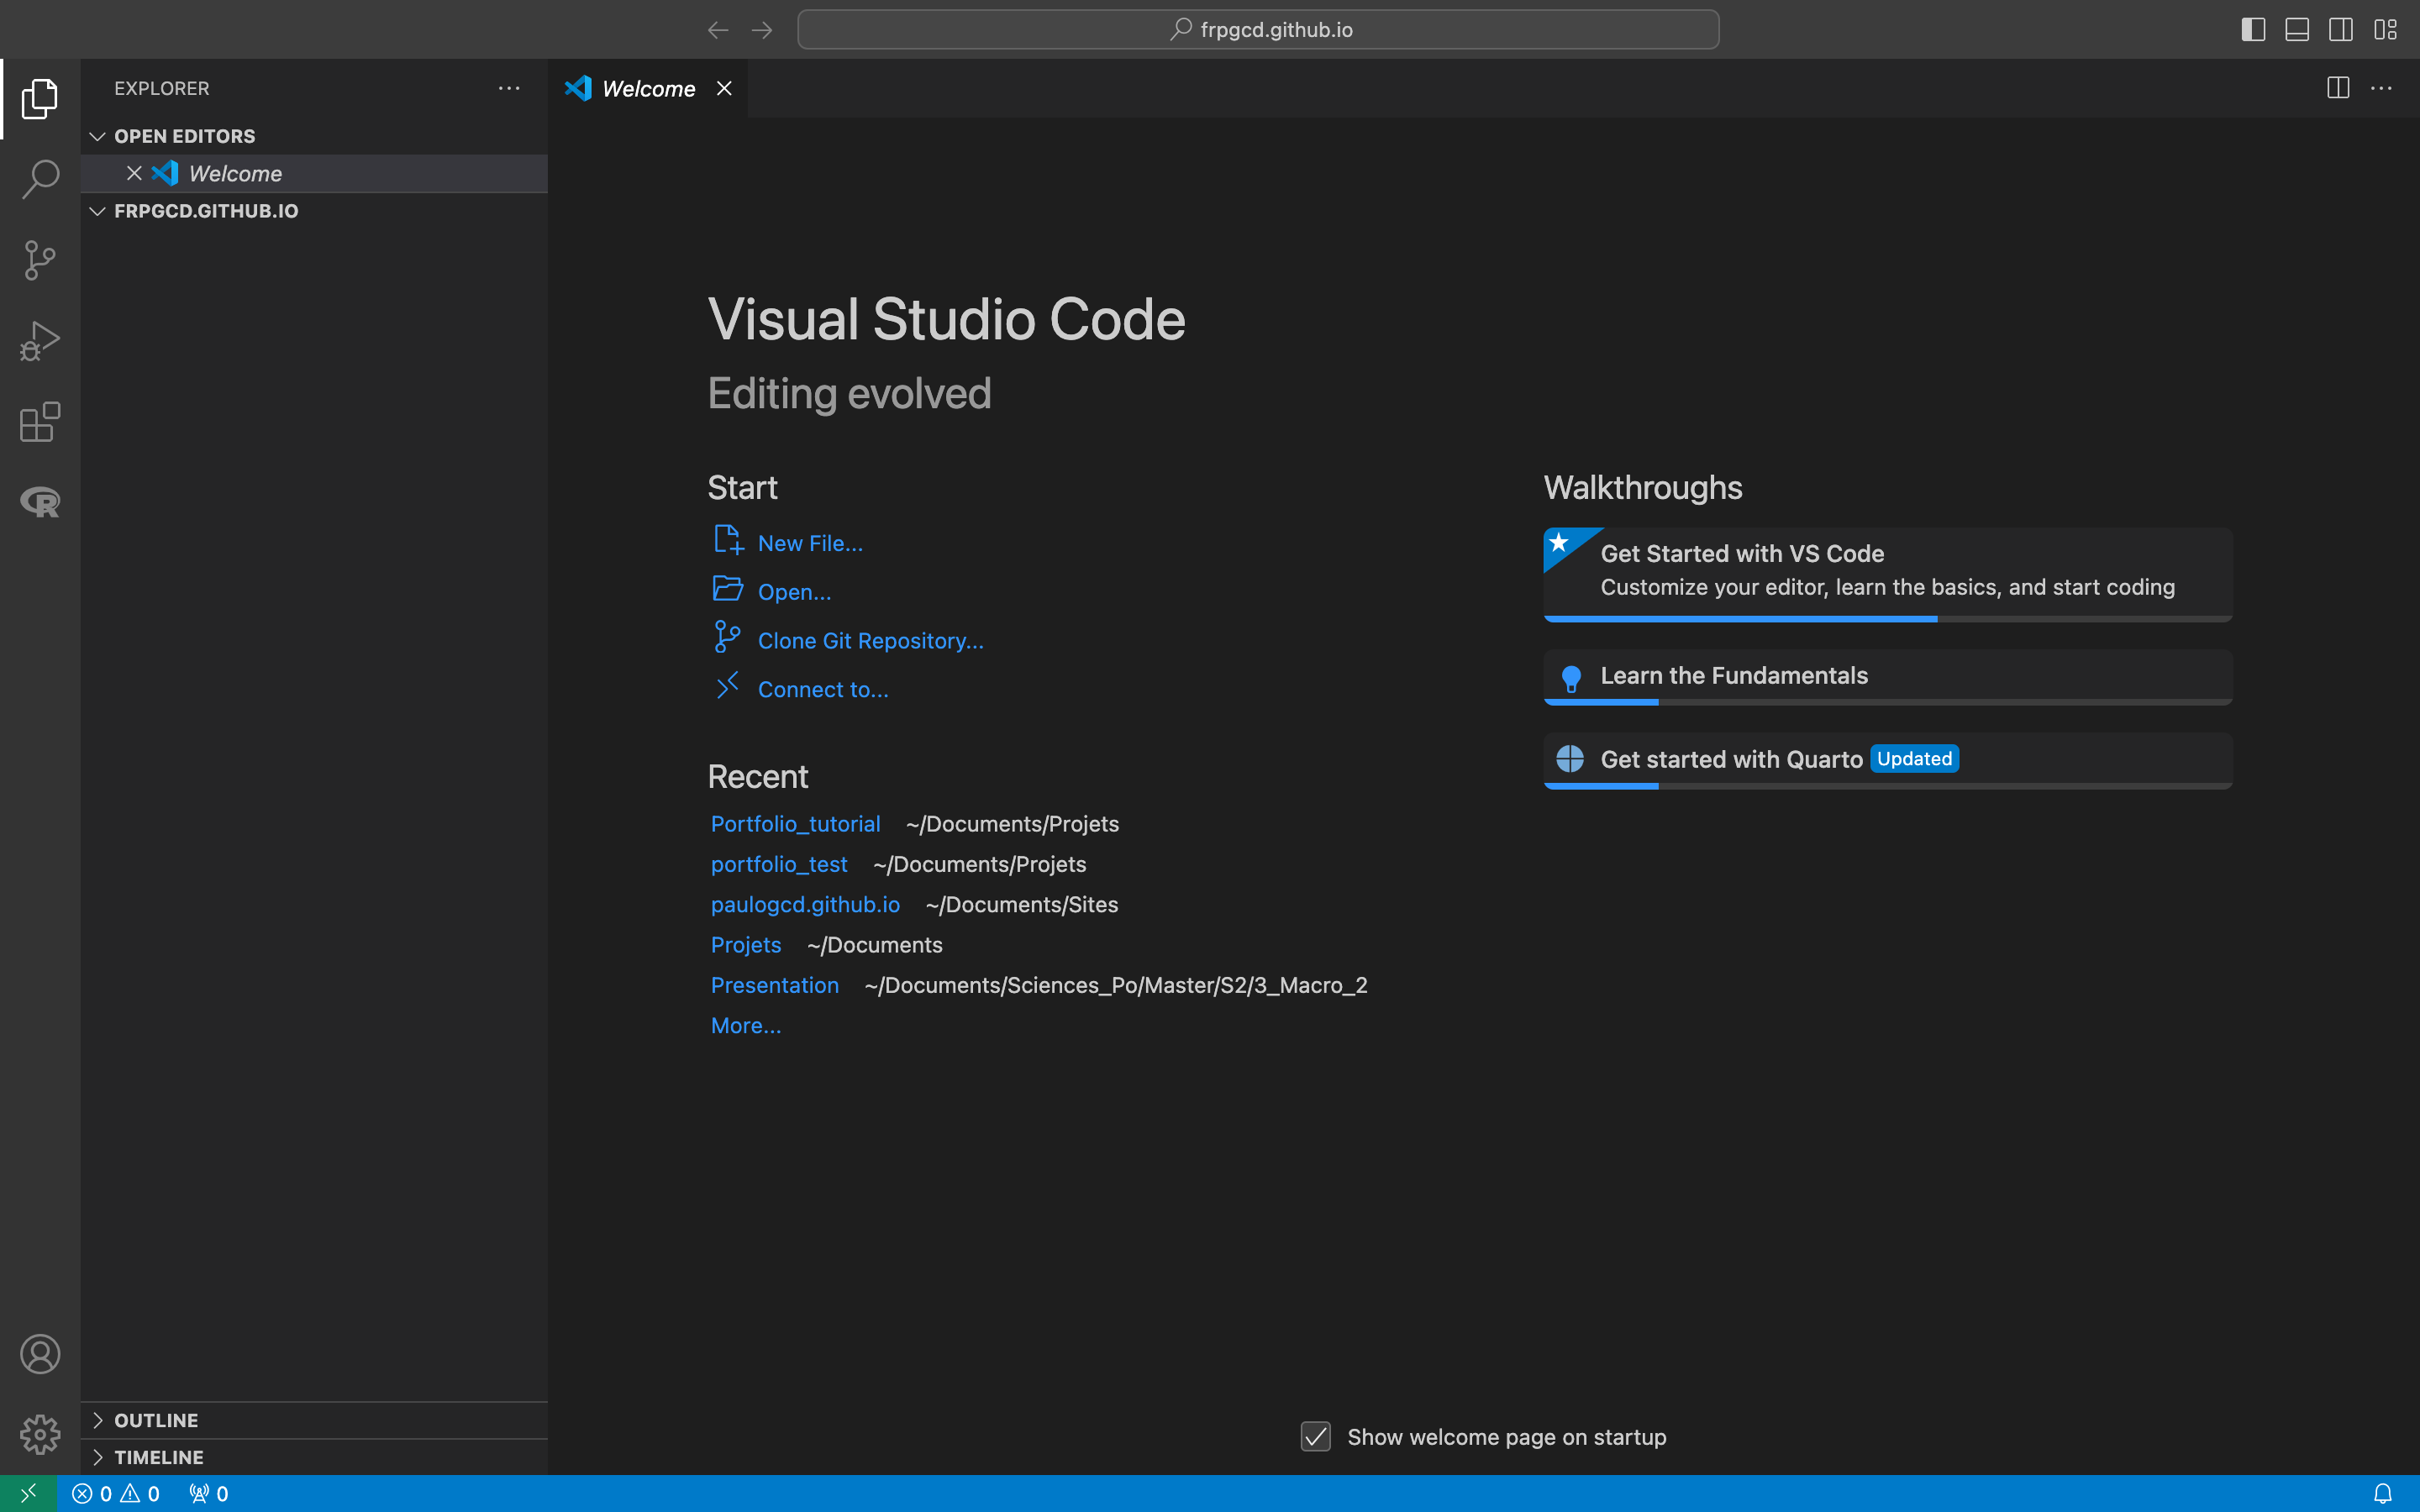
Now that we selected our folder, vscode opened it and we should see something like that :
NOTE : When a folder is opened for the first time, vscode may ask “Do you trust the authors of the files in this folder?”. Since you just created your folder and that it is empty, you can naturally click on yes. You are the author !
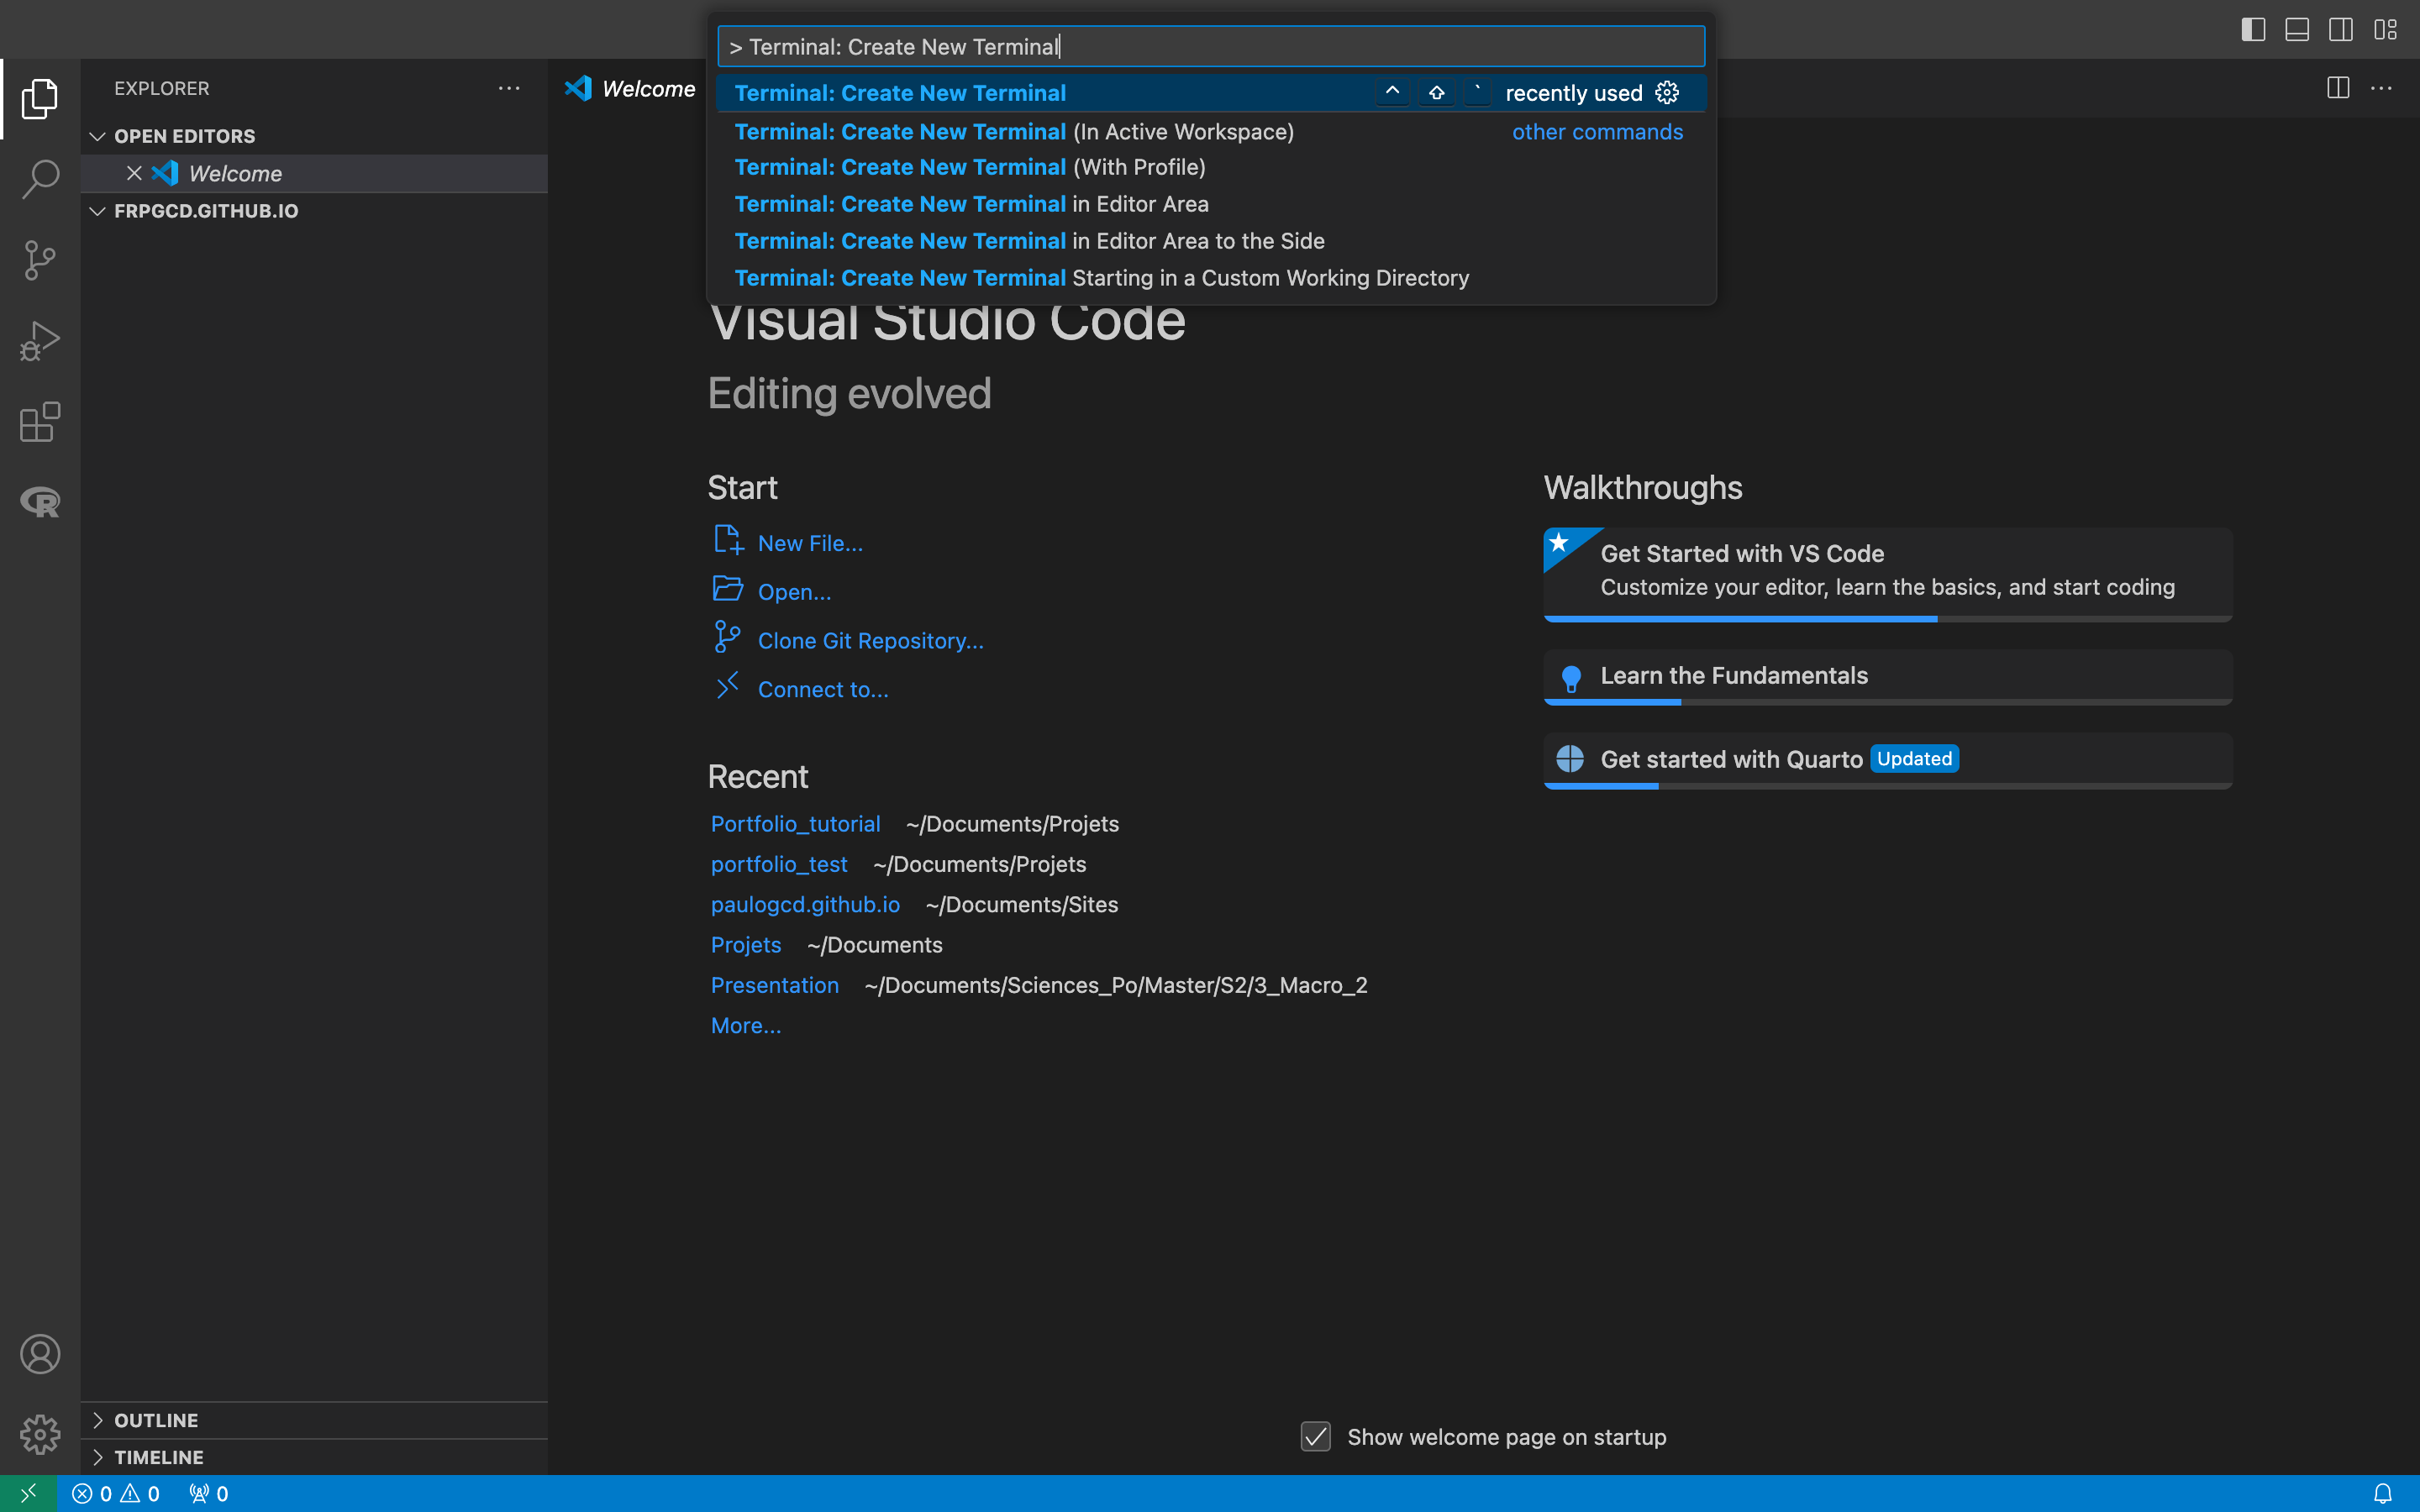
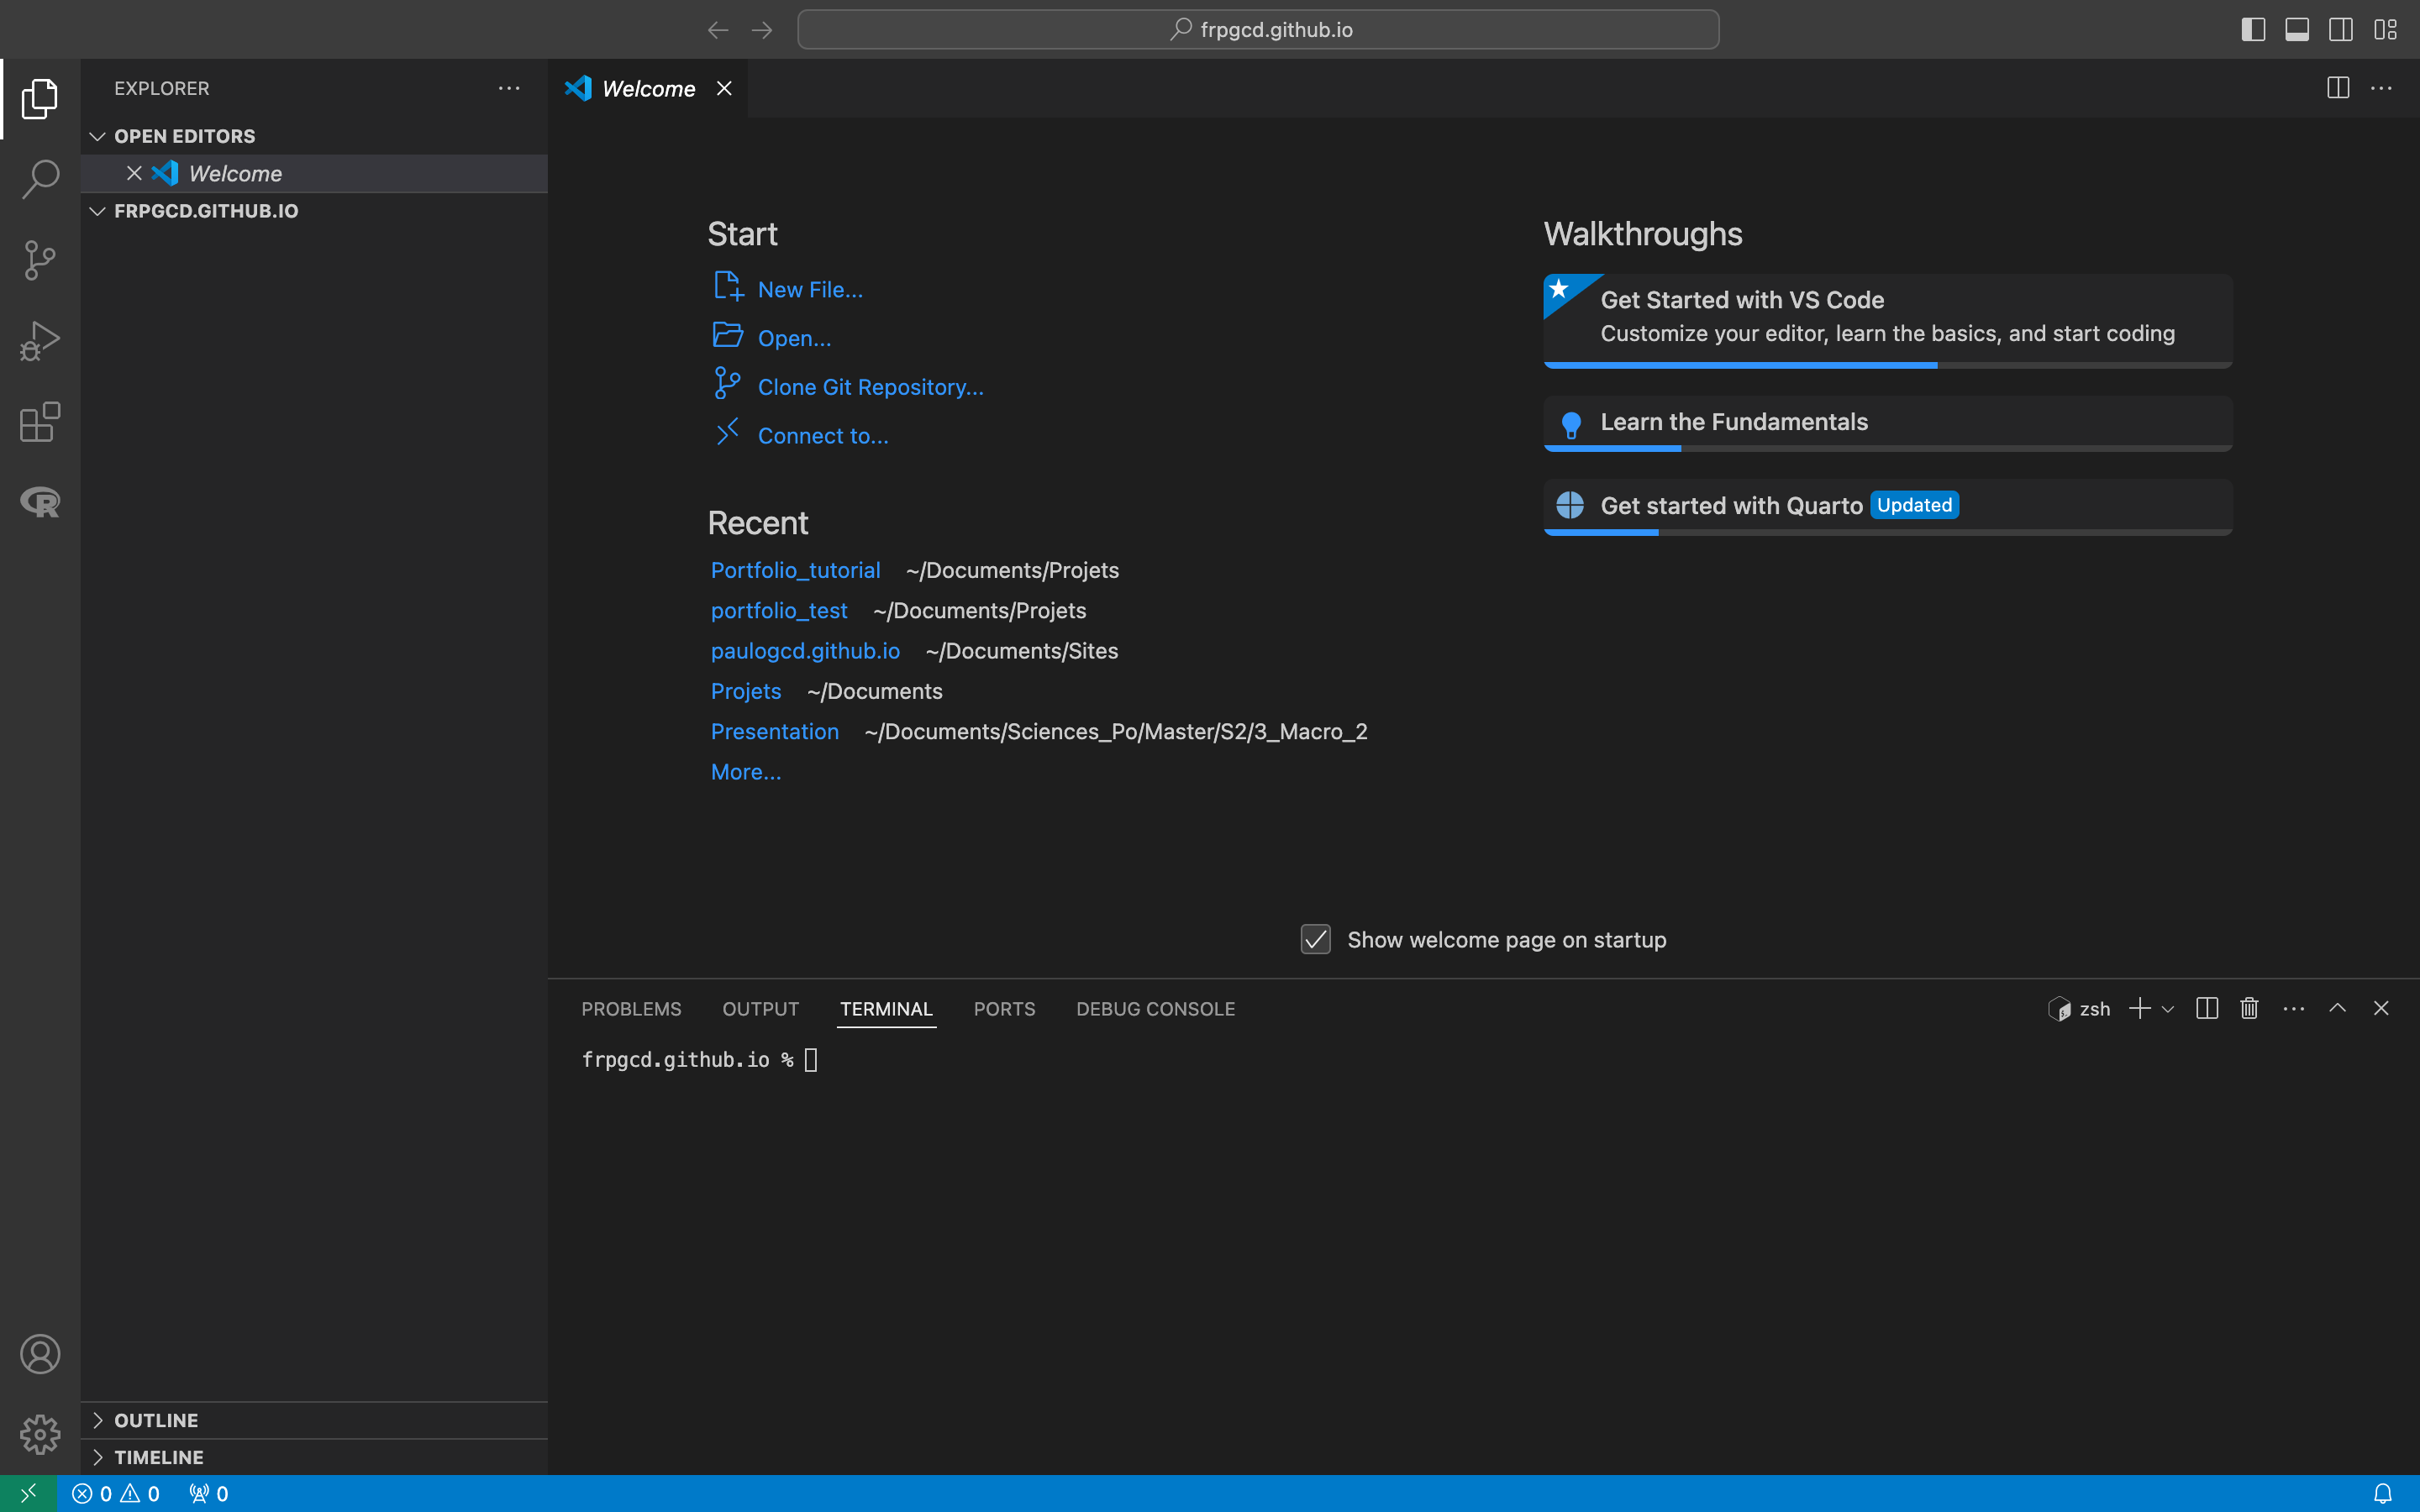
We are almost done. The last step is to create a terminal within vscode. In order for us to do that, we go the research bar at the top and enter “>Terminal: Create New Terminal”. This will pop-up a terminal console in vscode.
This should normally generate a console at the bottom of vscode, where our username, the name of our computer, adn/or the name of our current folder do appear :
Simply put, the terminal allows to textually communicate with your machine, instead of graphically, like it is usually the case nowadays. For those following the CLI section, we use Git with the terminal, and it is the reason the section is called the Command Line Interface section. Having a terminal opened in vscode makes it possible to manipulate the current opened folder more easily. This is also how we will be using Quarto in the next chapter.
This tutorial does not focus on what a terminal is, what shell, bash or any kinds of line command are and do. However, it would be very useful for you to know how to use the basics of it. Further resources are available at the end of this page, and I strongly encourage you to check them, especially the first four chapters of Florian Oswald’s lecture on the shell.
🎉 It is done ! We have created a GitHub account, connected it to our GitHub Desktop application, created a repository, and opened it with vscode. Next step : use Quarto to create web content.
Further Resources
We are now ready to proceed to the second chapter, that treats content generation with Quarto. However, if you wish to dive deeper into the tools presented in this first chapter, and try to understand better Git, GitHub, or even the Terminal and Visual Studio Code, you might be tempted to look at additional material. First of all, for all that has been covered in this tutorial, I recommend the lecture of Florian Oswald about Git and GitHub, available here. For more specific questions, you might find the following resources useful :
About vscode :
- The official documentation of vscode, available here.
About the terminal :
- The first four sessions of the Florian Oswald lecture, available here.
- A general tutorial about the command line, including resources for Windows, MacOS, and Linux, available here.
- The vscode documentation about the terminal inside vscode, that might require some prior knowledge about the command line, available here.
About Git :
- The official documentation of Git, availbale here.
- The w3school tutorial for Git, available here.
About GitHub :
- The official tutorial of GitHub on using Git and GitHub together, available here.
