3. Publish your website with Github Pages
Congratulations for having made it so far 😁 ! Now that we have a decent-looking basis for our online portfolio, we are ready to make it available to the real world. In order for us to publish our content, we are going to use GitHub Pages, a website hosting service of GitHub.
Several free hosting services exist, such as Netlify, Quarto Pub, and GitHub Pages, among other ones. We focus here on Github Pages because of its simplicity and because it allows to have an easy and stable workflow with our Github repository.
This final step is the easiest one, so hang in there, we are soon reaching the end of this tutorial 😁.
Saving our changes
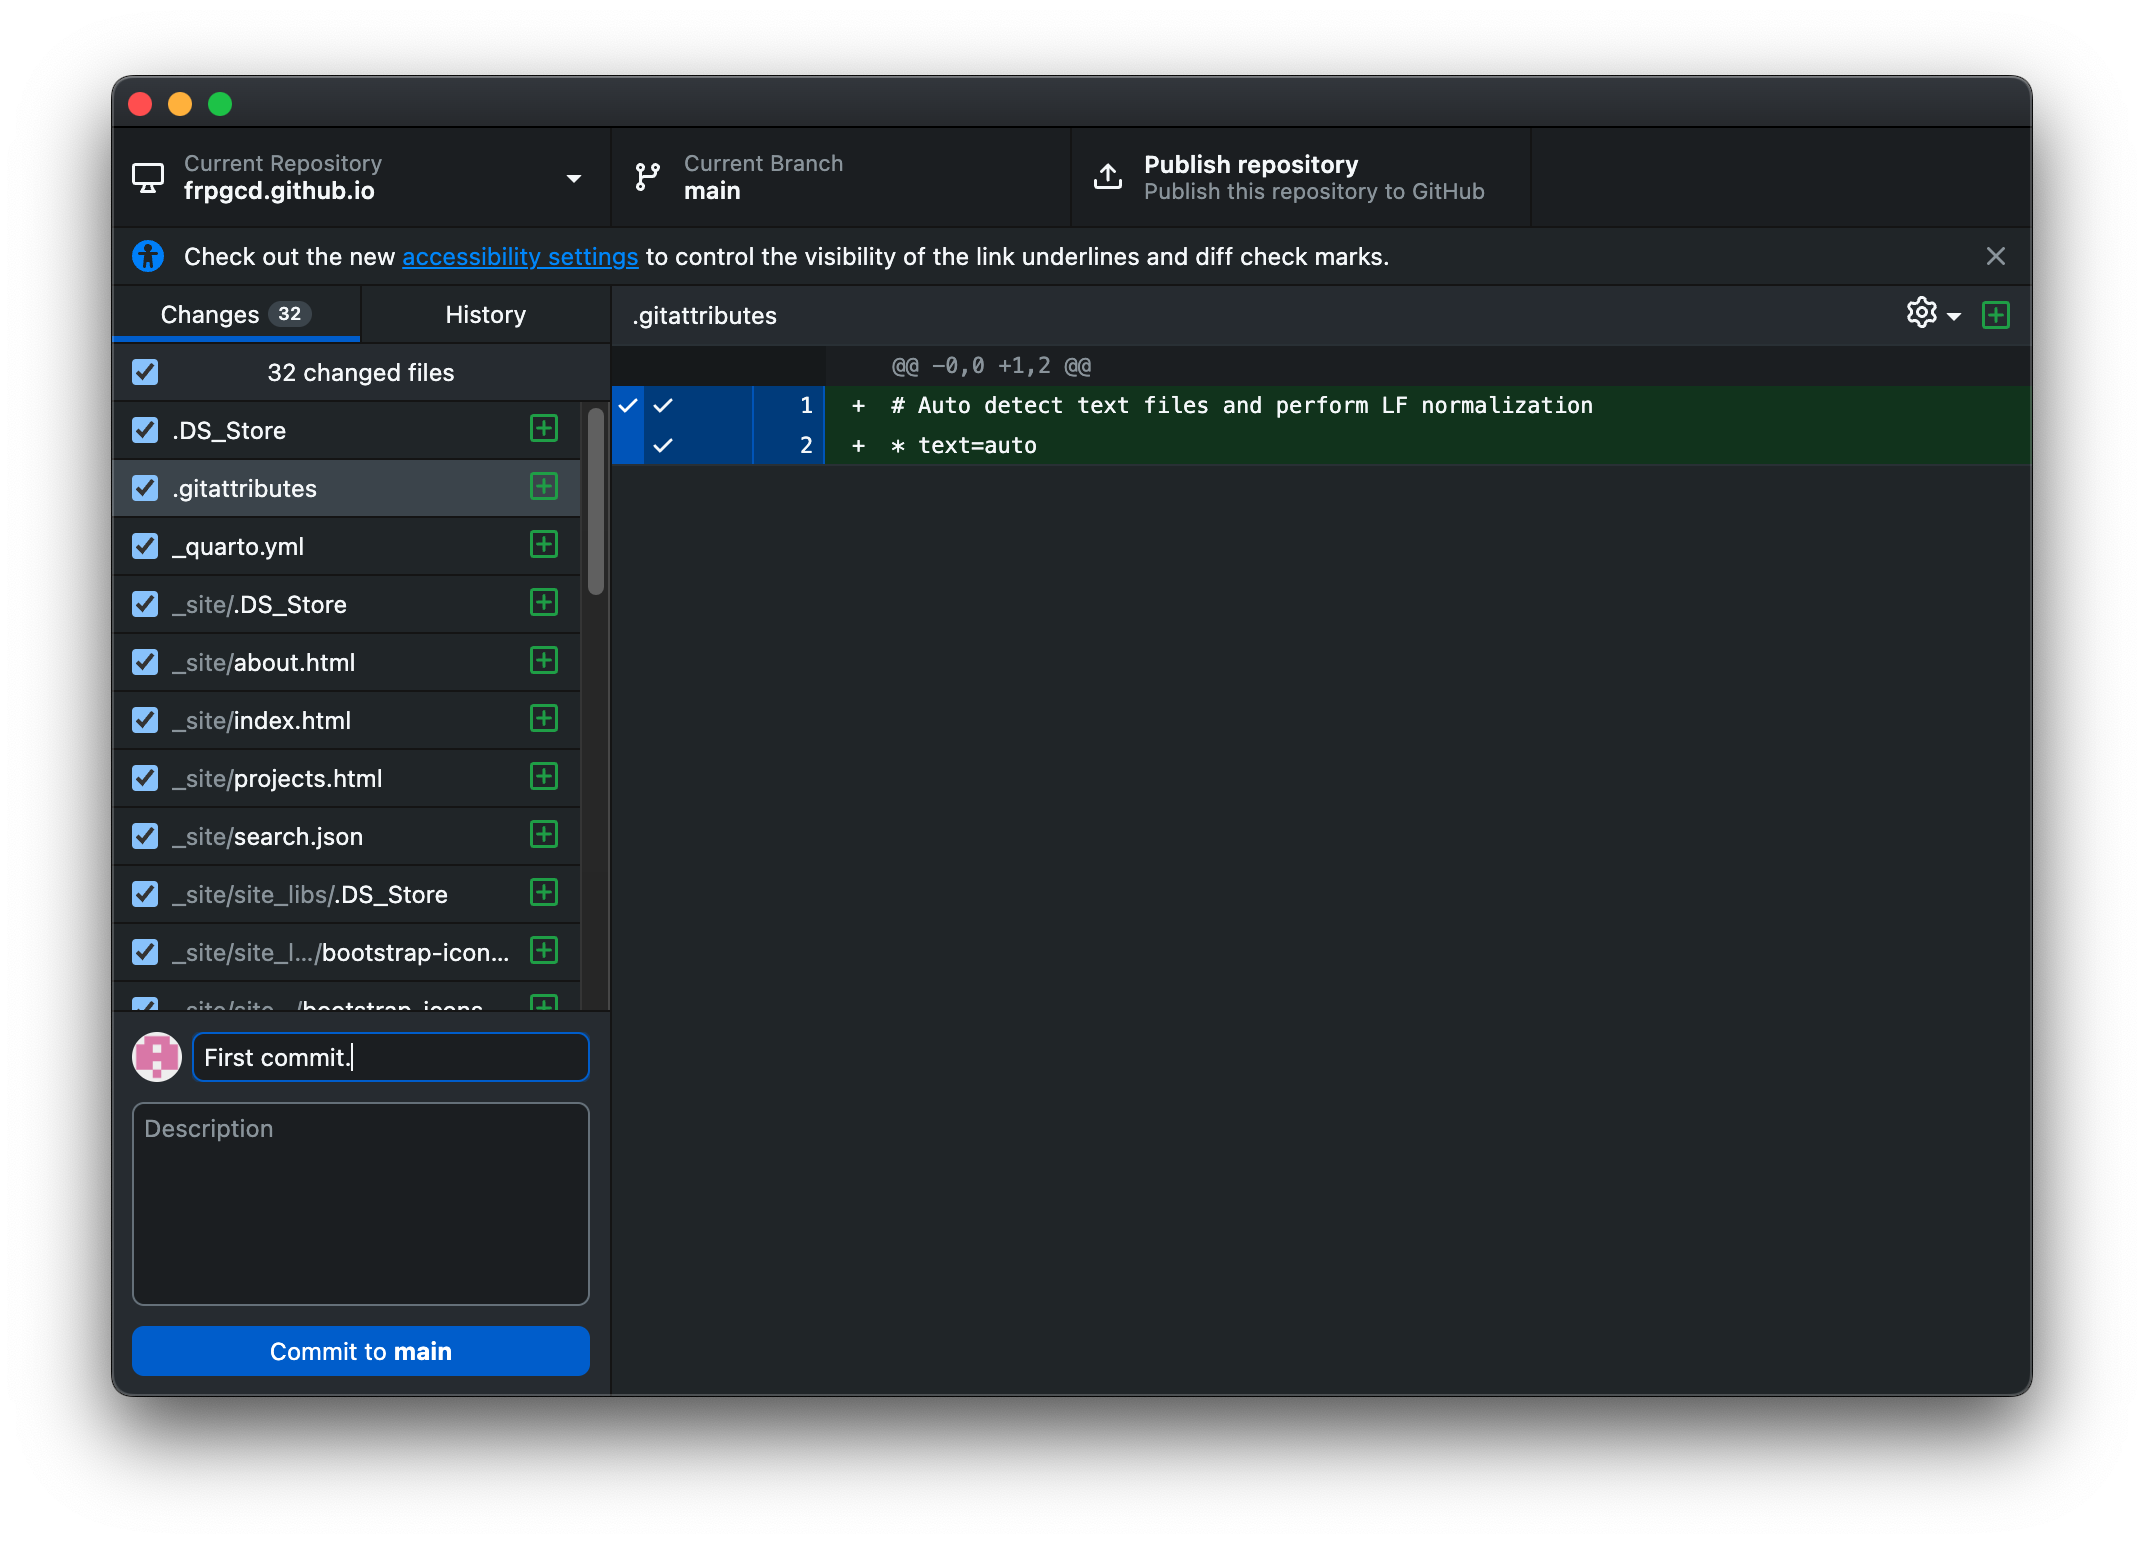
Before we publish our website, we have to make sure we saved all of our changes. Let us do a quick recap of our workflow here :
- We create our repository on Github and open it in our computer.
- We create a Quarto project in vscode, and make some changes to our qmd and yml files.
- We stop the previewing process in our Terminal by clicking in it and entering
cmd+cor clicking on the trash bin that appears when we pass our mouse on it at the right-bottom part of vscode. - We make sure all of our files are saved and enter
quarto renderin the Terminal. - We add all of our changes in Git and commit them, depending on our method :
- Through the commit button in Github Desktop,
- Through the
git add *andgit commit -m "..."commands via the CLI
- We publish our changes in our Github repository, depending on our method :
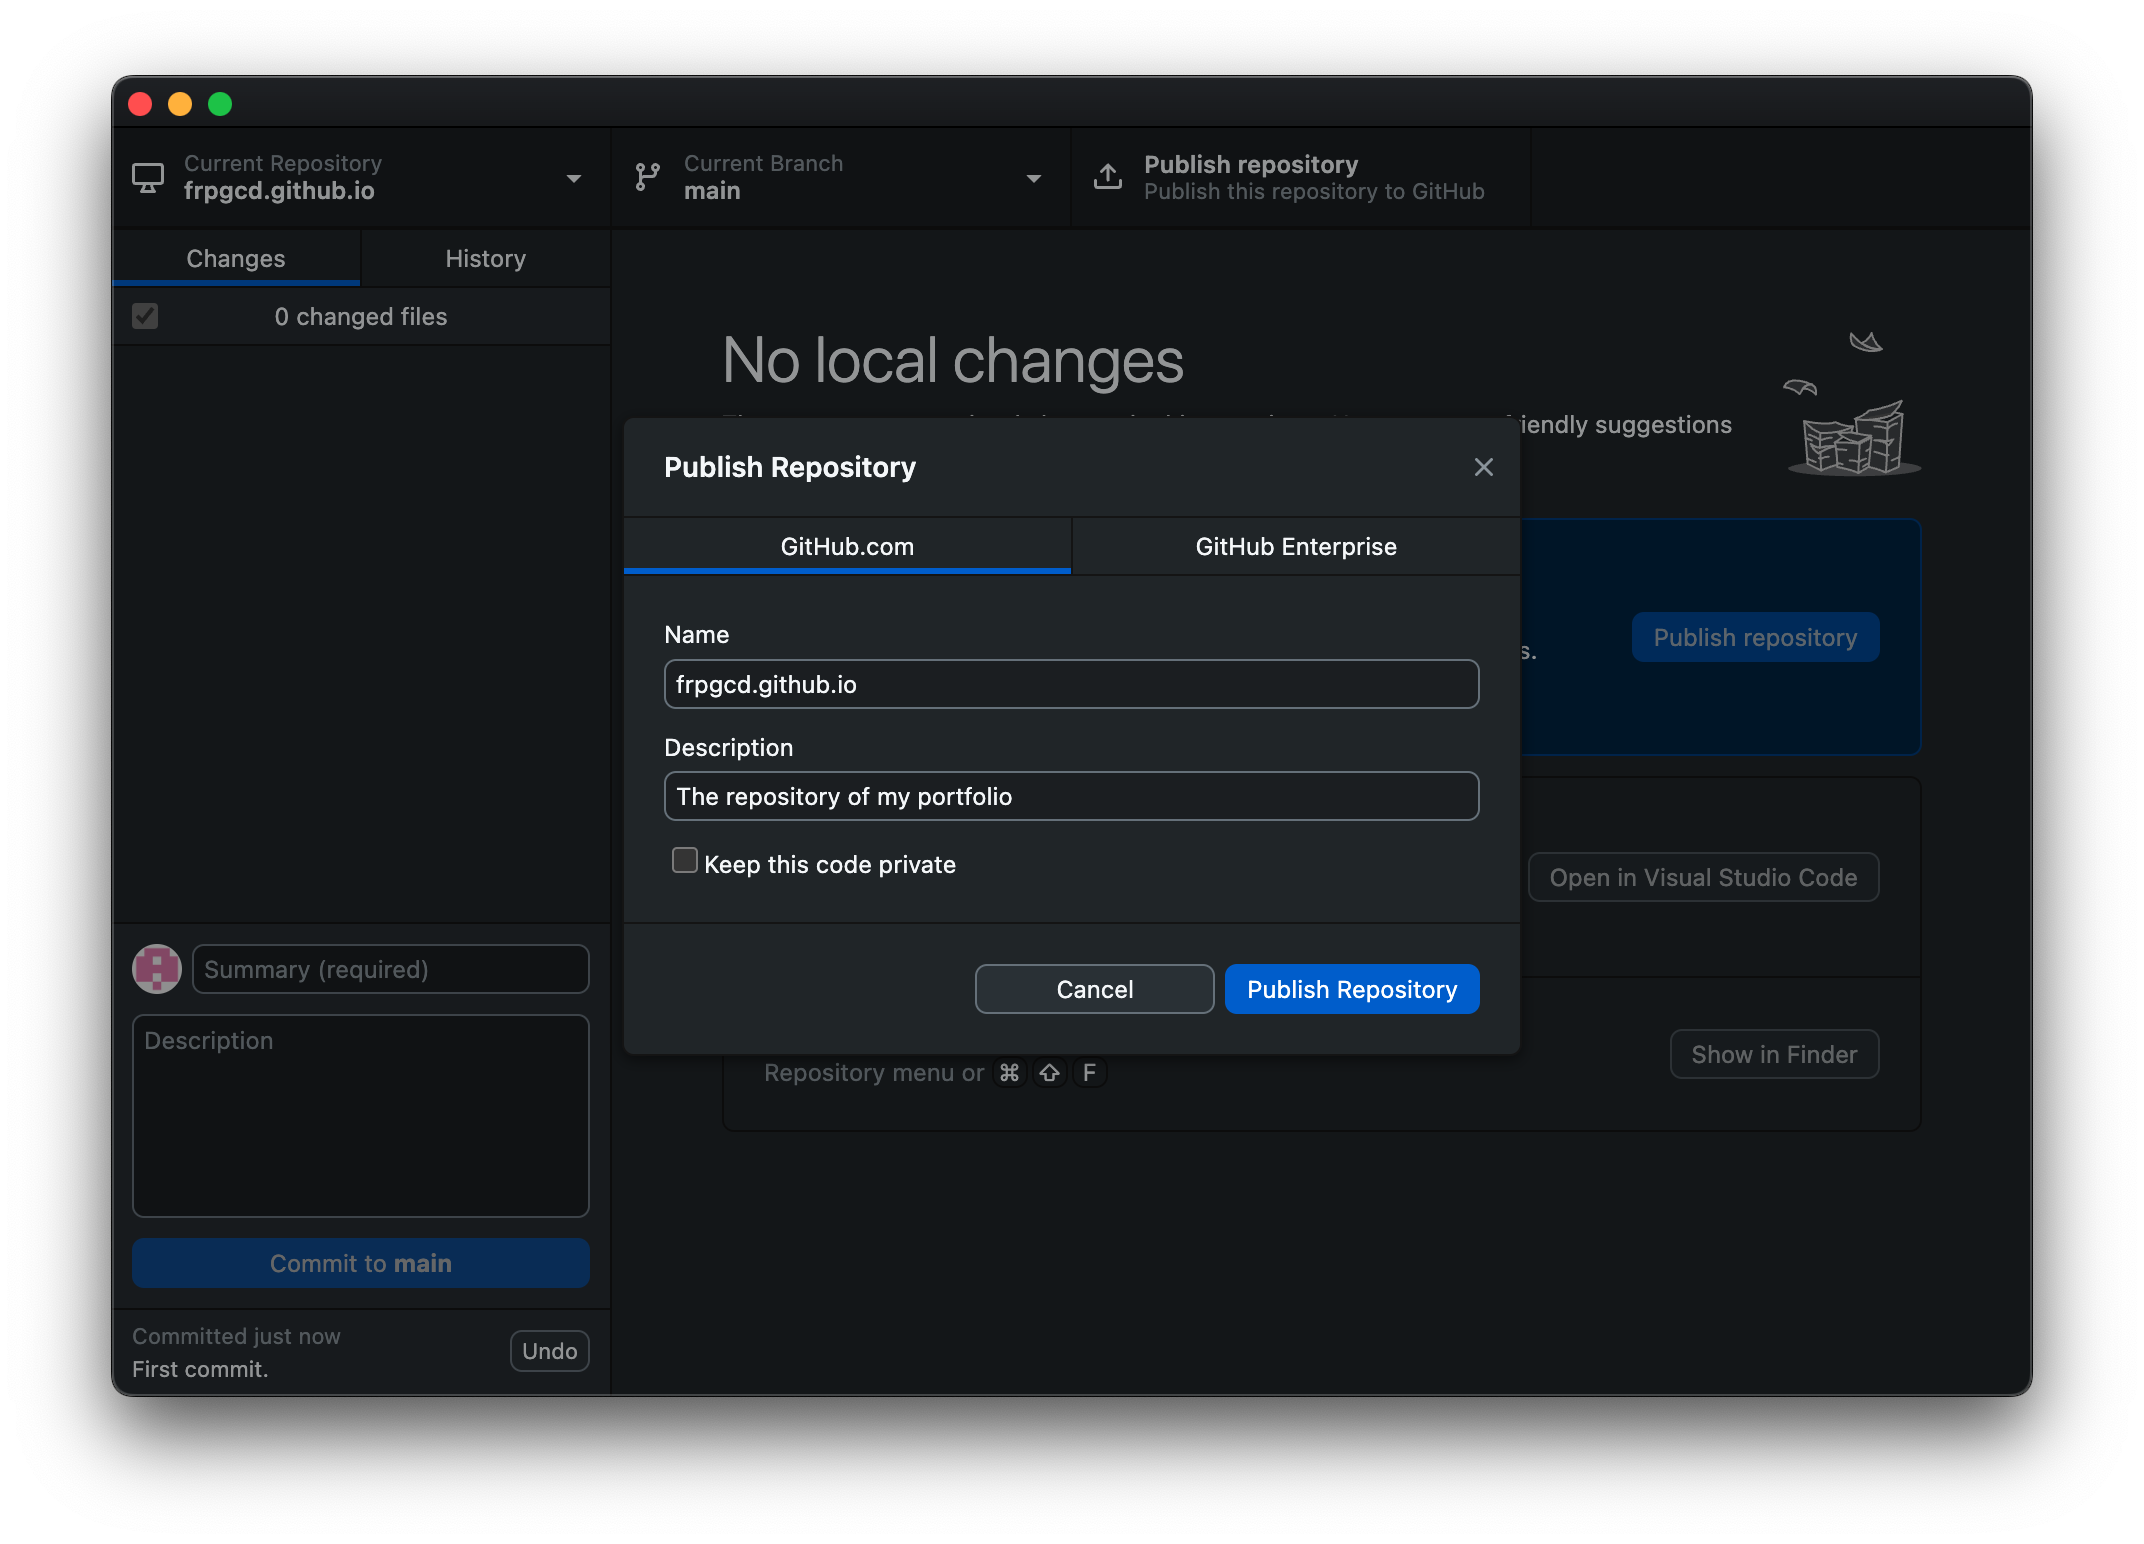
- Through the “publish” buttons in Github Desktop,
- Through the
git pushcommand via the CLI.
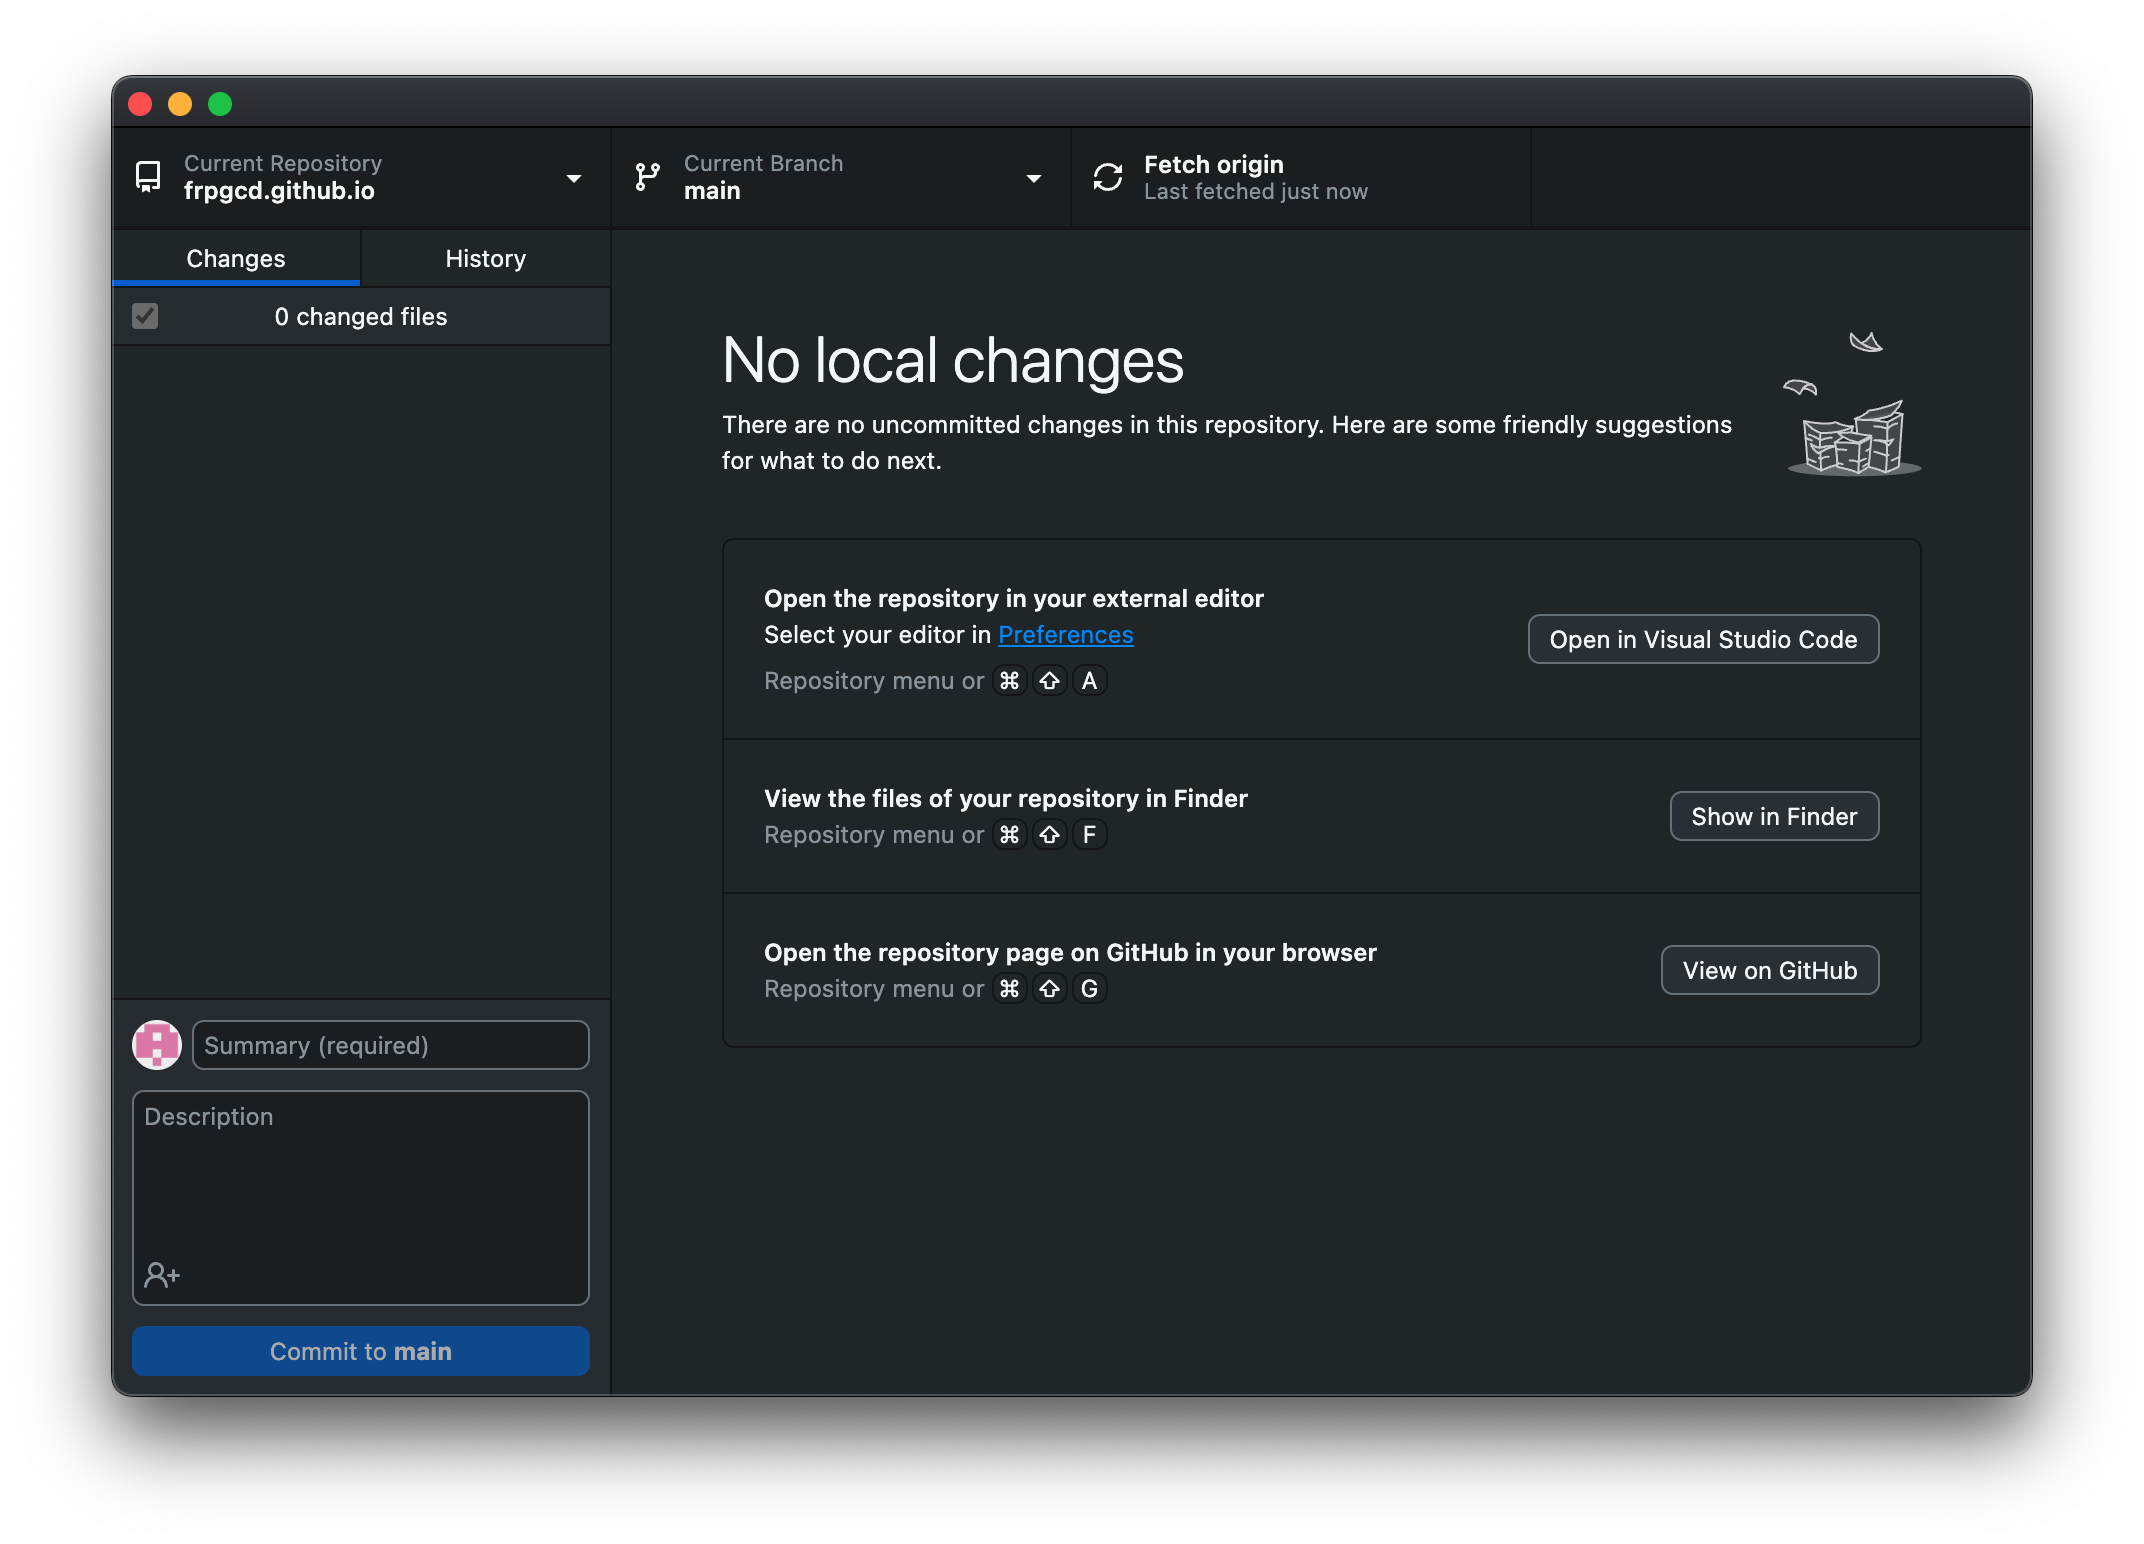
On Github Desktop, we should have a message like “Last fetched just now” just under the publish “Publish” button, that has now turned into a “Fetch origin” button :
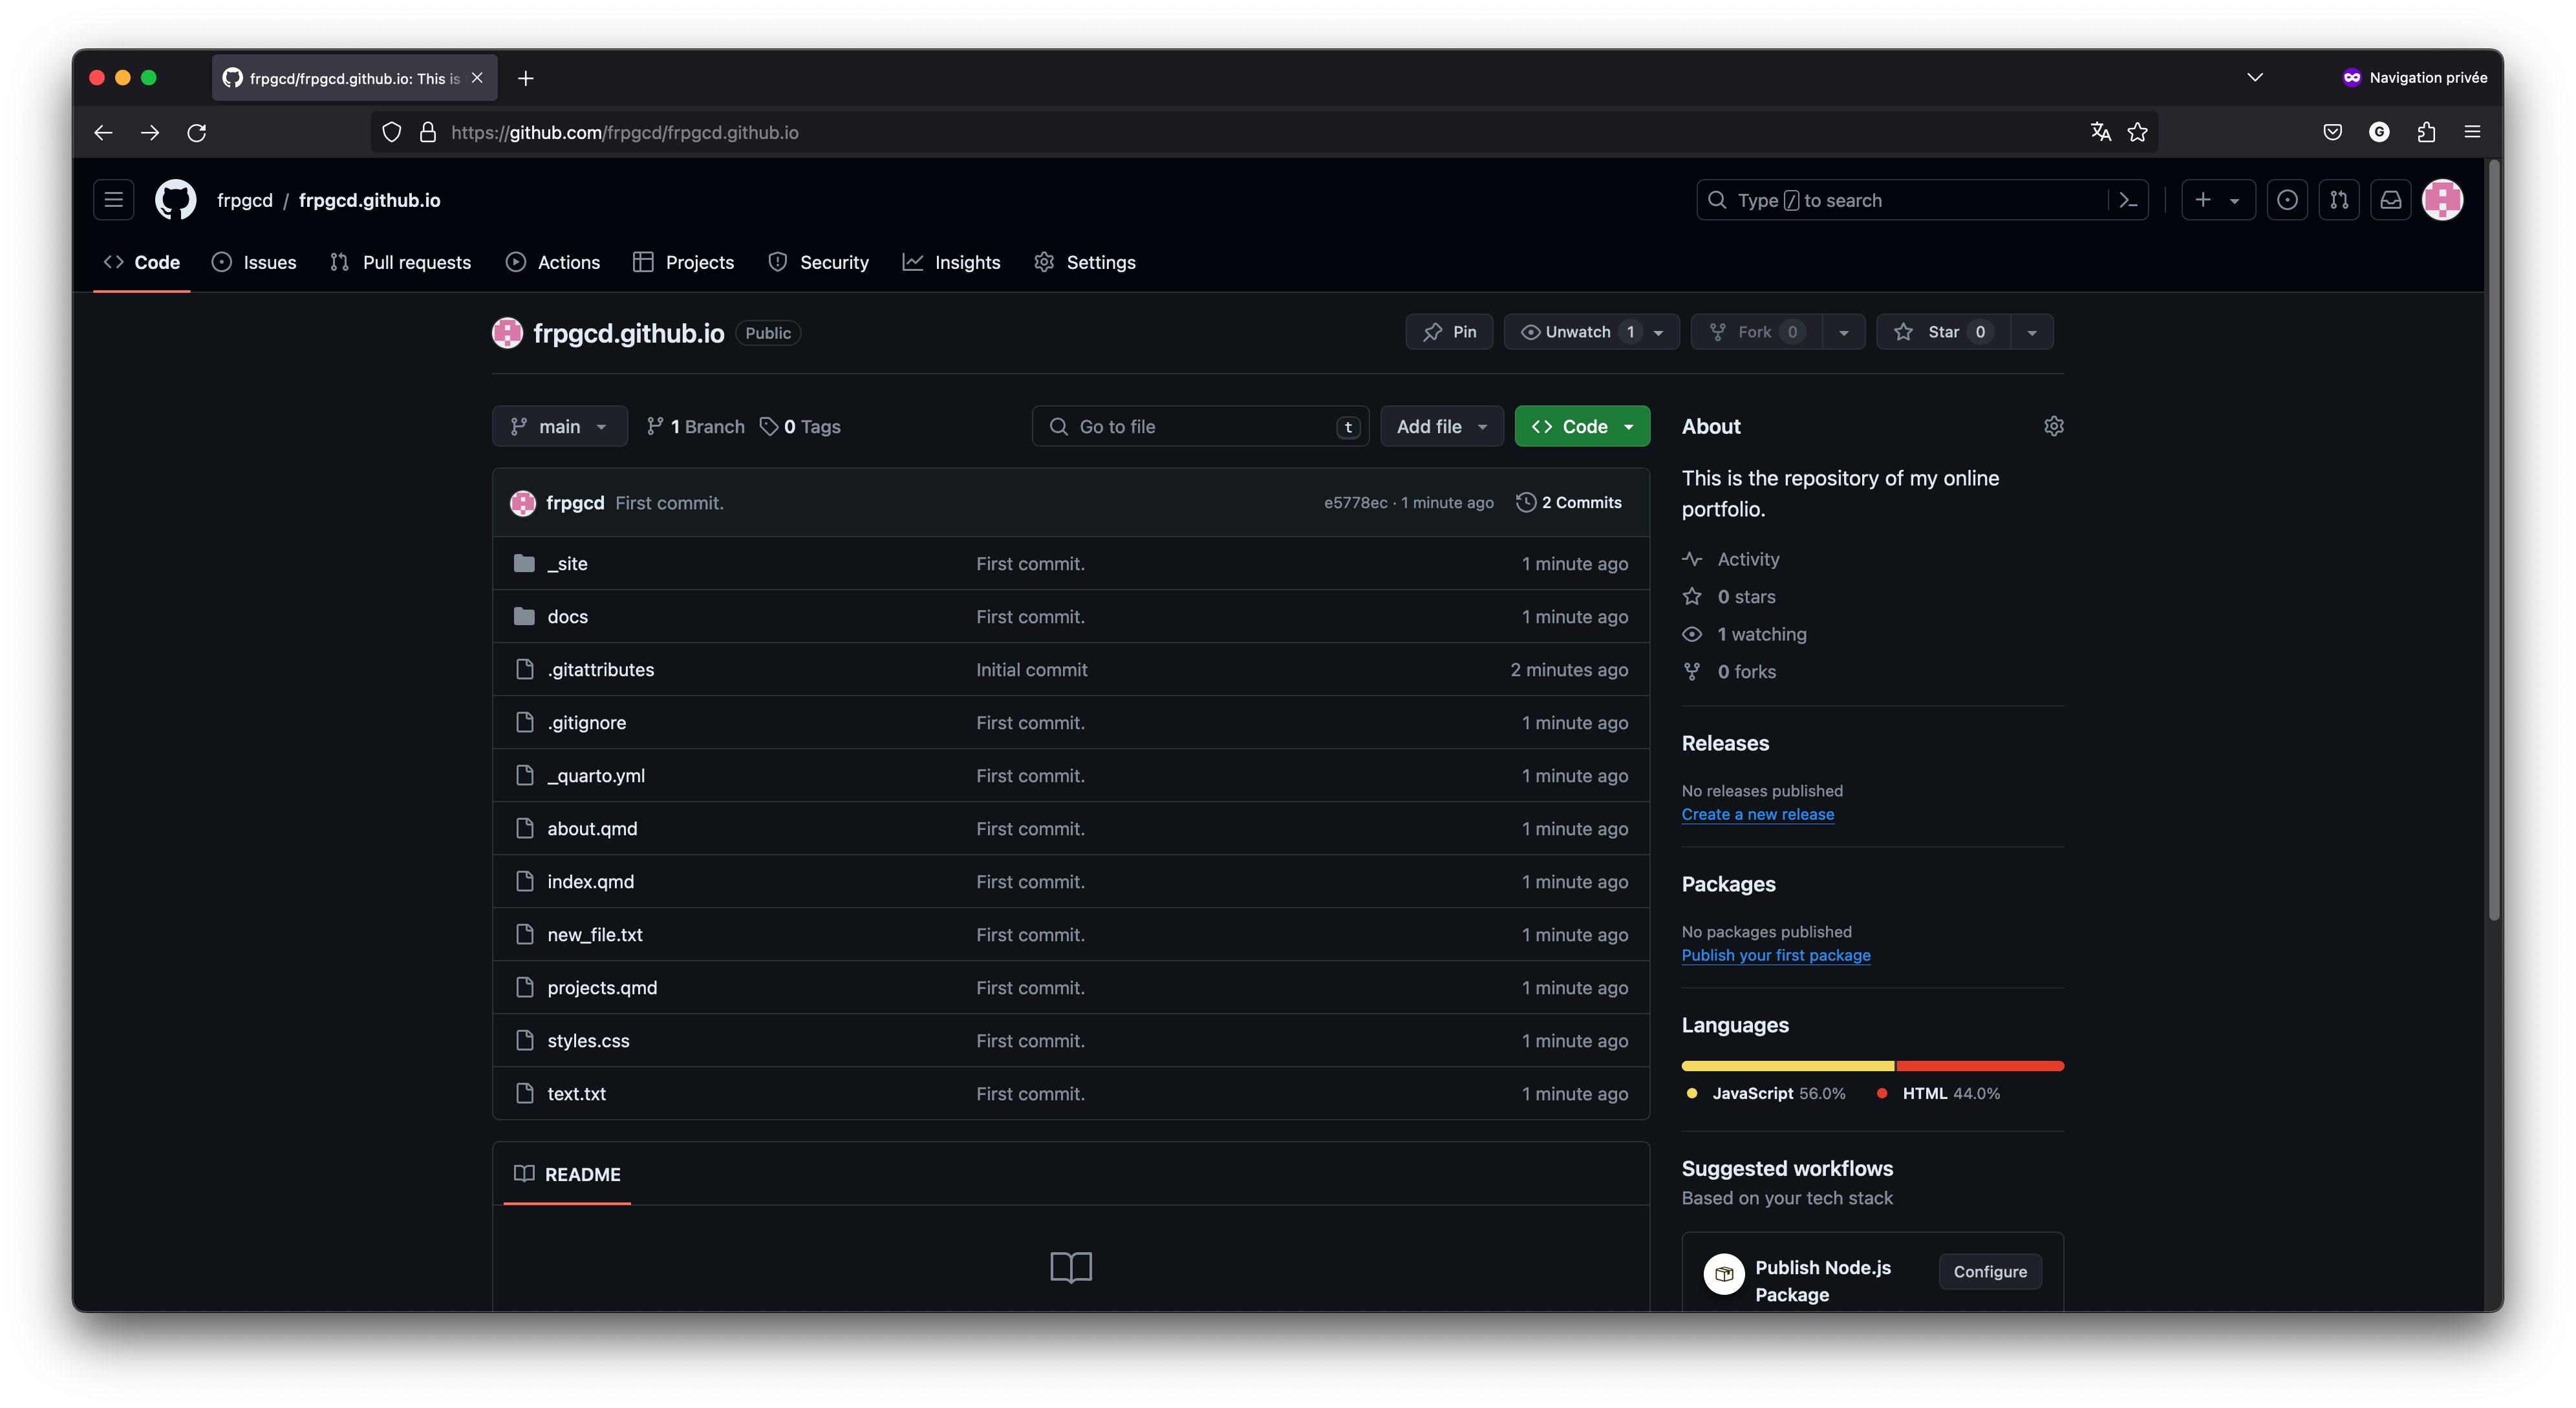
Now, our changes are saved on Github and ready to be published on the Web !
Activating GitHub Pages
In order for us to publish the content that is available in our docs folder, we need first to goto our GitHub repository, and to click on “Settings”, the last item of the top-bar :
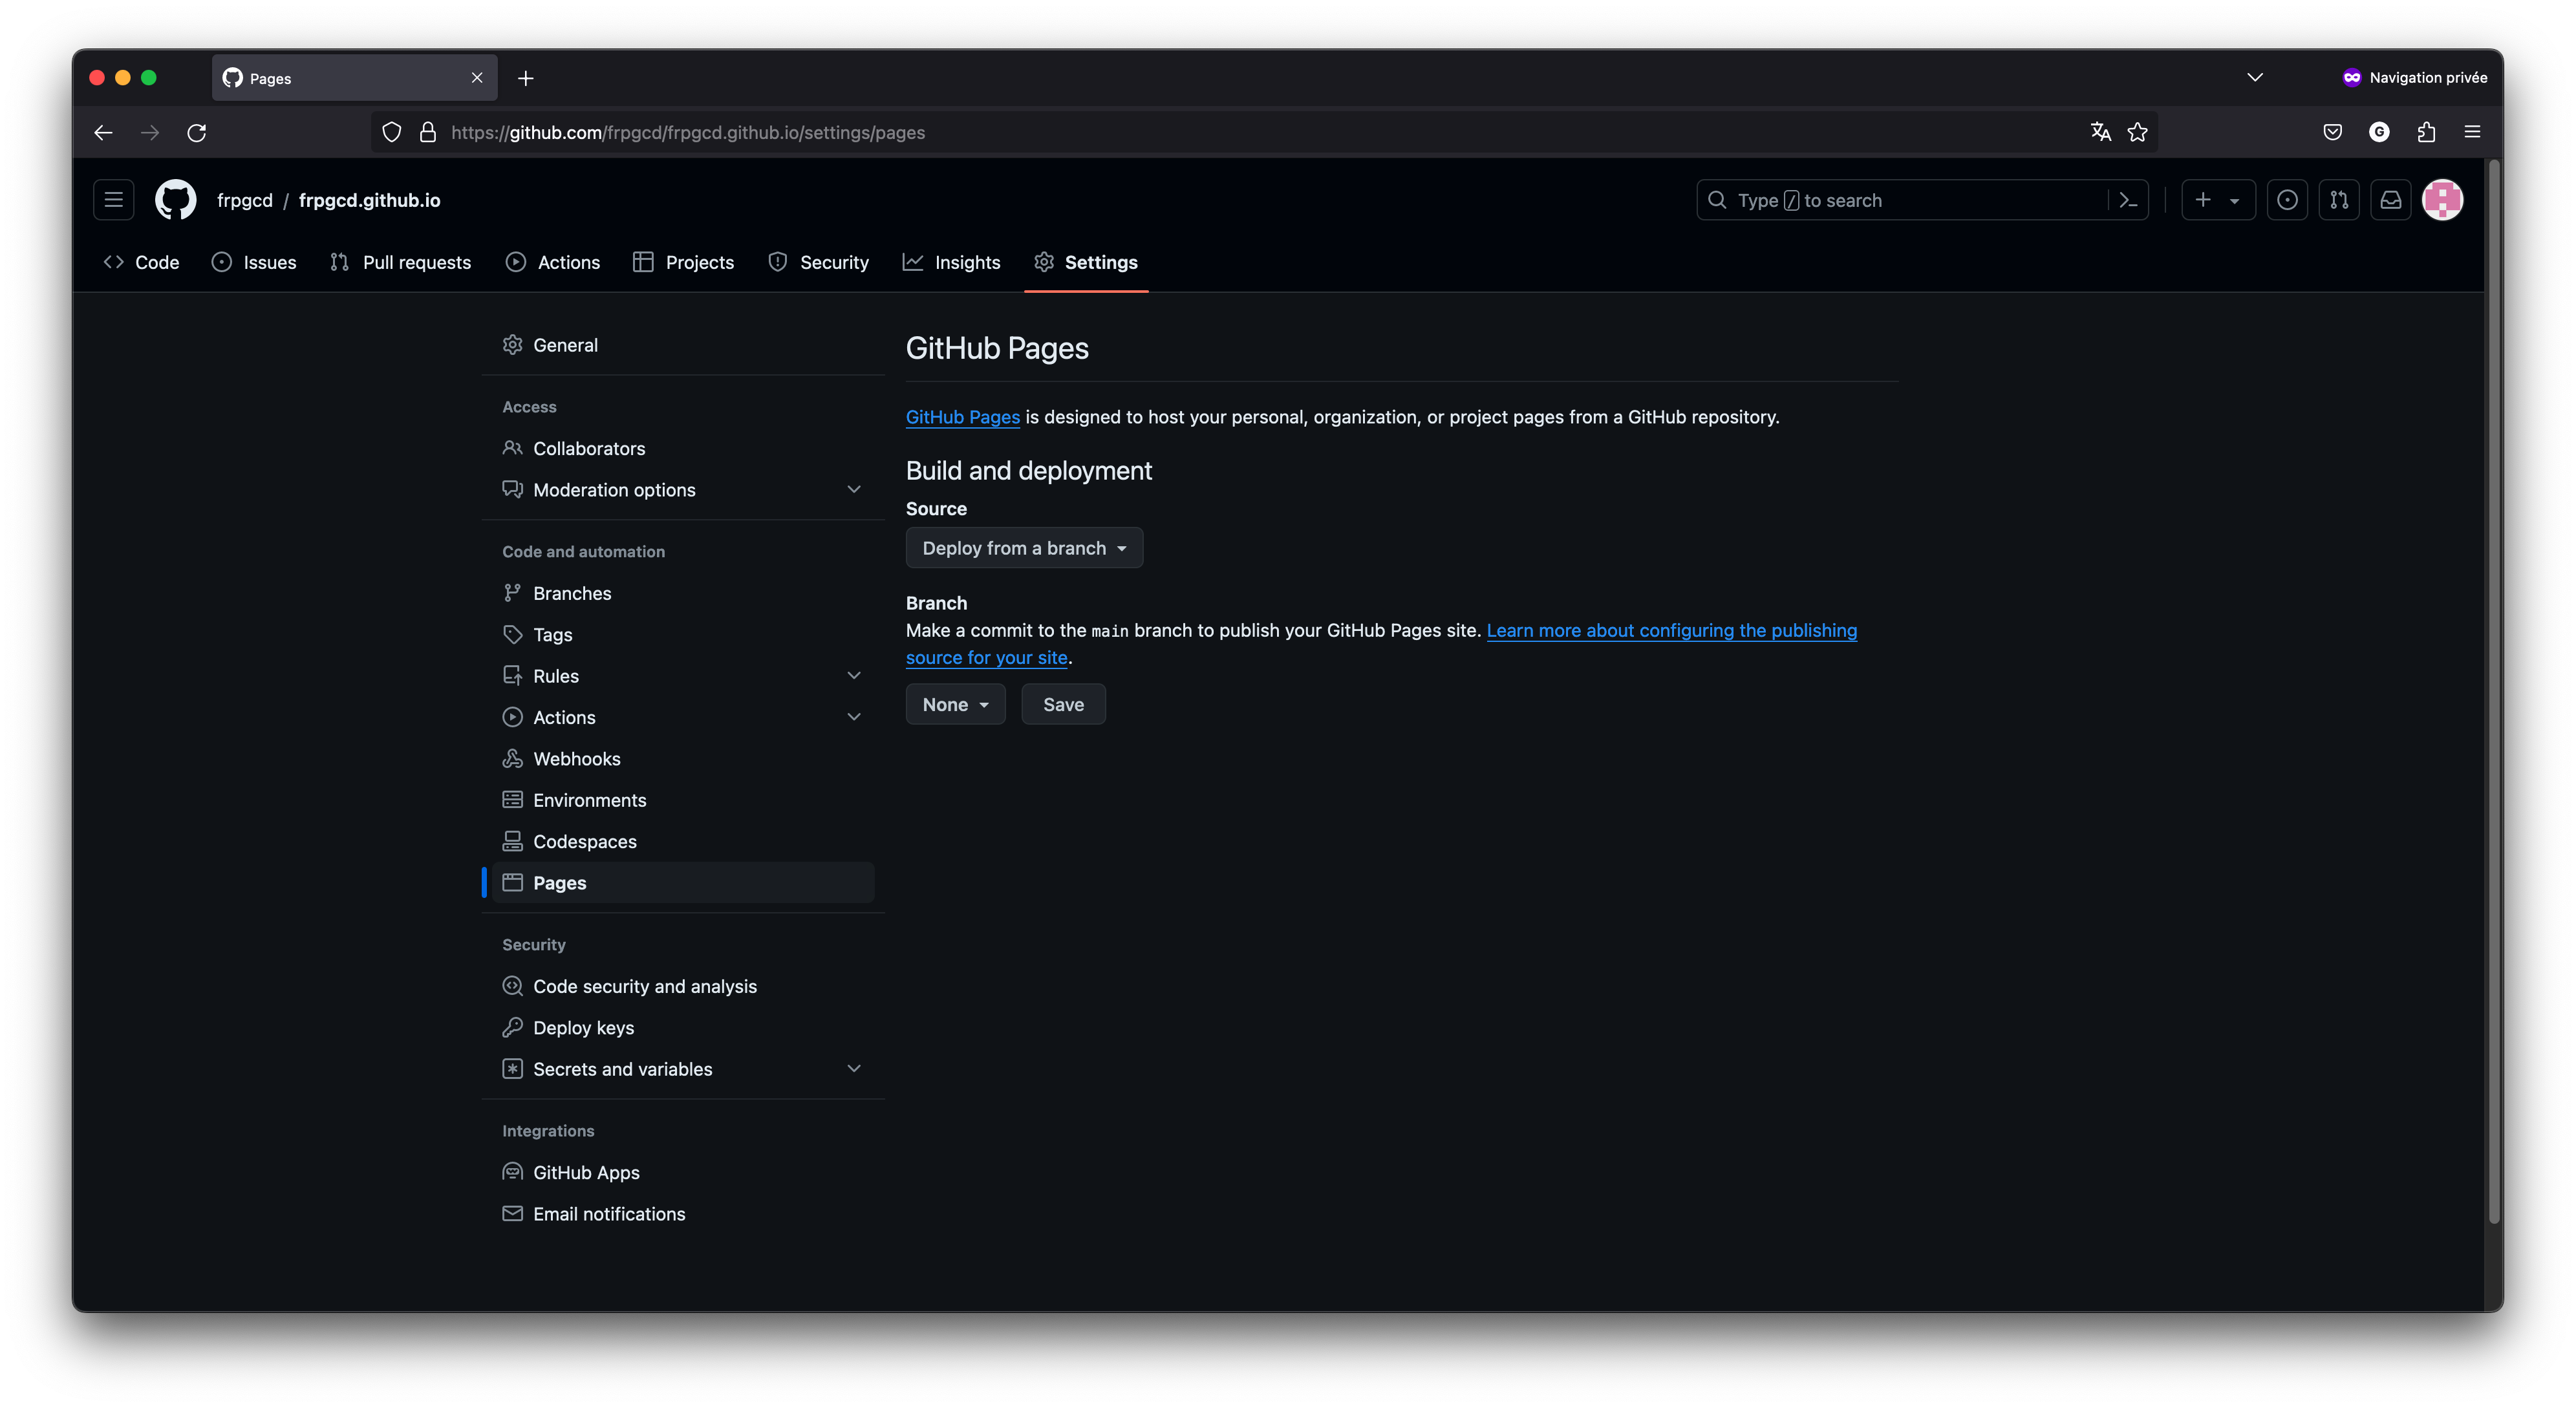
We then click in the “Code and automation” on the “Pages” section :
We should be seeing something like this :
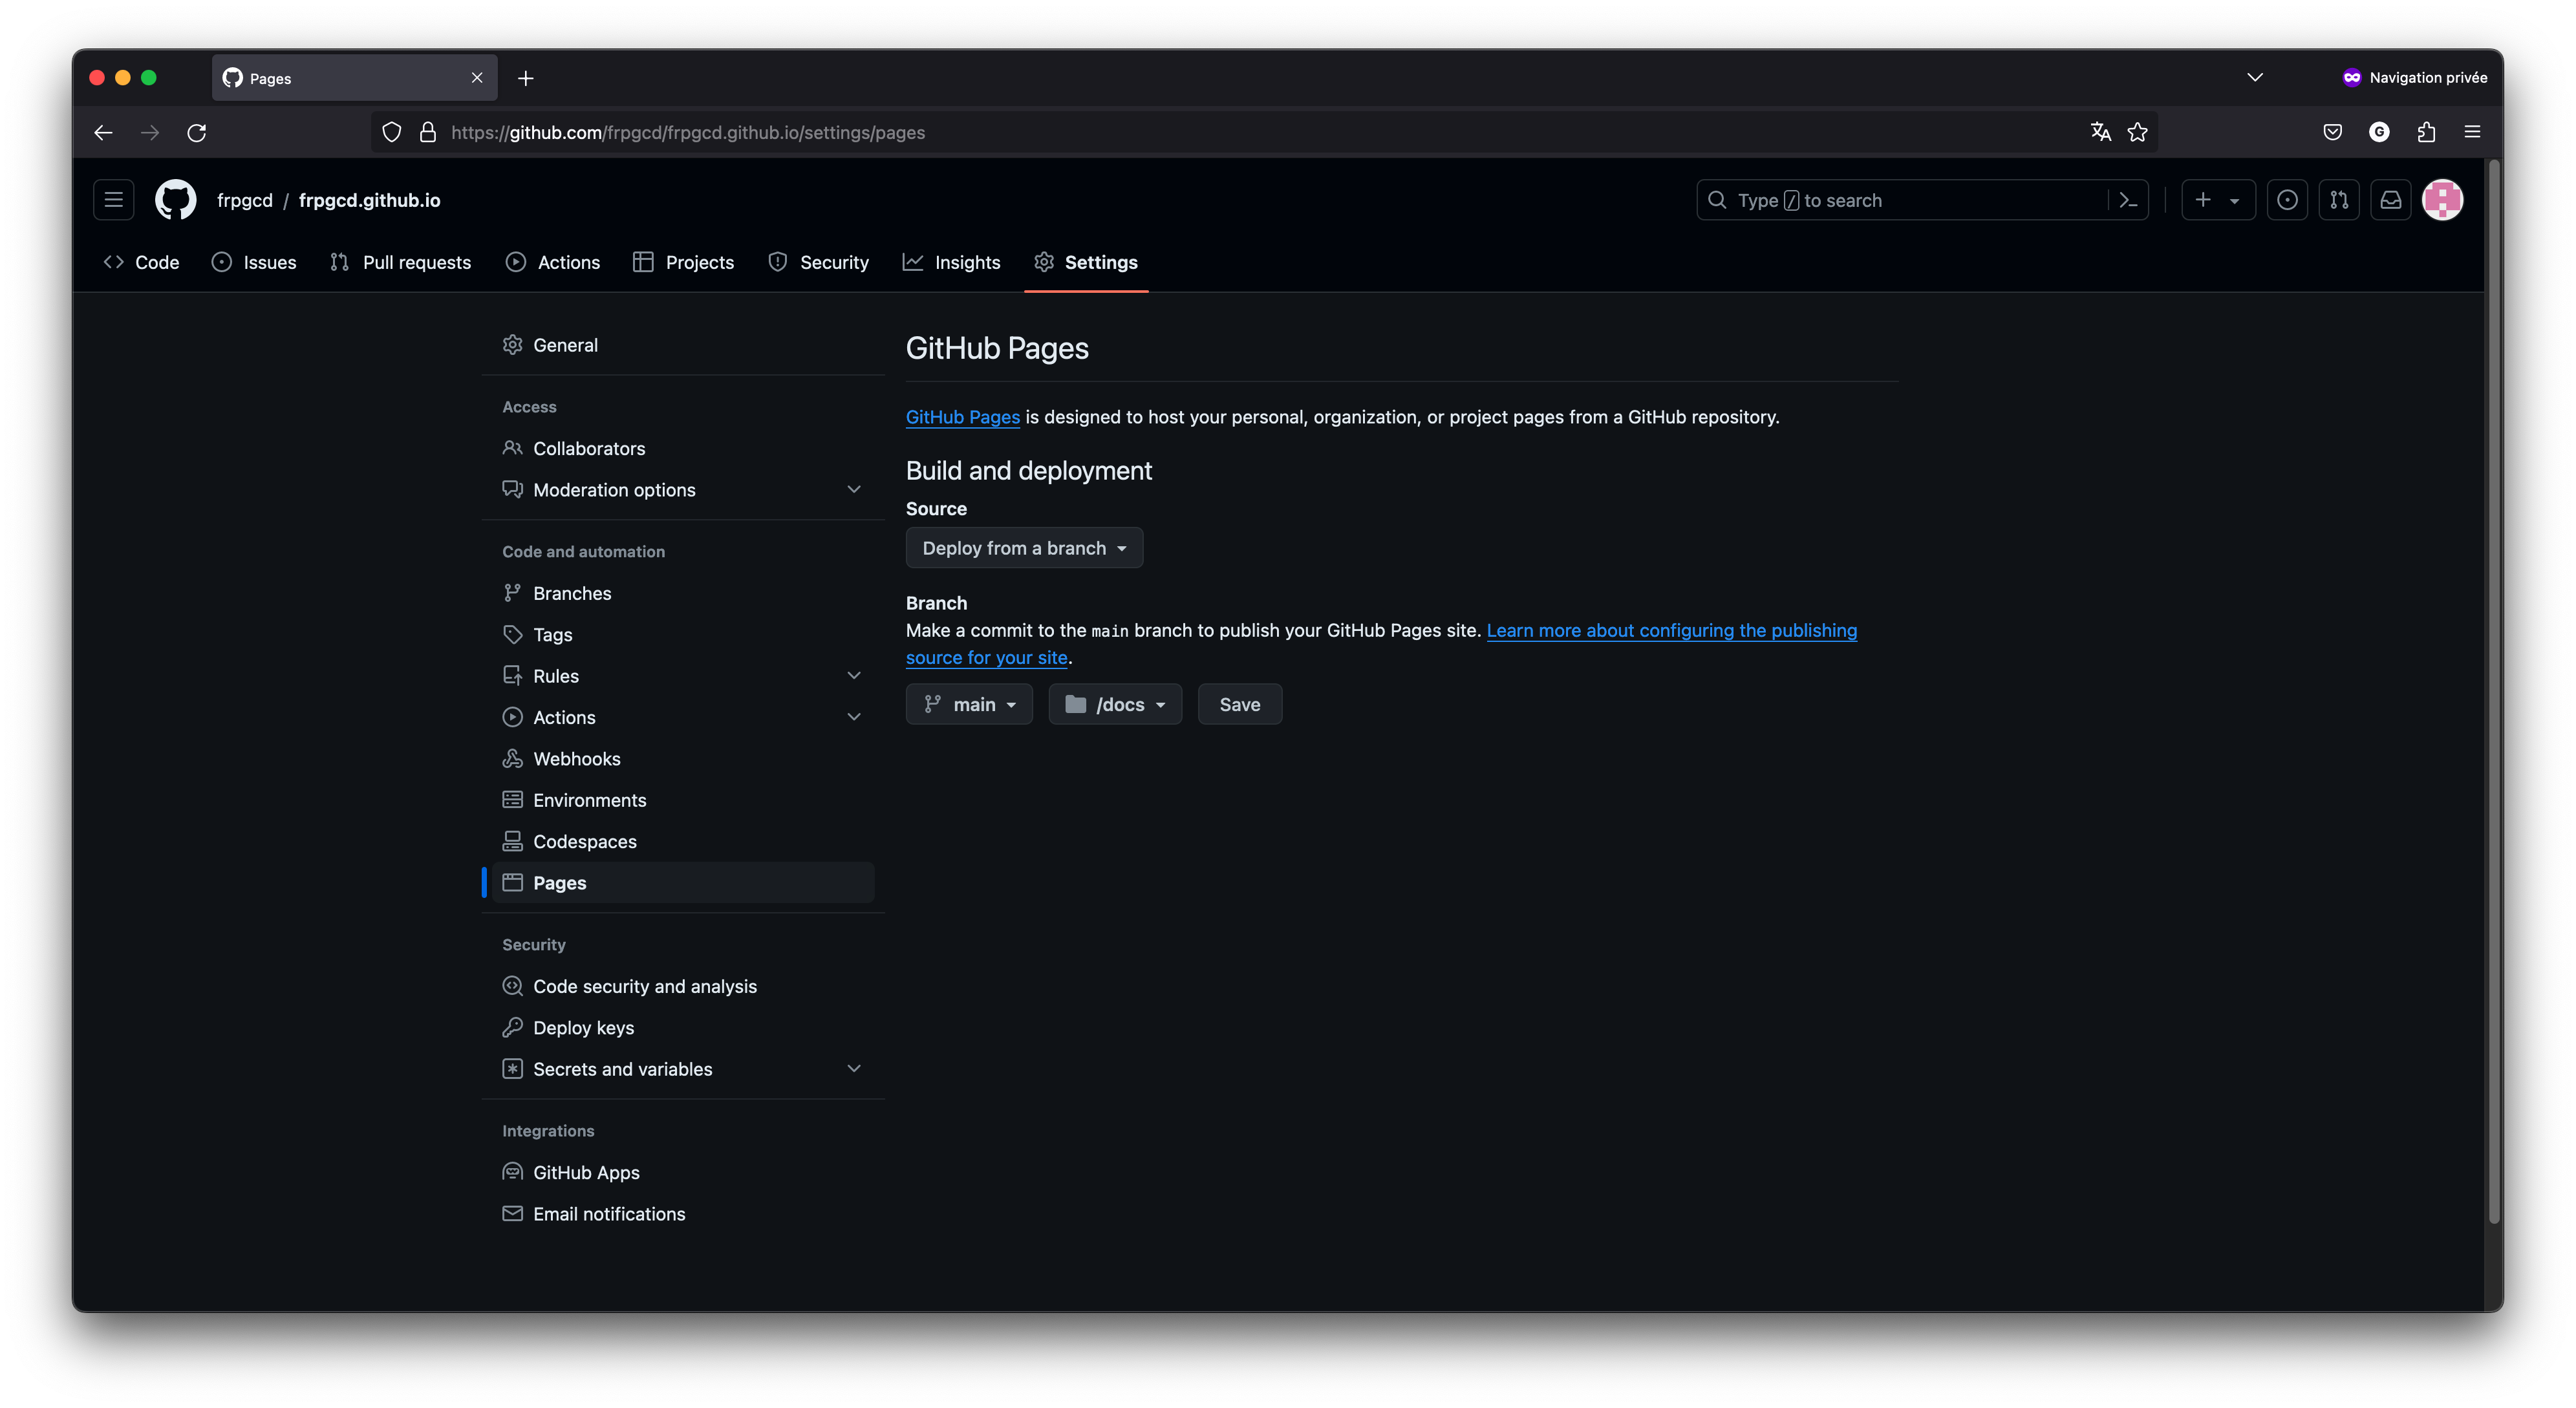
We are now going to activate GitHub Pages, and select “Deploy from a branch” for the Source. We select the folder from which GitHub Pages publishes our website. In our case, it is the “docs” folder we created in the last section of the second chapter. The branch from which it selects the folder should be “main” or “master” (but could have another name) depending on our git configuration.
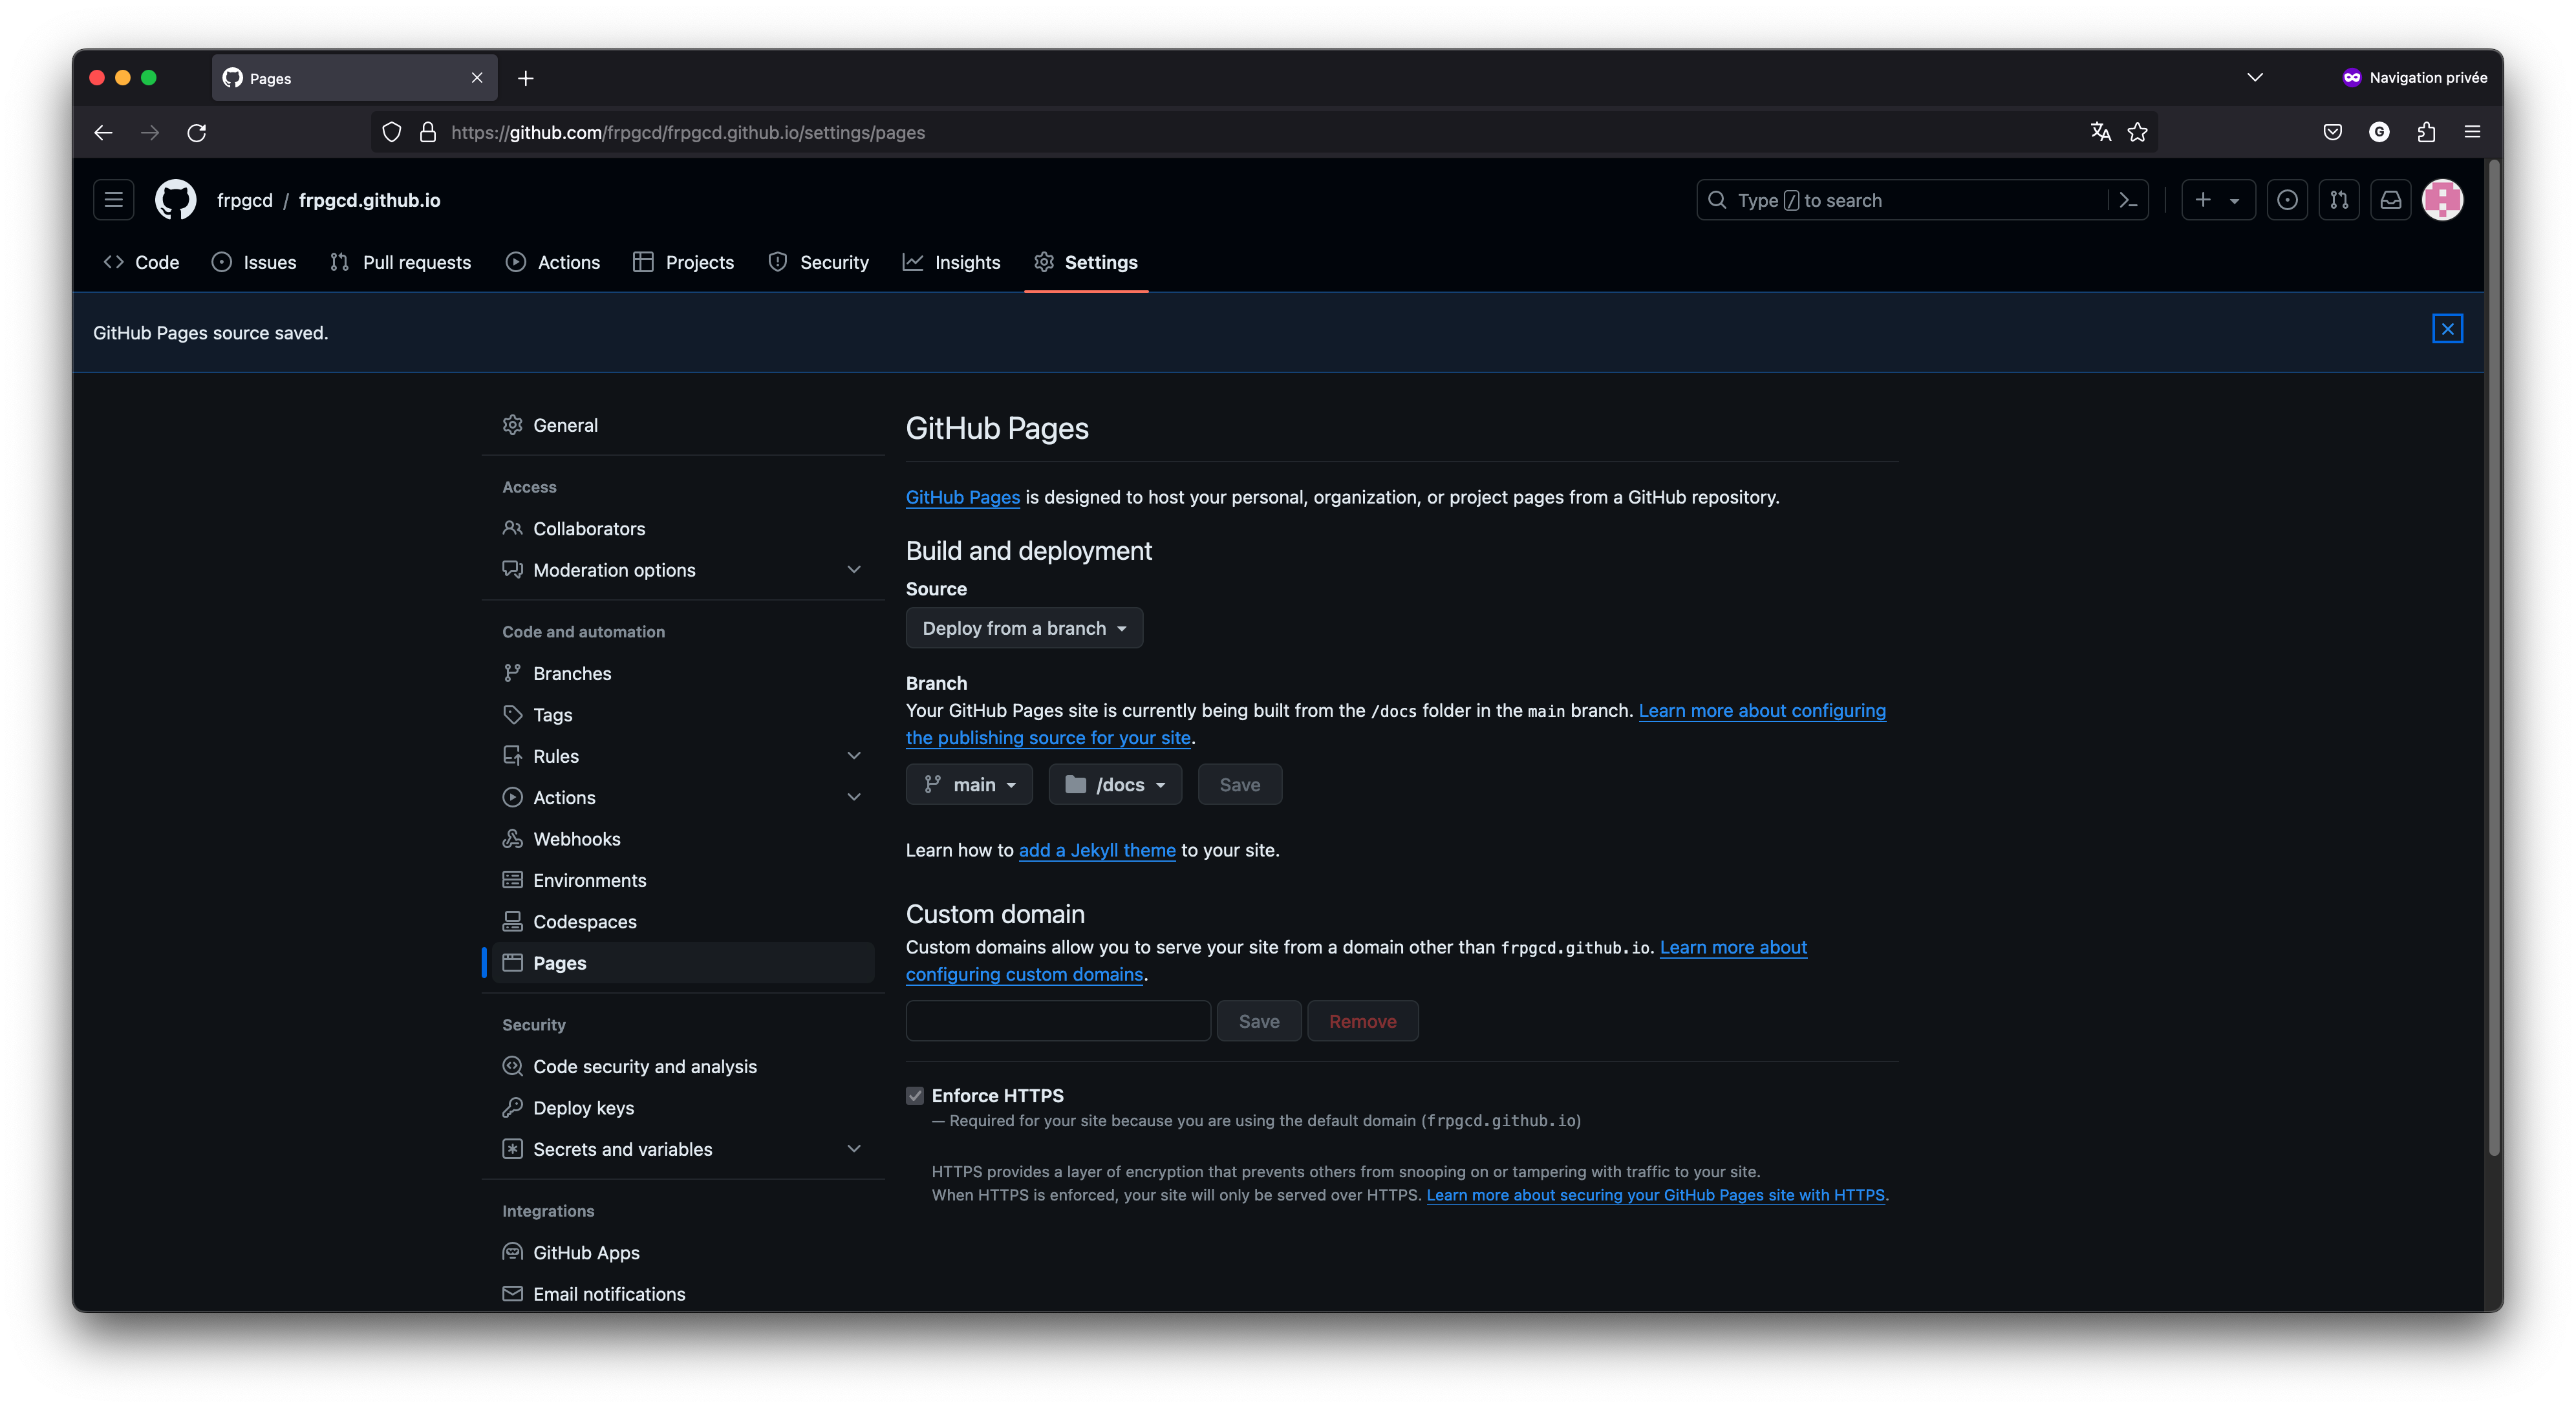
After selecting it, we can click on “Save”. Github will popup a bar at the top of the page indicating : “GitHub Pages source saved.” Also, a “Custom domain” section should appear, that we can later configurate if we wish to have our own customed URL :
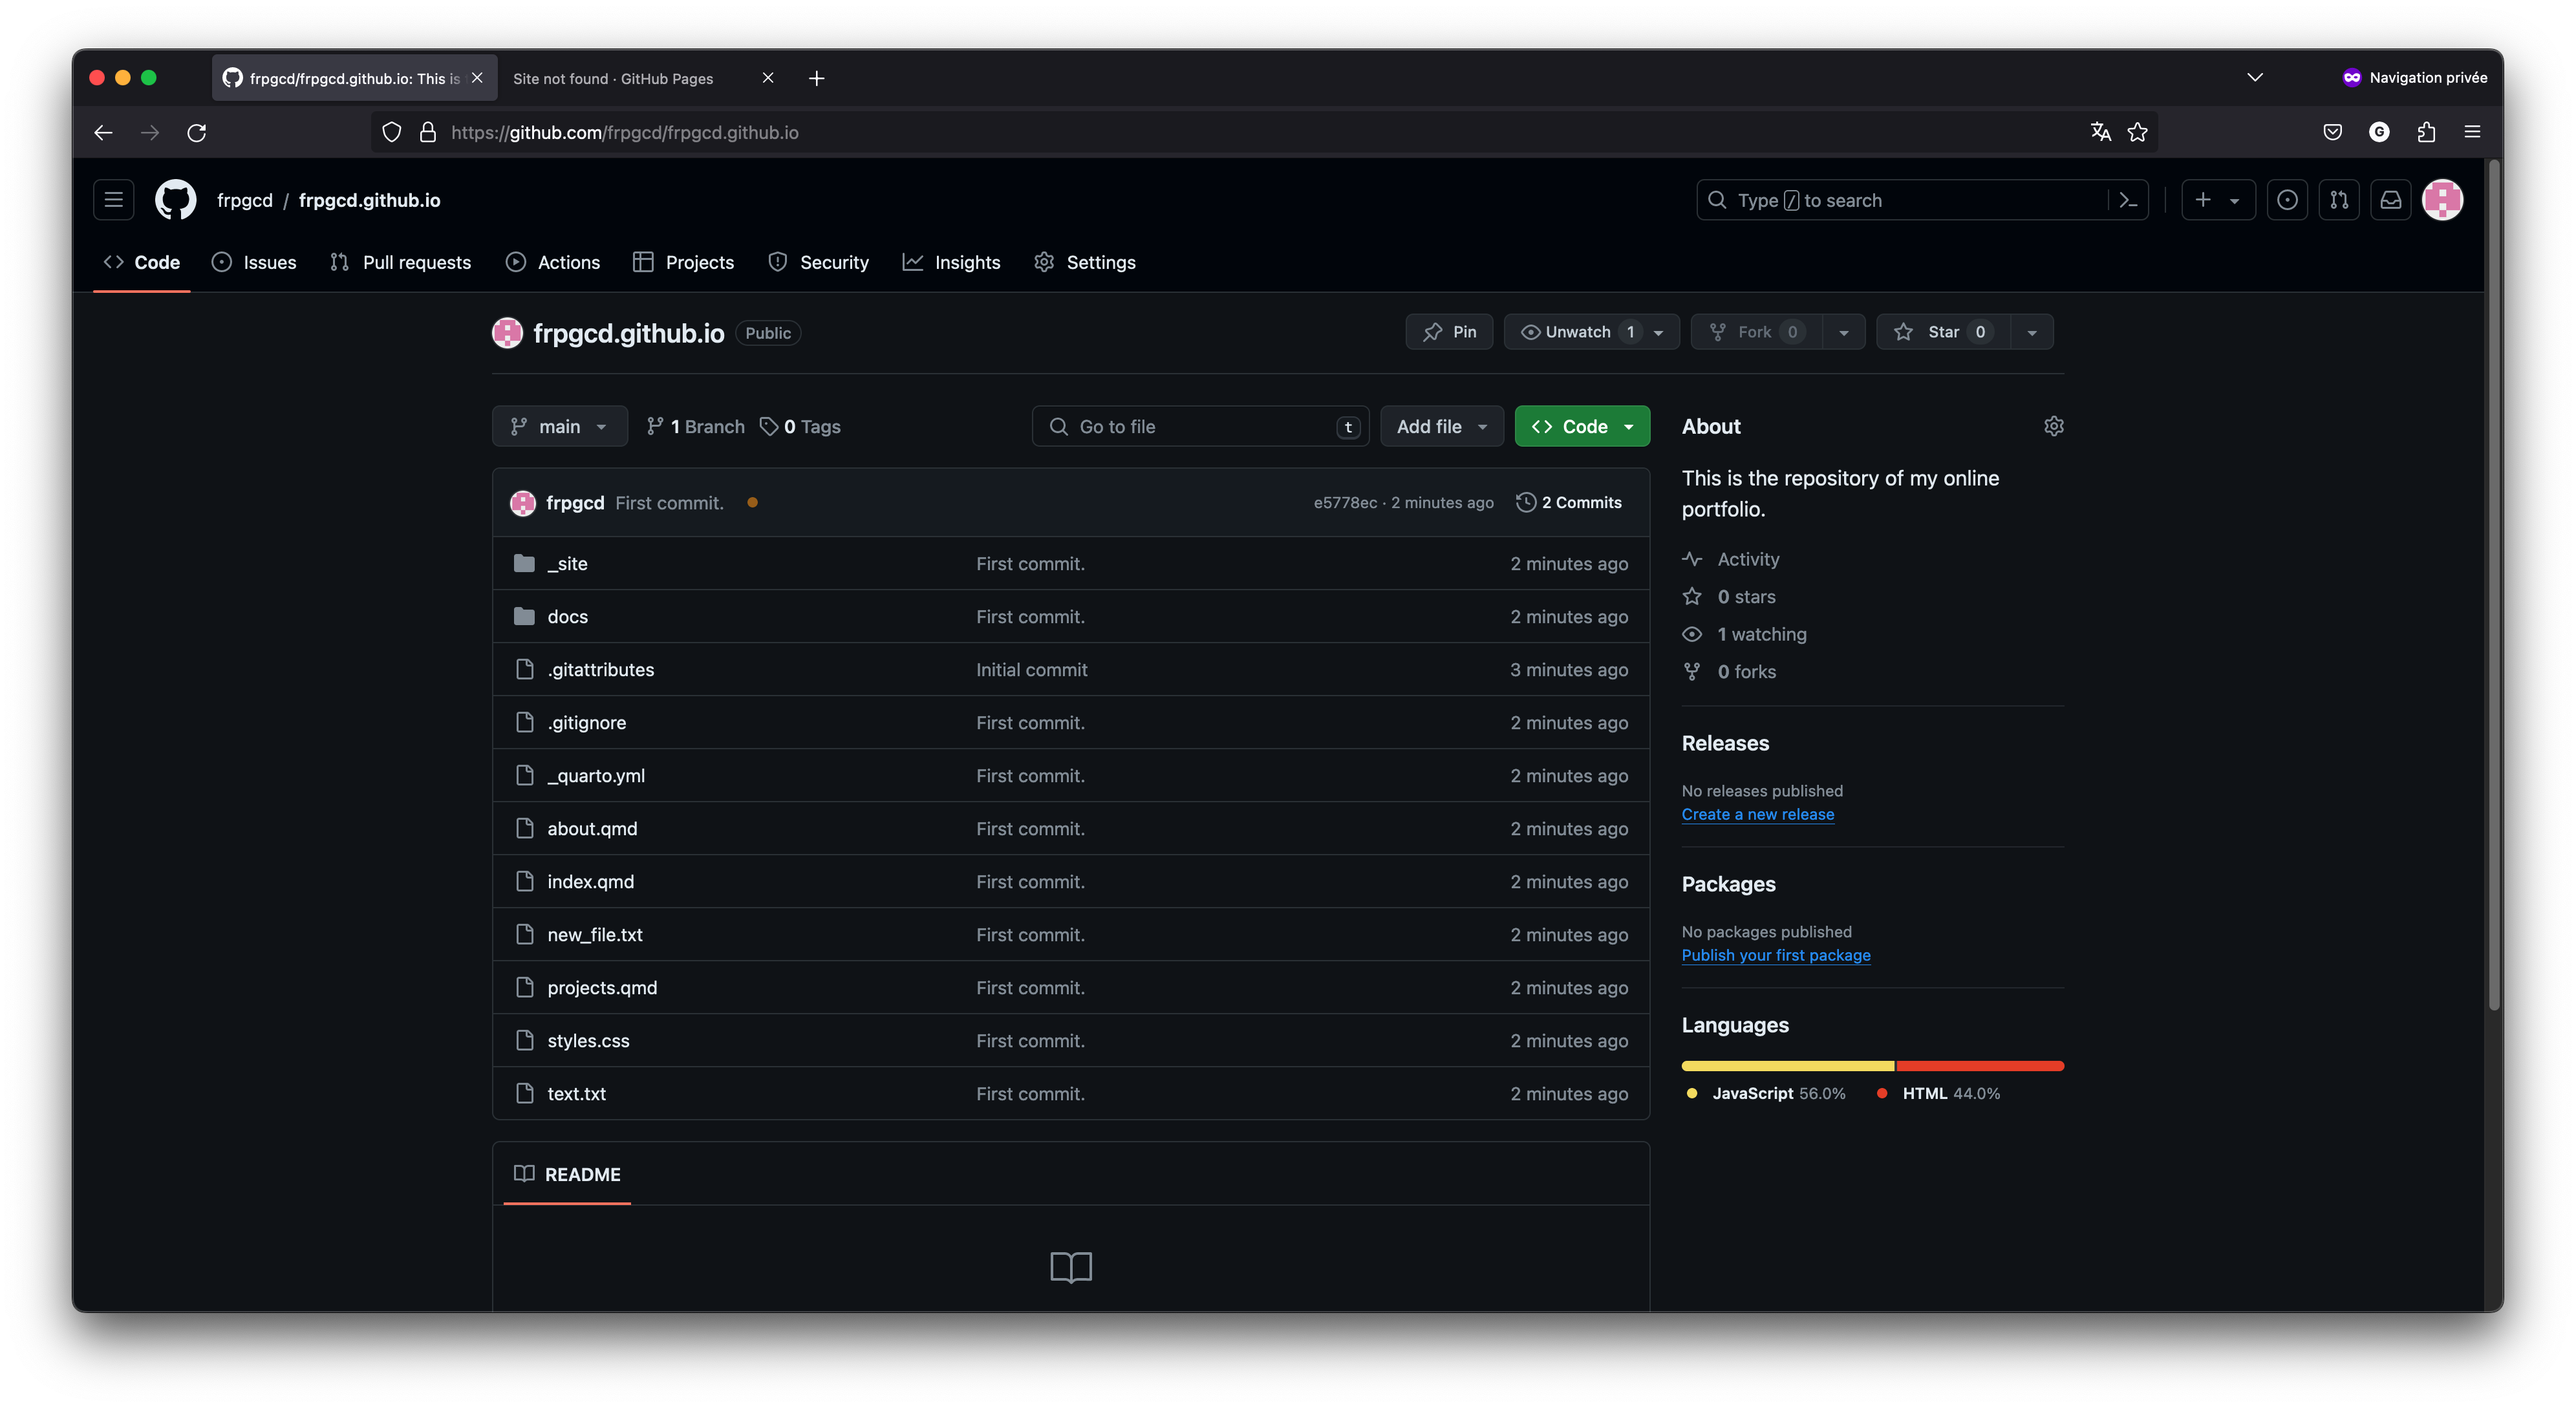
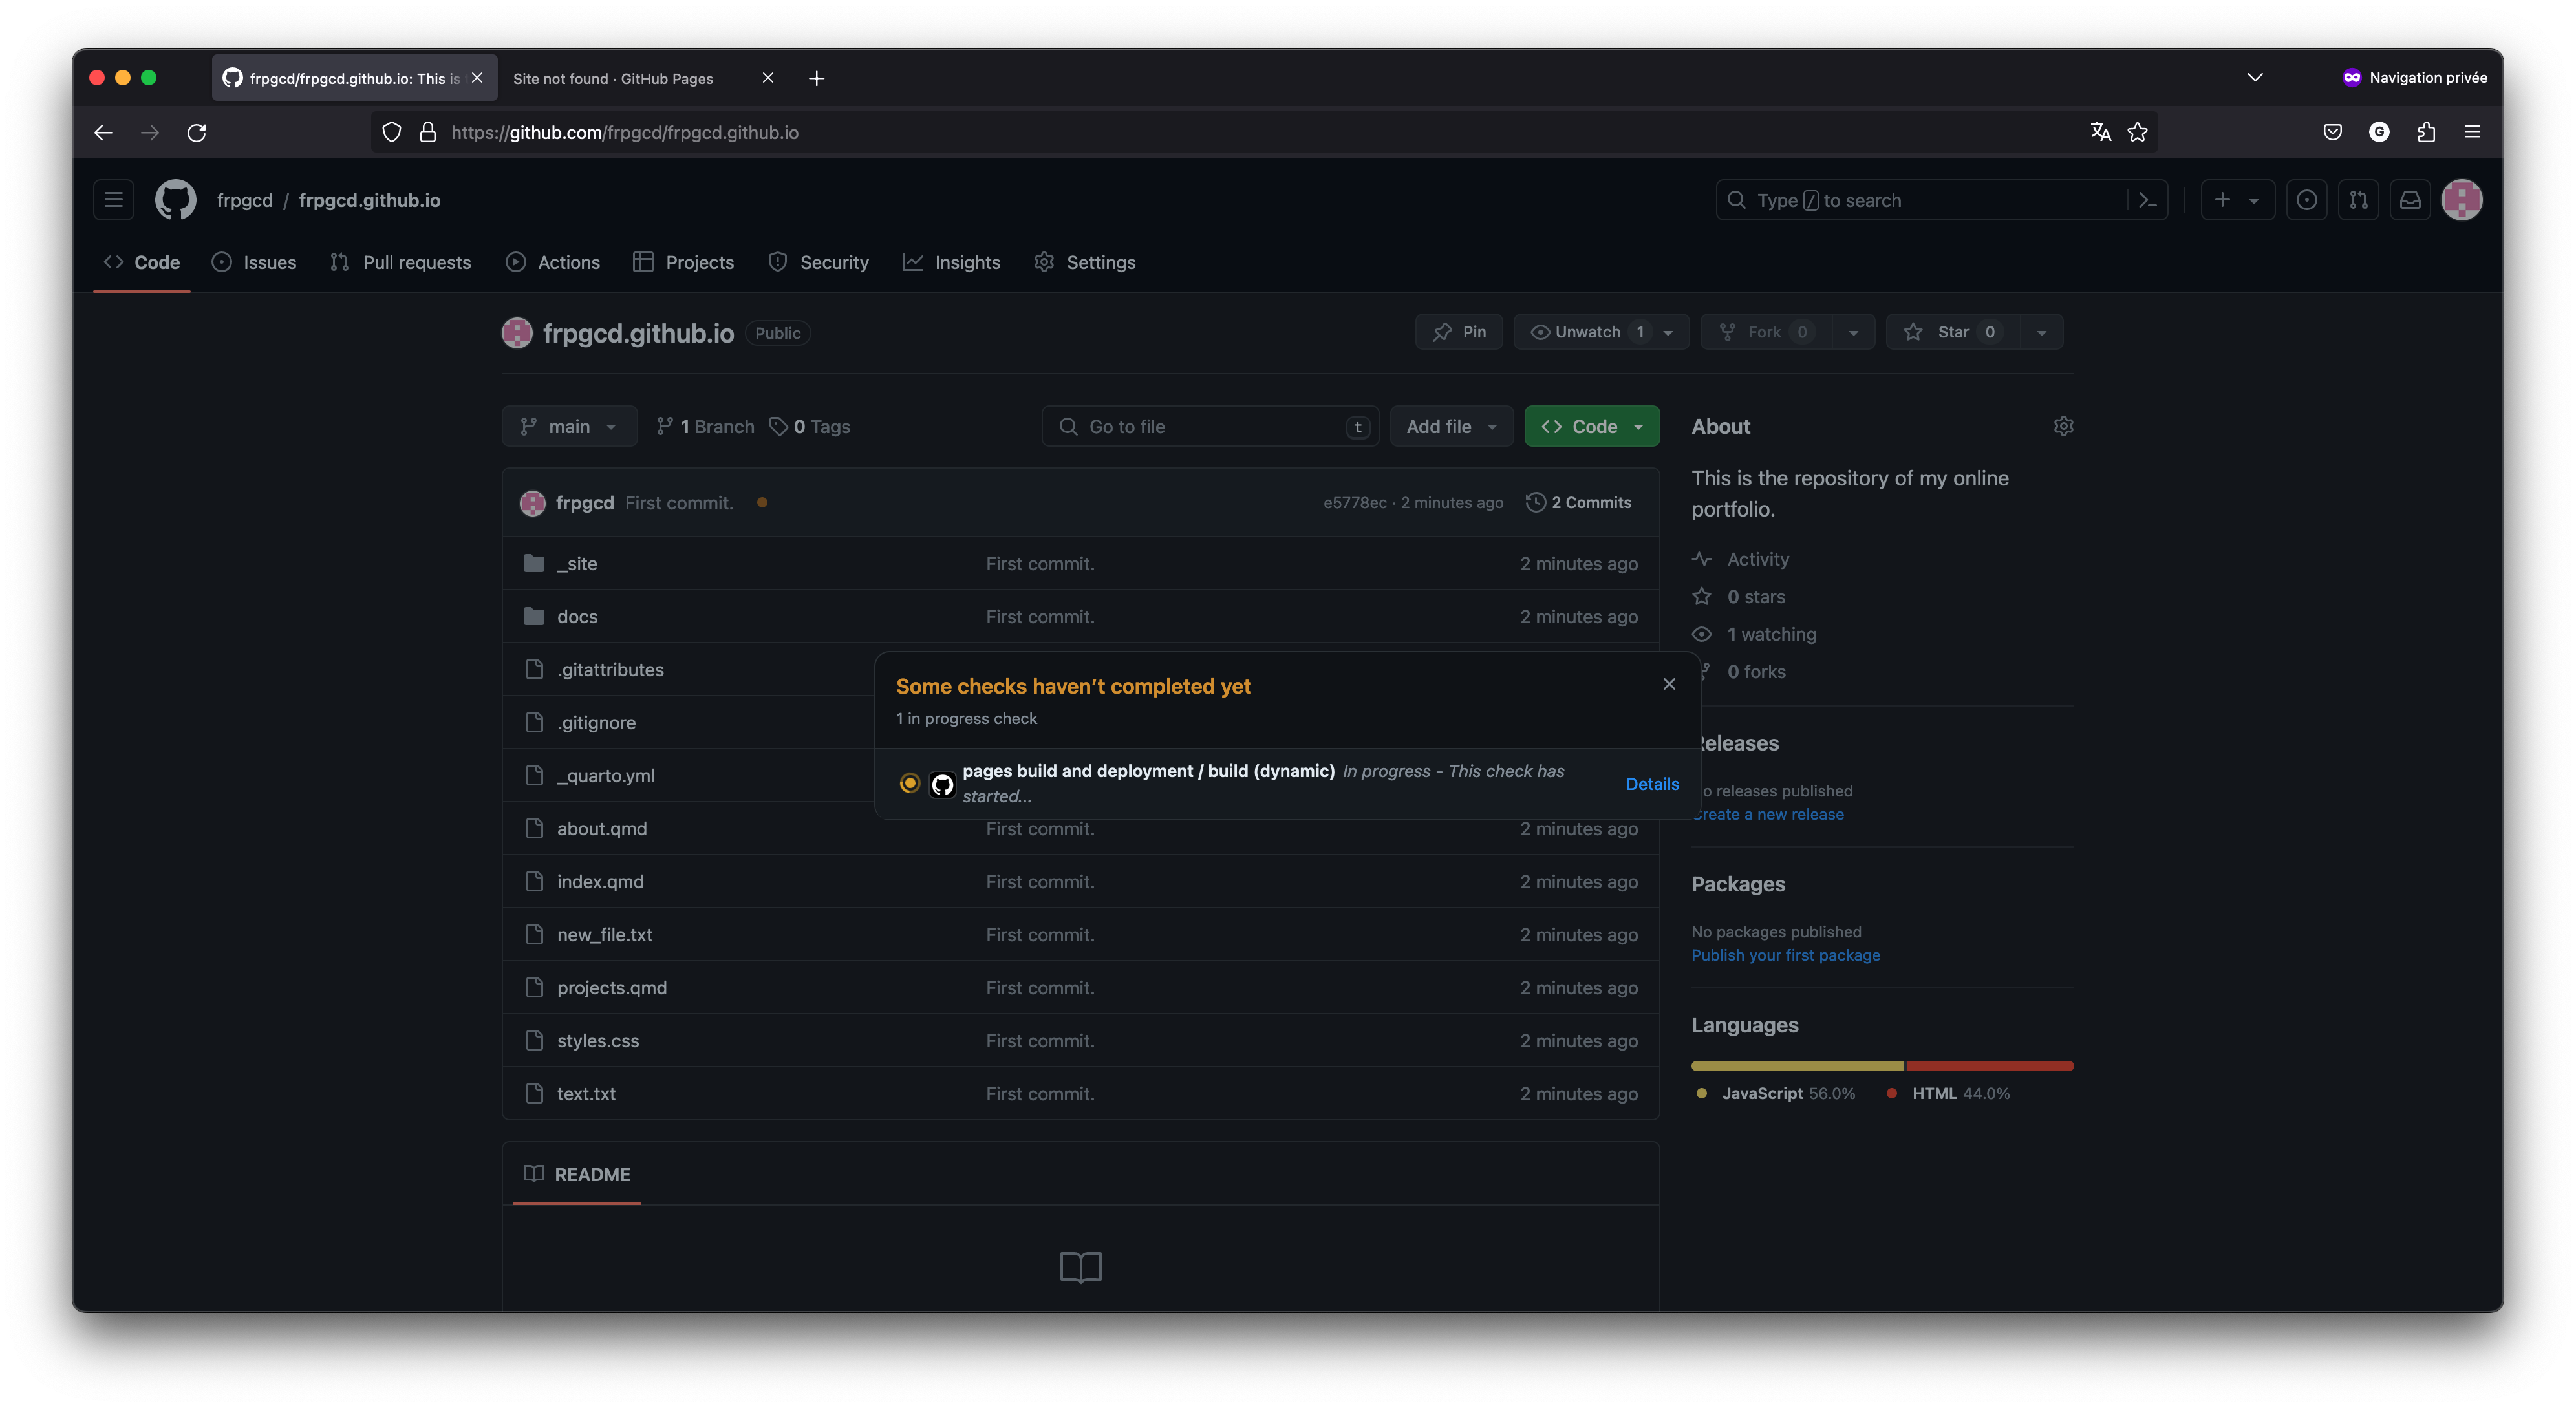
Now, GitHub is going to test our code to see if it is possible to publish it online without errors. If we come back to the home page of our repository, we will notice an orange dot next to our last commit message. If we click on this orange dot, a small pop-up window will appear, with additional information on the test.
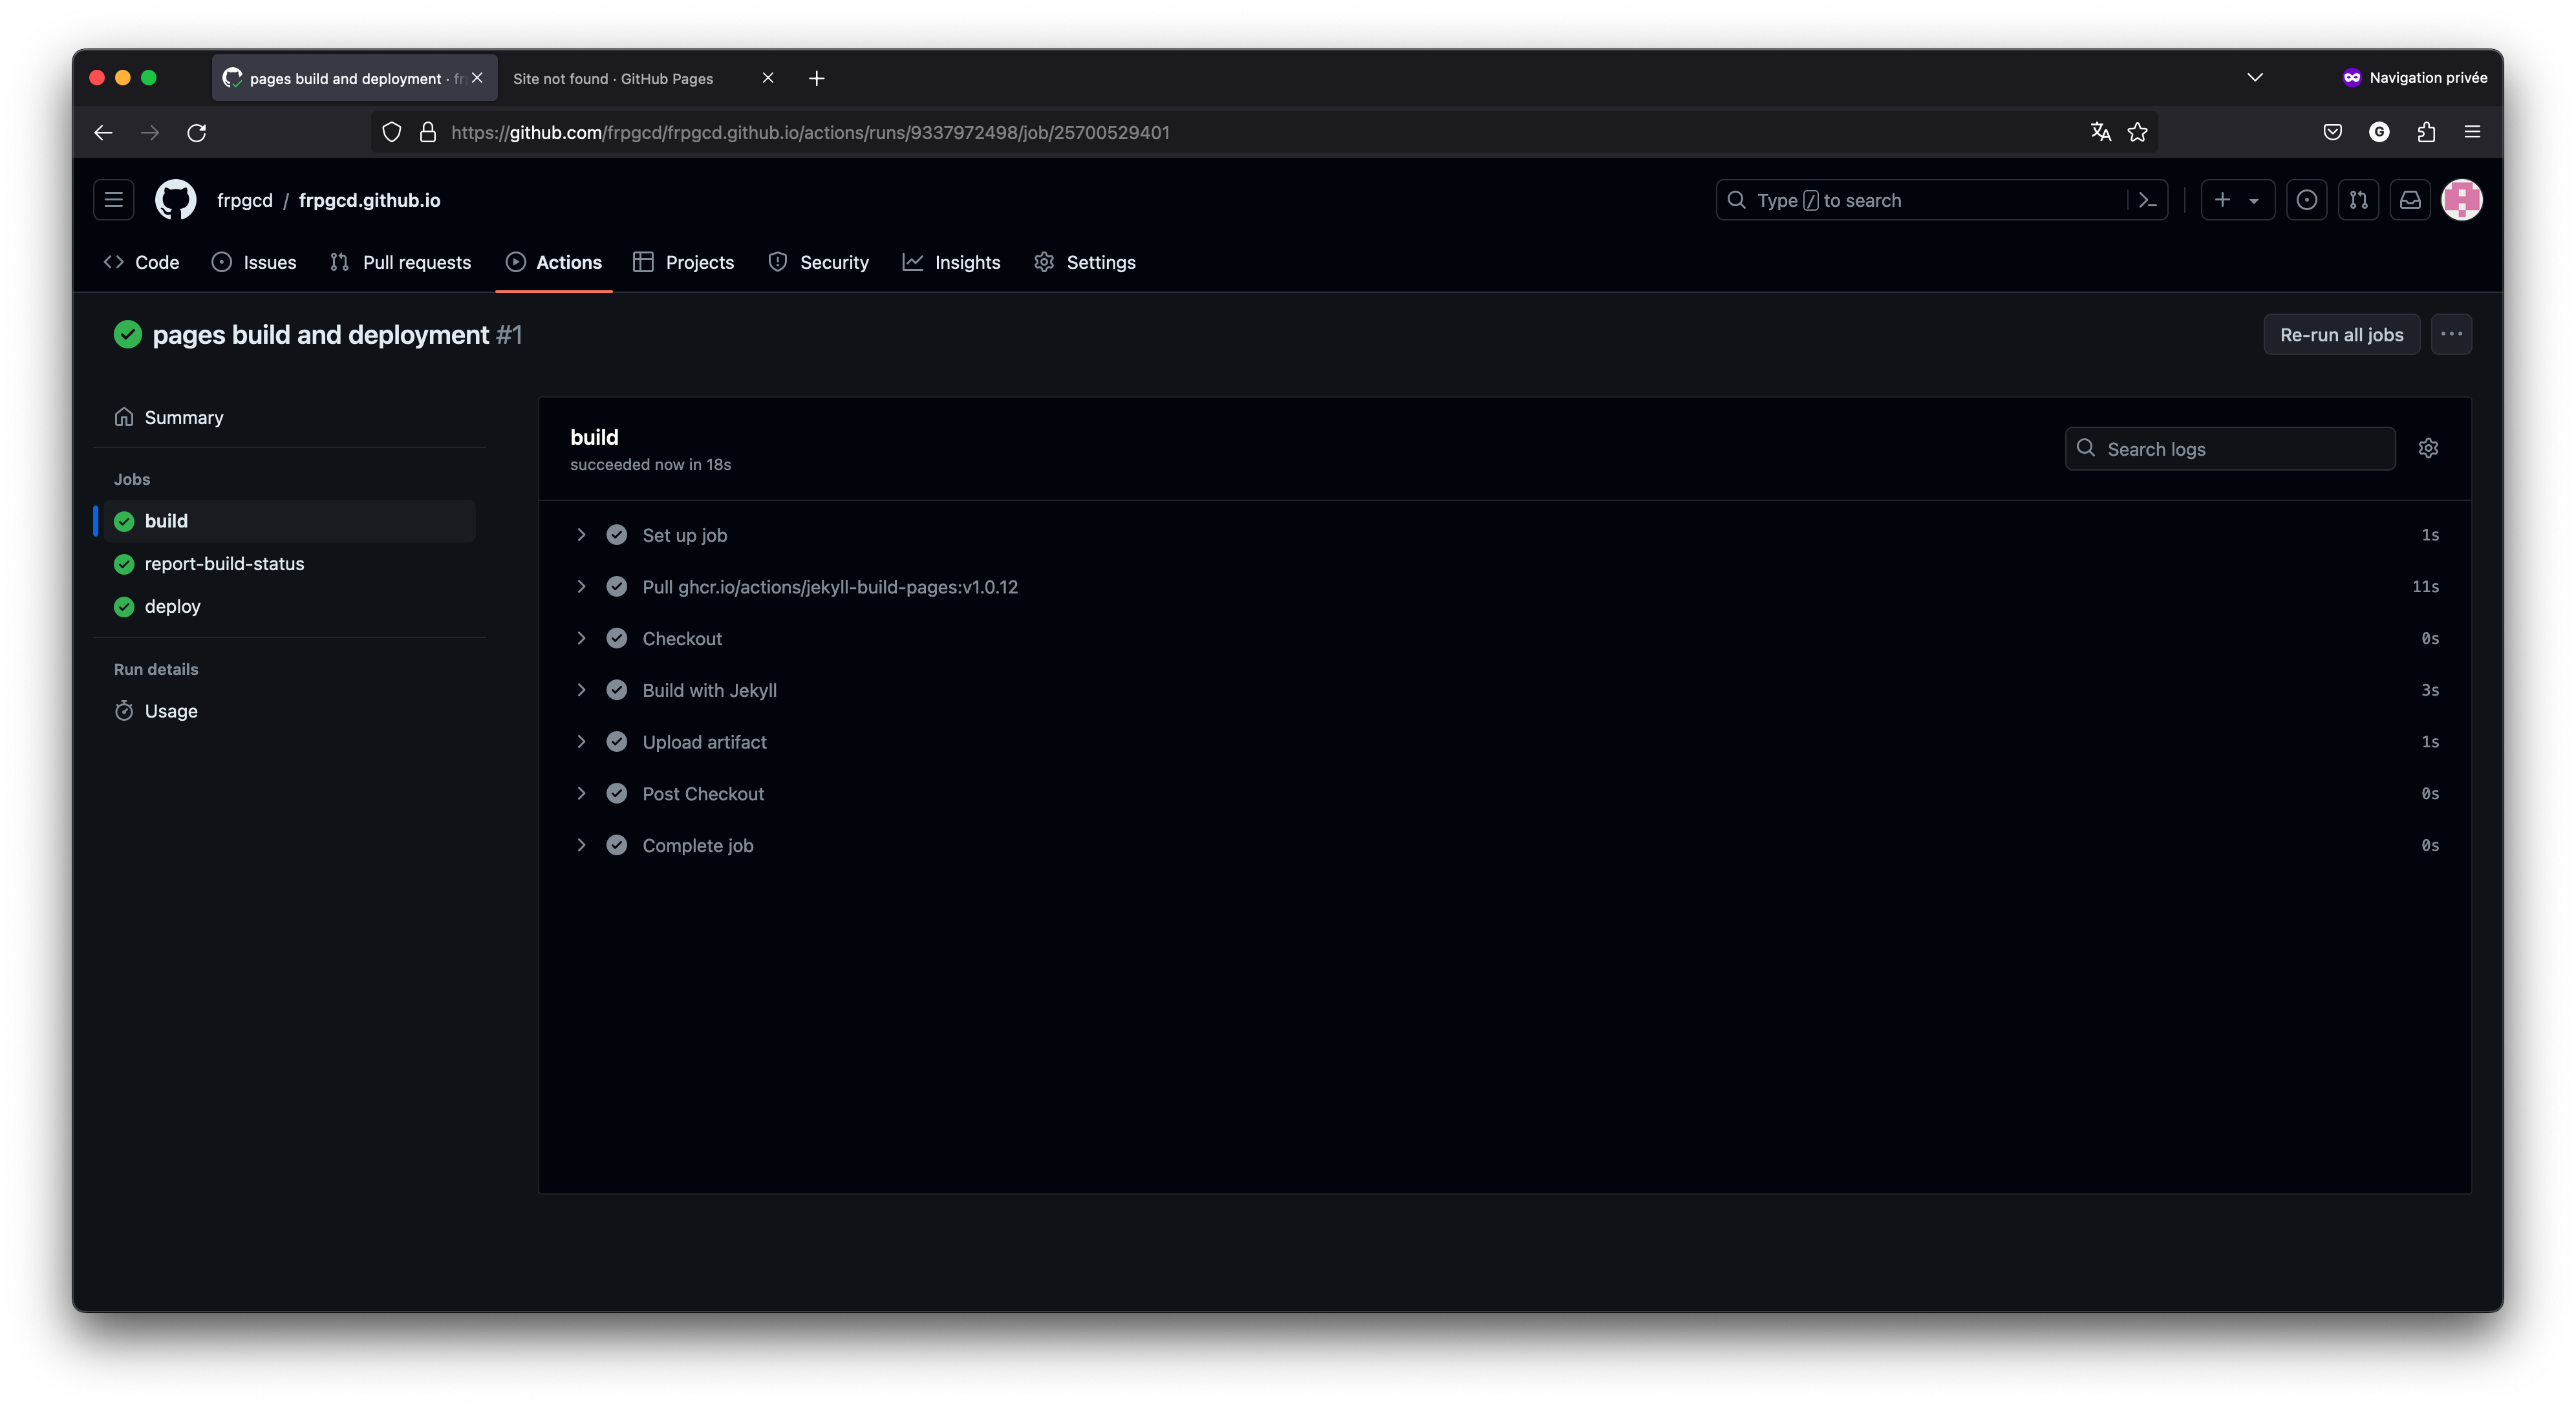
Now, if we click on “Details”, we can have more information on what is going on :
At this point, if we followed carefully the steps of this tutorial, everything should turn green in a few seconds.
If a test did not pass, you can click on it to get more information. You can then look into it by searching solutions online. Errors are very common and a lot of possible solutions have been proposed. You can check the official guide of Github here and the guide of Quarto here. Stack Overflow is also a very good platform to find solutions.
If you see an error message related to Jekyll, try adding an empty file named
.nojekyllin your folder by enteringtouch .nojekyllin your vscode terminal. Publish this change to your Github repository, and see if the test is passing. This issue seems to occur regularly, but not in all cases.
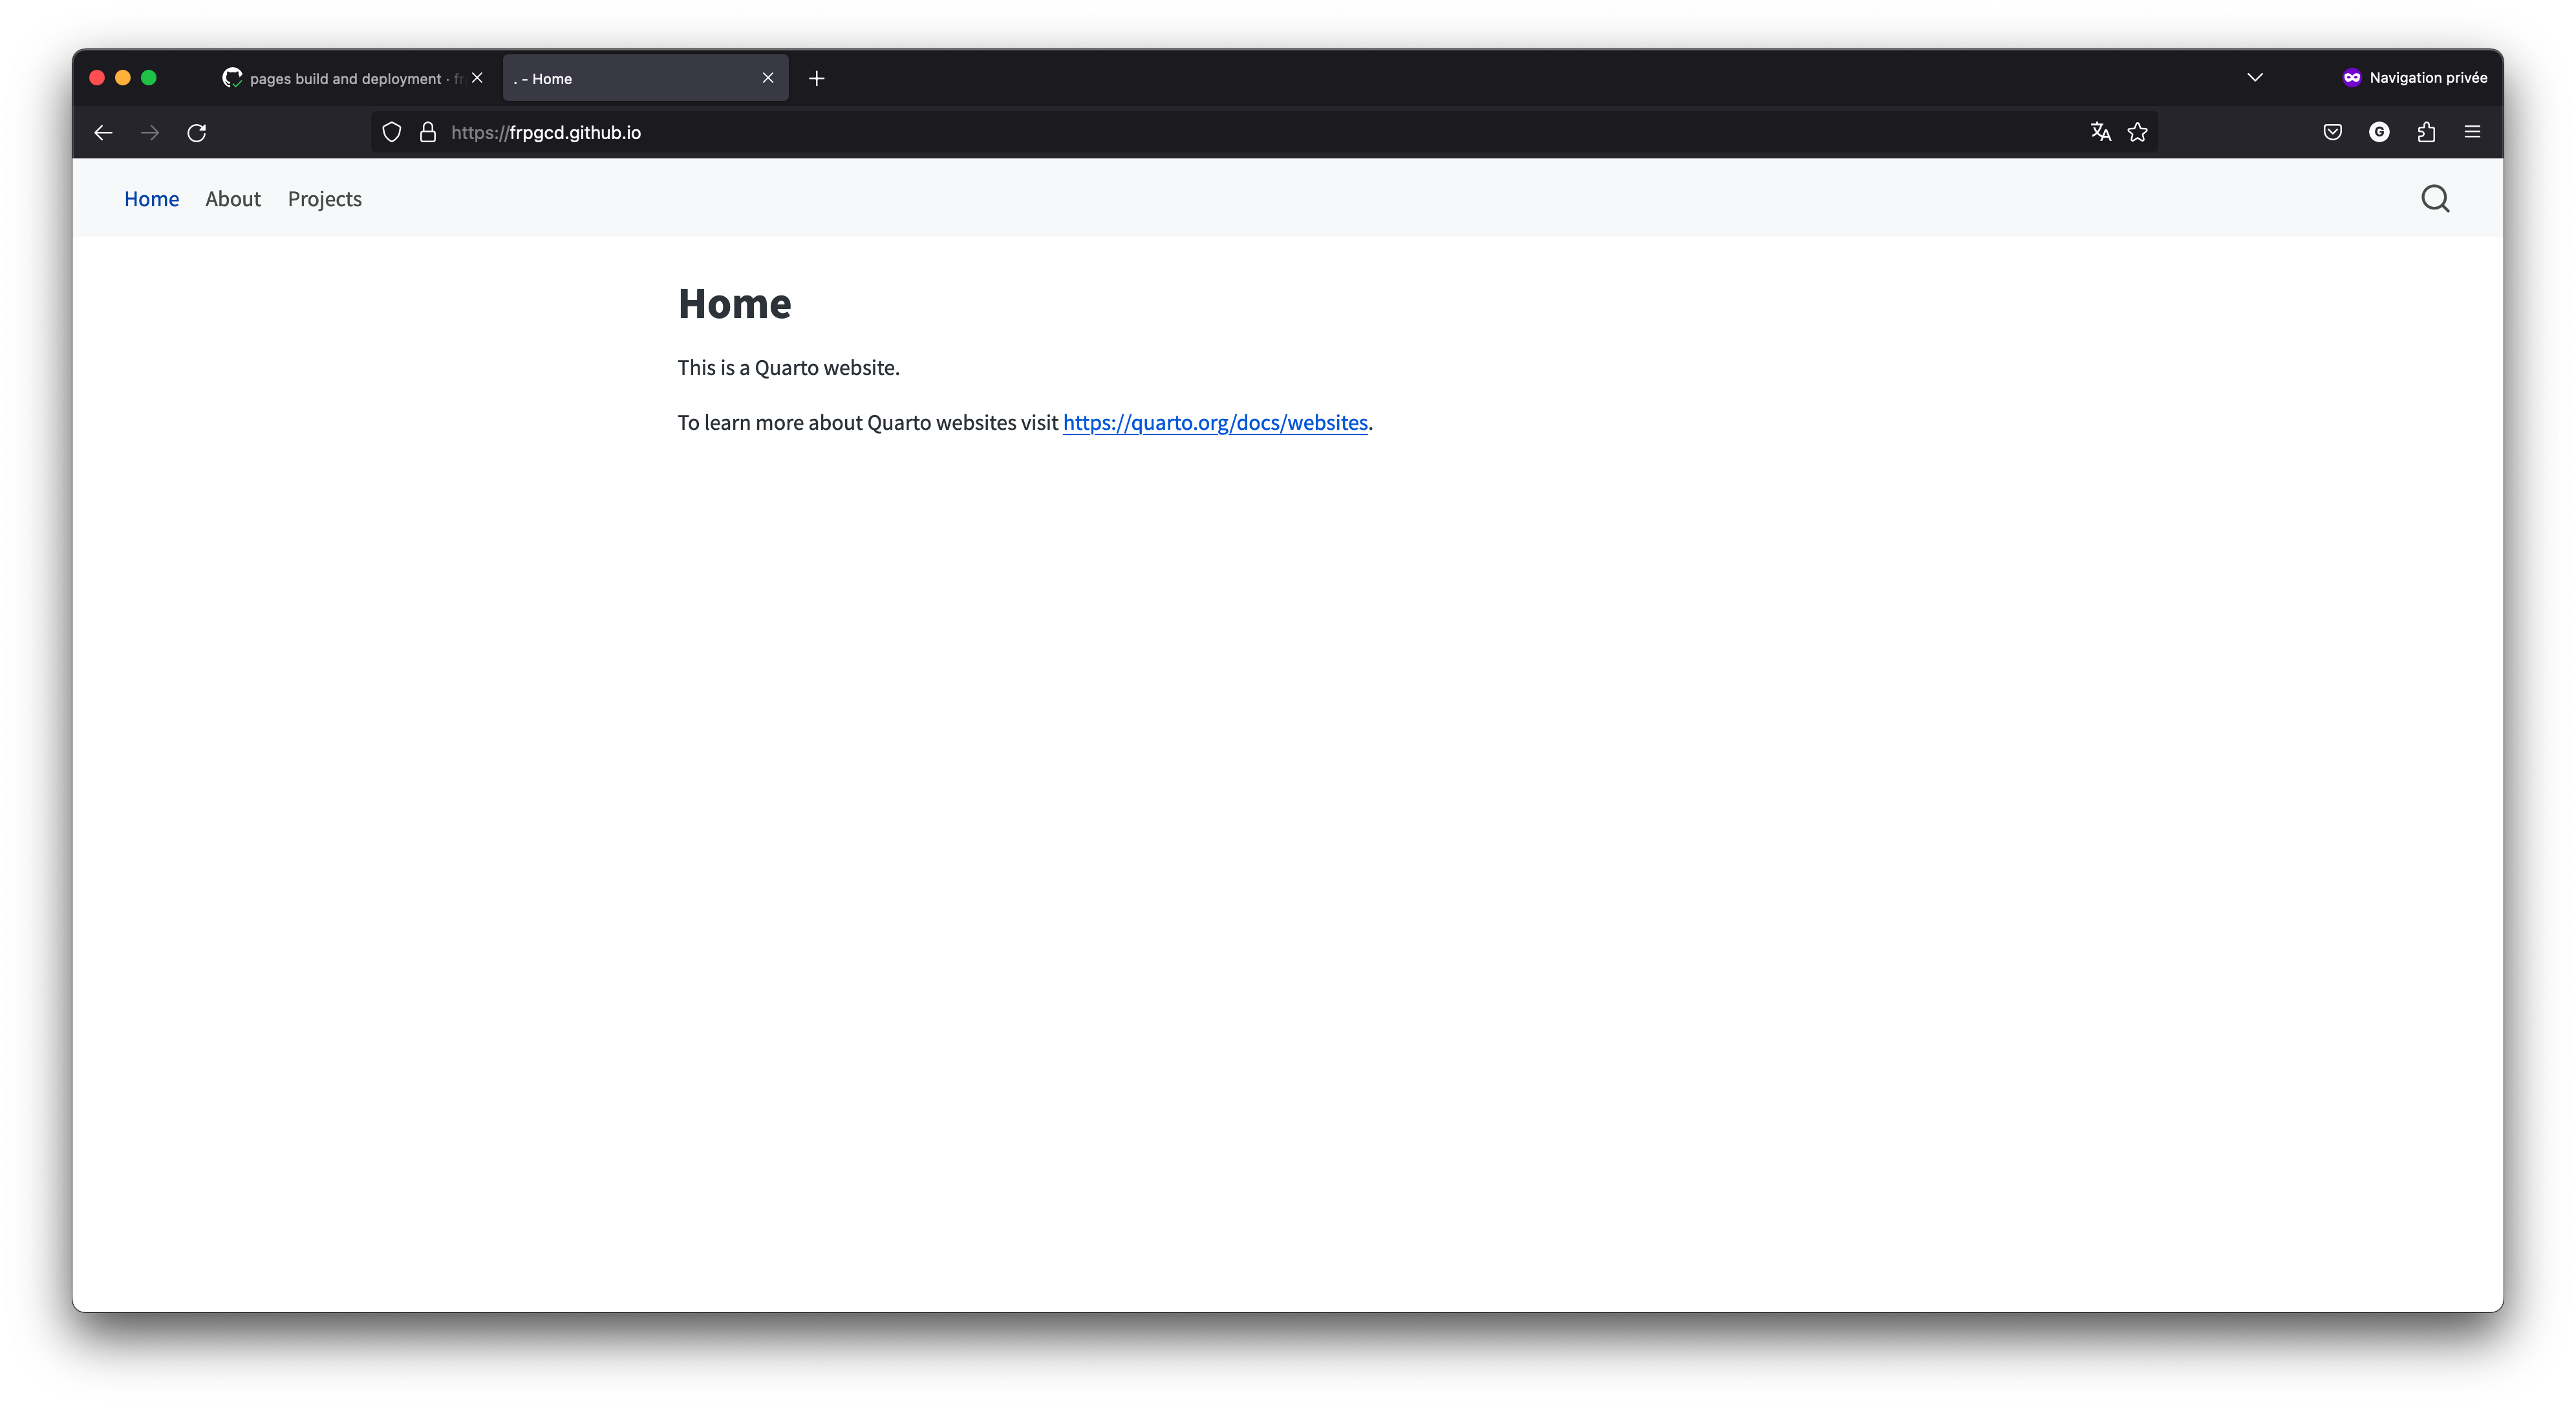
Once all the dots are green, we can go to https://username.github.io, with our actual GitHub username instead of “username”. After a few minutes, it should be on.
Congratulations, you have published your portfolio ! 🔥 🔥 🔥
We see that it is online with the URL. In my case, I see “https://frpgcd.github.io”, and not something with “localhost”. Try accessing your website from another machine, be it a computer or a mobile phone. It should work !
Further resources
If you wish to understand more about the publishing process, you can find more information in the following material :
In order to understand better what the publication process is, it is also useful to understand how internet works, and what the difference between frontend and backend development is :
- The Wikipedia article about Internet is a good starting point.
- To understand what the frontend is, you can check the Wikpedia article of the topic or this w3school guide.
- Similarly for the backend, you can check the Wikibooks article.
You can also check this Wikipedia article about the difference between Front and Backend.
Epilog
🎉 Congratulations on finishing this tutorial. I hope you enjoyed it. If you noticed some things that seemed wrong, too complicated, or some bugs in the website, please reach to me. This tutorial is currently under construction and I am trying to improve it as much as possible.
If you want to suggest some modification to this tutorial, you can also click on the top-right buttons “Report an issue” (“Edit this page” will create a pull request on Github. Feel free to take a look at what it does) under the table of content of this chapter 😉.
